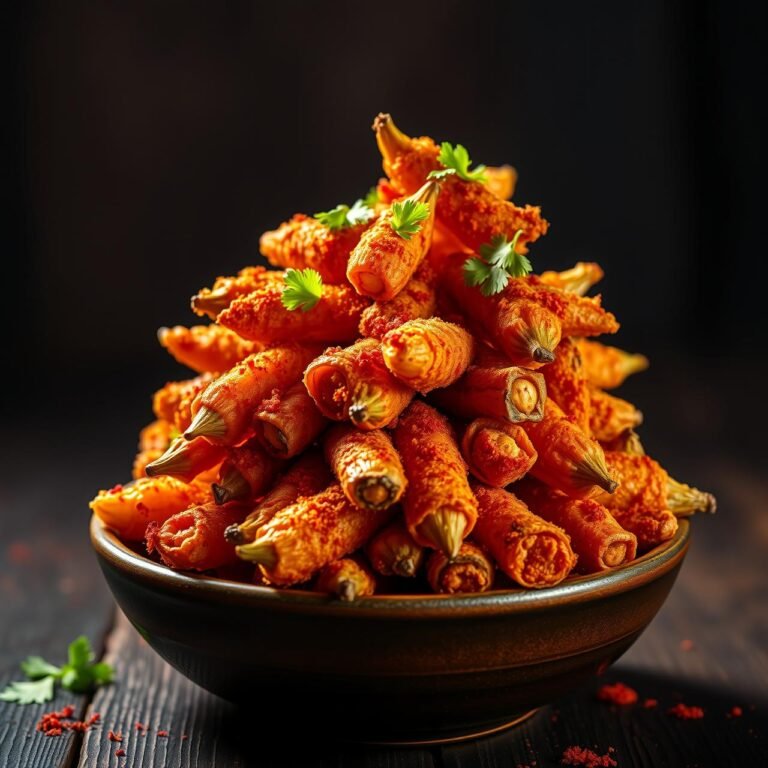
Stop Eating Chips: Make These Spicy Roasted Chickpeas Instead (Detailed Recipe)
There’s a universal, almost primal, craving for a good snack. It often strikes mid-afternoon or late at night—a desire for something salty, savory, and above all, crunchy. For decades, the default answer has been the potato chip. While undeniably satisfying in the moment, that satisfaction often comes with a side of grease, empty calories, and post-snack regret. What if you could answer that craving with something that not only delivers an explosive crunch and bold flavor but also nourishes your body? Enter the hero of the healthy snack world: the spicy roasted chickpea.
Forget the bland, soft chickpeas you might associate with salads. When roasted correctly, these humble legumes transform into shatteringly crisp, golden orbs that serve as the perfect vehicle for any spice blend you can dream up. They are a rustic, homestyle powerhouse of nutrition, packed with plant-based protein and dietary fiber that keeps you feeling full and energized, rather than lethargic. This isn’t just about replacing a bad habit; it’s about upgrading your entire snacking experience. In this detailed guide, we will walk you through the chef’s secrets to achieving that perfect, chip-like crunch every single time, creating a spicy, smoky, and utterly addictive snack that your taste buds and your body will thank you for.
The Irresistible Call of the Crunch: Why We Crave Chips (And Why Chickpeas Are Better)
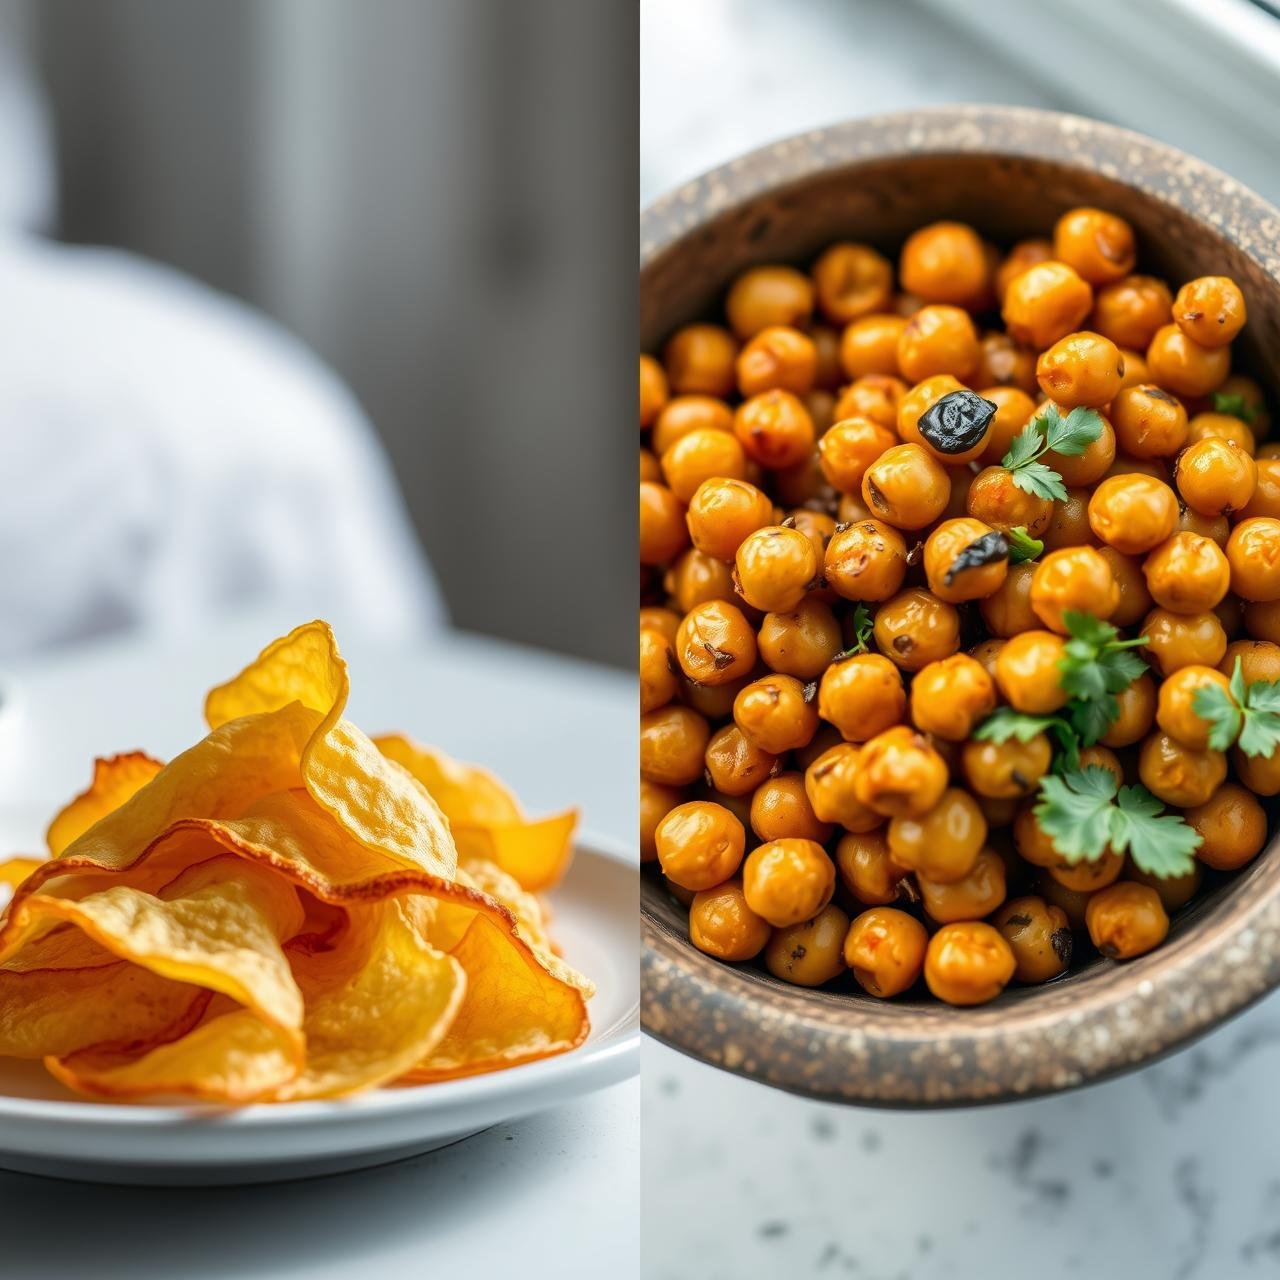
The science behind our love for crunchy foods is fascinating. The sound and sensation of a crunch signal freshness and satisfaction to our brains. Potato chips master this sensory experience, but at a nutritional cost. A standard serving is often high in sodium, unhealthy fats, and refined carbohydrates, leading to energy spikes and crashes.
Roasted chickpeas, on the other hand, offer a ‘clean’ crunch with a robust nutritional profile. Here’s a quick comparison:
Nutritional Showdown: Chickpeas vs. Chips
A single ounce of roasted chickpeas typically provides:
- Around 5-7 grams of protein, essential for muscle repair and satiety.
- About 5-6 grams of fiber, which aids digestion and helps regulate blood sugar.
- A wealth of minerals like manganese, folate, and iron.
Conversely, an ounce of potato chips offers minimal protein and fiber, with its calories primarily coming from fat and processed starches. By making the switch, you’re not just choosing a healthier option; you’re choosing a smarter, more substantial snack that works with your body, not against it. They are naturally gluten-free and vegan, making them an inclusive treat for almost any dietary need. The best part? The flavor is entirely in your control, allowing for endless customization far beyond ‘Sour Cream & Onion’ or ‘Barbecue’.
Your Culinary Toolkit: Essential Equipment for Chickpea Perfection
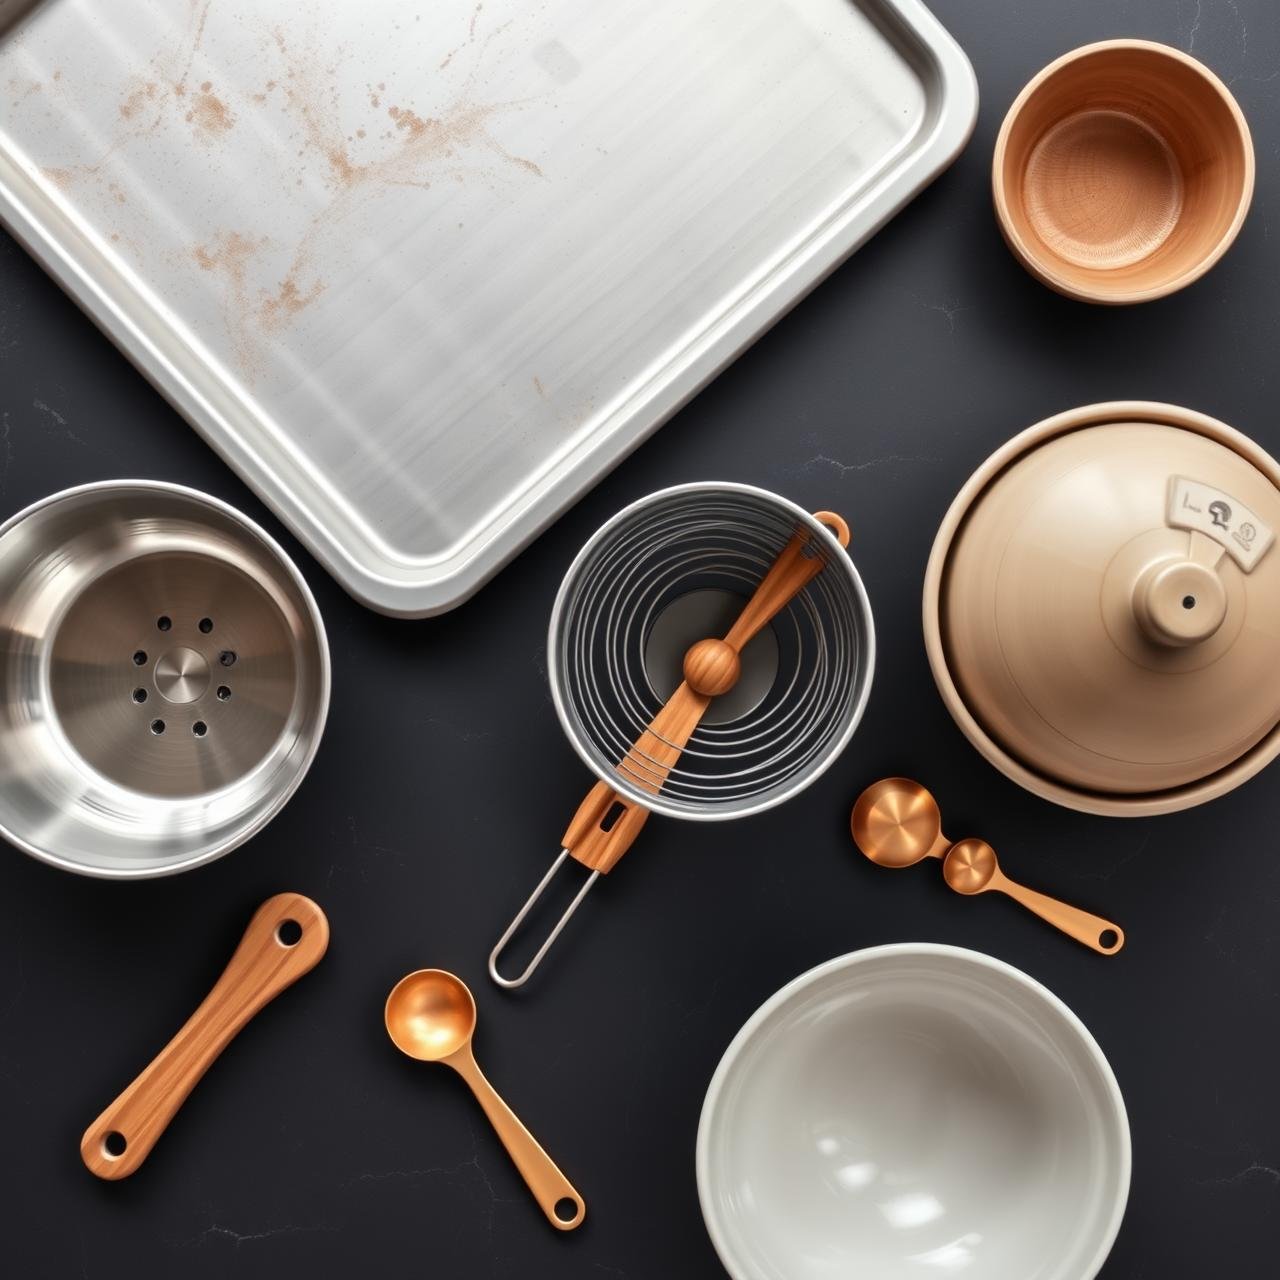
You don’t need a professional kitchen to achieve snack nirvana. The beauty of this recipe lies in its simplicity. However, having the right tools on hand will make the process seamless and ensure the best possible results. Before you begin, gather these kitchen staples.
| Equipment | Chef’s Note |
|---|---|
| Large Baking Sheet | A large, rimmed baking sheet is non-negotiable. It allows the chickpeas to roast in a single layer without touching, which is the golden rule for achieving maximum crispiness. Overcrowding will steam them instead of roasting them. |
| Colander | For thoroughly rinsing and draining the canned chickpeas. Removing the aquafaba (the liquid in the can) is a key first step. |
| Salad Spinner or Clean Kitchen Towels | The absolute secret to a crispy chickpea is starting with a completely dry chickpea. A salad spinner works wonders, but patiently and thoroughly patting them dry with clean towels is just as effective. |
| Large Mixing Bowl | You’ll need a bowl spacious enough to toss the chickpeas with oil and spices, ensuring every single one is evenly and generously coated. |
| Measuring Spoons | For accurately measuring your spices. While you can eyeball it, precise measurements help you replicate your perfect blend time and time again. |
The Heart of the Heat: Crafting the Perfect Spicy Seasoning Blend
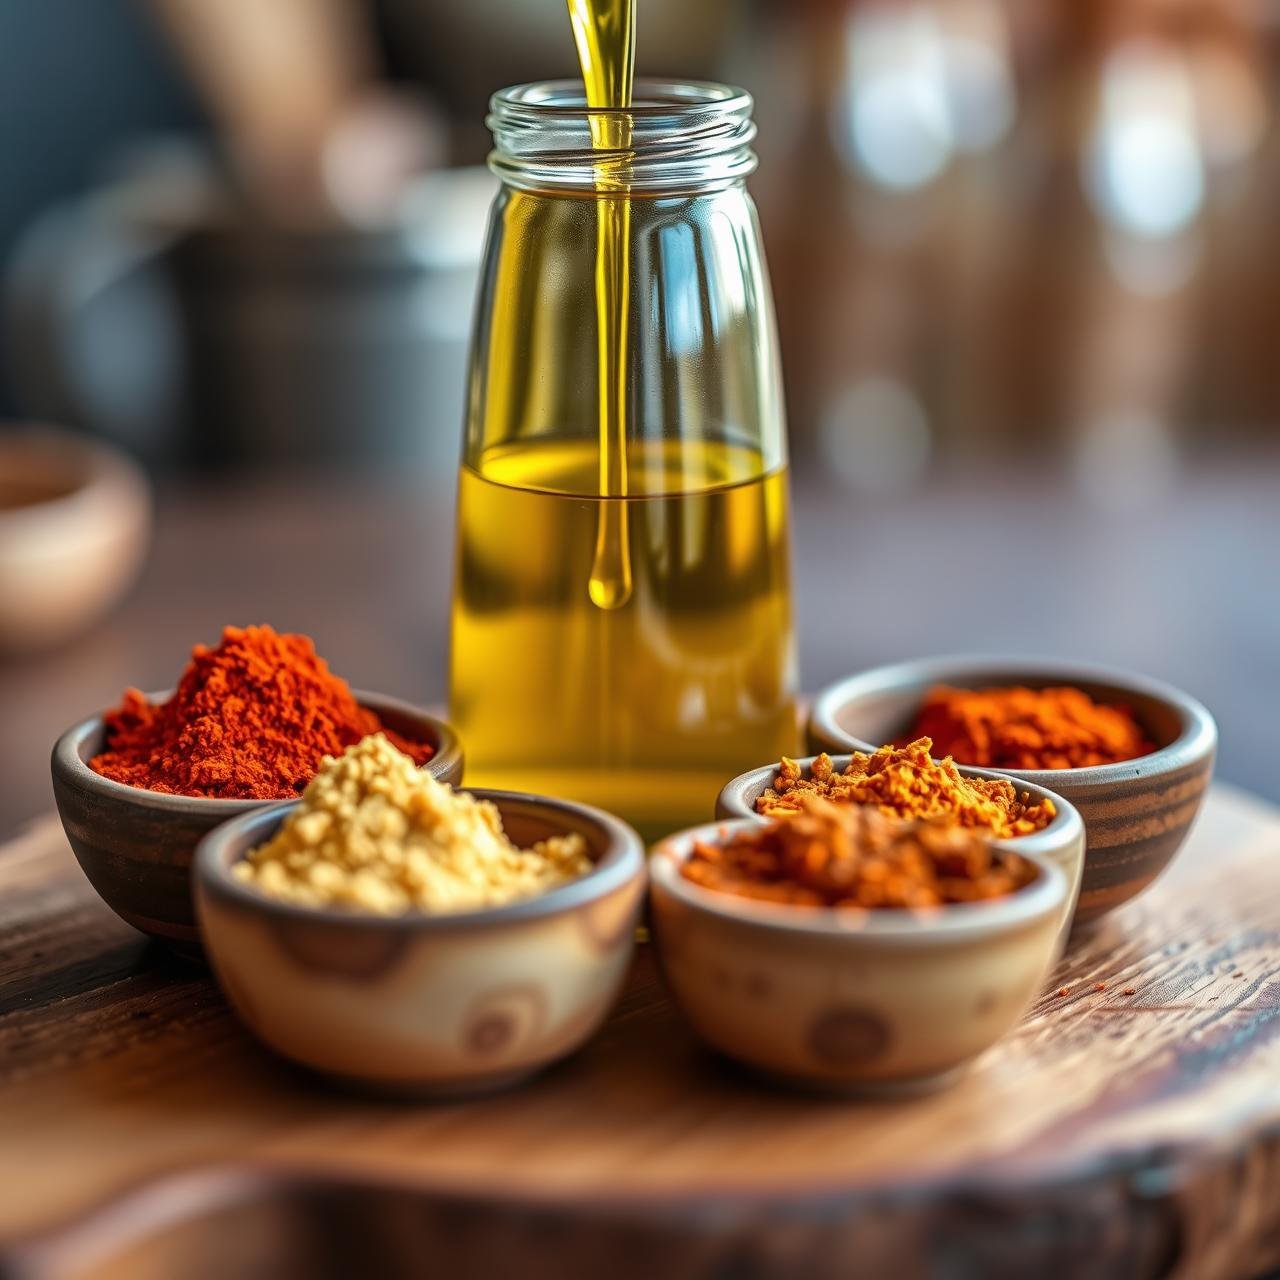
This is where the magic happens. Our signature spice blend is designed for a complex, smoky heat that builds with every bite without being overwhelmingly fiery. It’s a harmonious balance of earthy, savory, and spicy notes. Here are the components that make it so special:
- High-Quality Olive Oil: This is the binder that helps the spices adhere and facilitates crisping. Use a good quality extra virgin olive oil for the best flavor.
- Smoked Paprika: The backbone of the blend. It provides a deep, smoky flavor reminiscent of barbecue chips, but with much more sophistication.
- Garlic Powder: For a savory, aromatic depth that rounds out the other flavors. Use powder, not fresh garlic, as fresh garlic can burn at high roasting temperatures.
- Onion Powder: Adds a subtle, sweet and savory undertone that complements the garlic perfectly.
- Cayenne Pepper: This is your primary source of heat. The amount can be adjusted to your personal preference. Start with less if you’re unsure; you can always add more.
- Cumin: Lends an earthy, warm, and slightly nutty flavor that pairs beautifully with the smokiness of the paprika.
- Fine Sea Salt & Freshly Ground Black Pepper: The essential flavor enhancers. Don’t be shy with the salt; a salty crunch is what we’re after!
The synergy of these spices creates a flavor profile that is robust and incredibly satisfying. Each ingredient plays a crucial role in transforming the humble chickpea into a gourmet snack.
The Master Method: A Step-by-Step Guide to Impossibly Crispy Chickpeas
Follow these steps with care and precision, and you will be rewarded with the crispiest, most flavorful chickpeas imaginable. The key is not to rush the process, especially the drying stage.
Phase 1: Preparation is Paramount
- Preheat Your Oven: Begin by preheating your oven to 400°F (200°C). Position a rack in the middle of the oven for even heat distribution. Do not use convection bake, as it can sometimes burn the spices before the chickpeas are fully crisped.
- Rinse and Drain: Open two 15-ounce cans of chickpeas (garbanzo beans). Pour them into a colander and rinse them thoroughly under cold running water. You want to wash away all the starchy canning liquid (aquafaba). Shake the colander well to remove excess water.
- The Crucial Drying Step: This is the most important step for achieving a true crunch. Spread the rinsed chickpeas on a clean kitchen towel or several layers of paper towels. Gently pat them dry with another towel. For extra-crispy results, you can even let them air-dry for 30-60 minutes. Some chefs recommend gently rolling them between towels to slough off some of the loose skins, which can trap moisture.
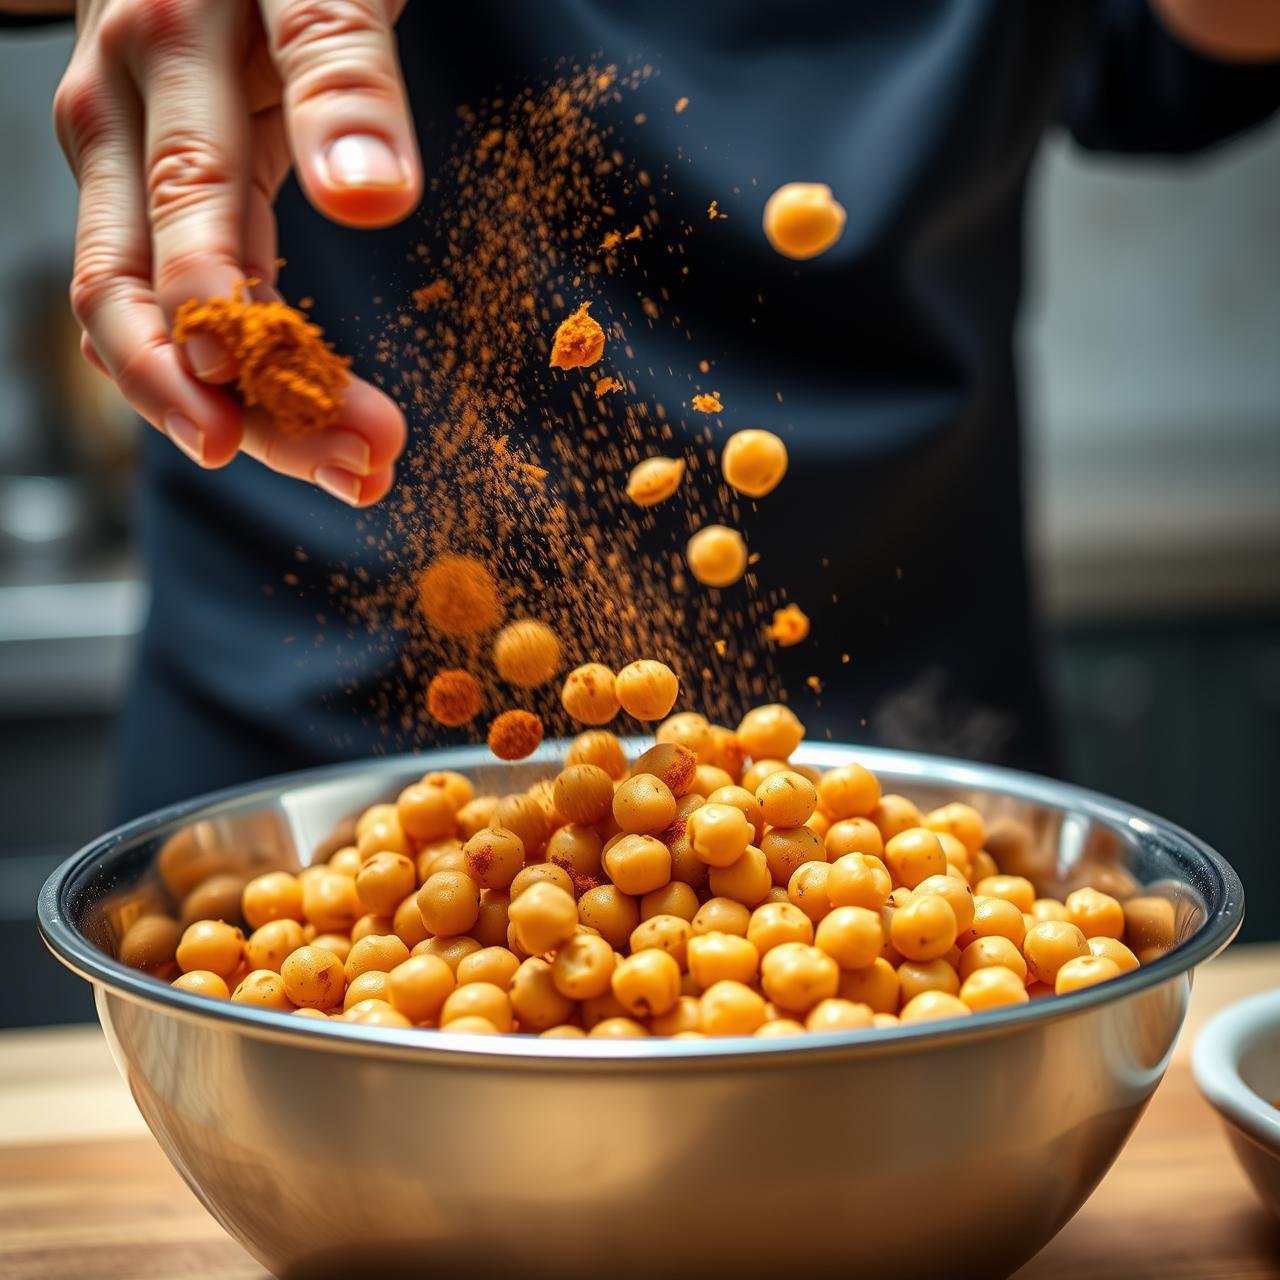
Phase 2: Seasoning to Perfection
- Oil Them Up: Transfer the bone-dry chickpeas to your large mixing bowl. Drizzle with 2 tablespoons of olive oil. Toss them gently but thoroughly until every chickpea has a light, even sheen of oil.
- Mix the Spices: In a small, separate bowl, combine 1 teaspoon smoked paprika, 1 teaspoon garlic powder, 1/2 teaspoon onion powder, 1/2 teaspoon cumin, 1/4 to 1/2 teaspoon cayenne pepper (to your taste), 1 teaspoon fine sea salt, and 1/2 teaspoon black pepper. Whisk them together to ensure they are evenly distributed.
- Coat Evenly: Sprinkle the spice mixture over the oiled chickpeas. Toss again until every nook and cranny is coated in the fragrant blend. Don’t be afraid to use your hands to really work the spices in.
Phase 3: The Roasting Process
- Spread Them Out: Pour the seasoned chickpeas onto your large, rimmed baking sheet. Spread them into a single, even layer. Ensure they are not touching each other. Use two baking sheets if necessary to avoid overcrowding.
- Roast to Golden-Brown: Place the baking sheet in the preheated oven. Roast for 20-30 minutes. About halfway through the cooking time (around the 15-minute mark), shake the pan to toss the chickpeas, promoting even browning.
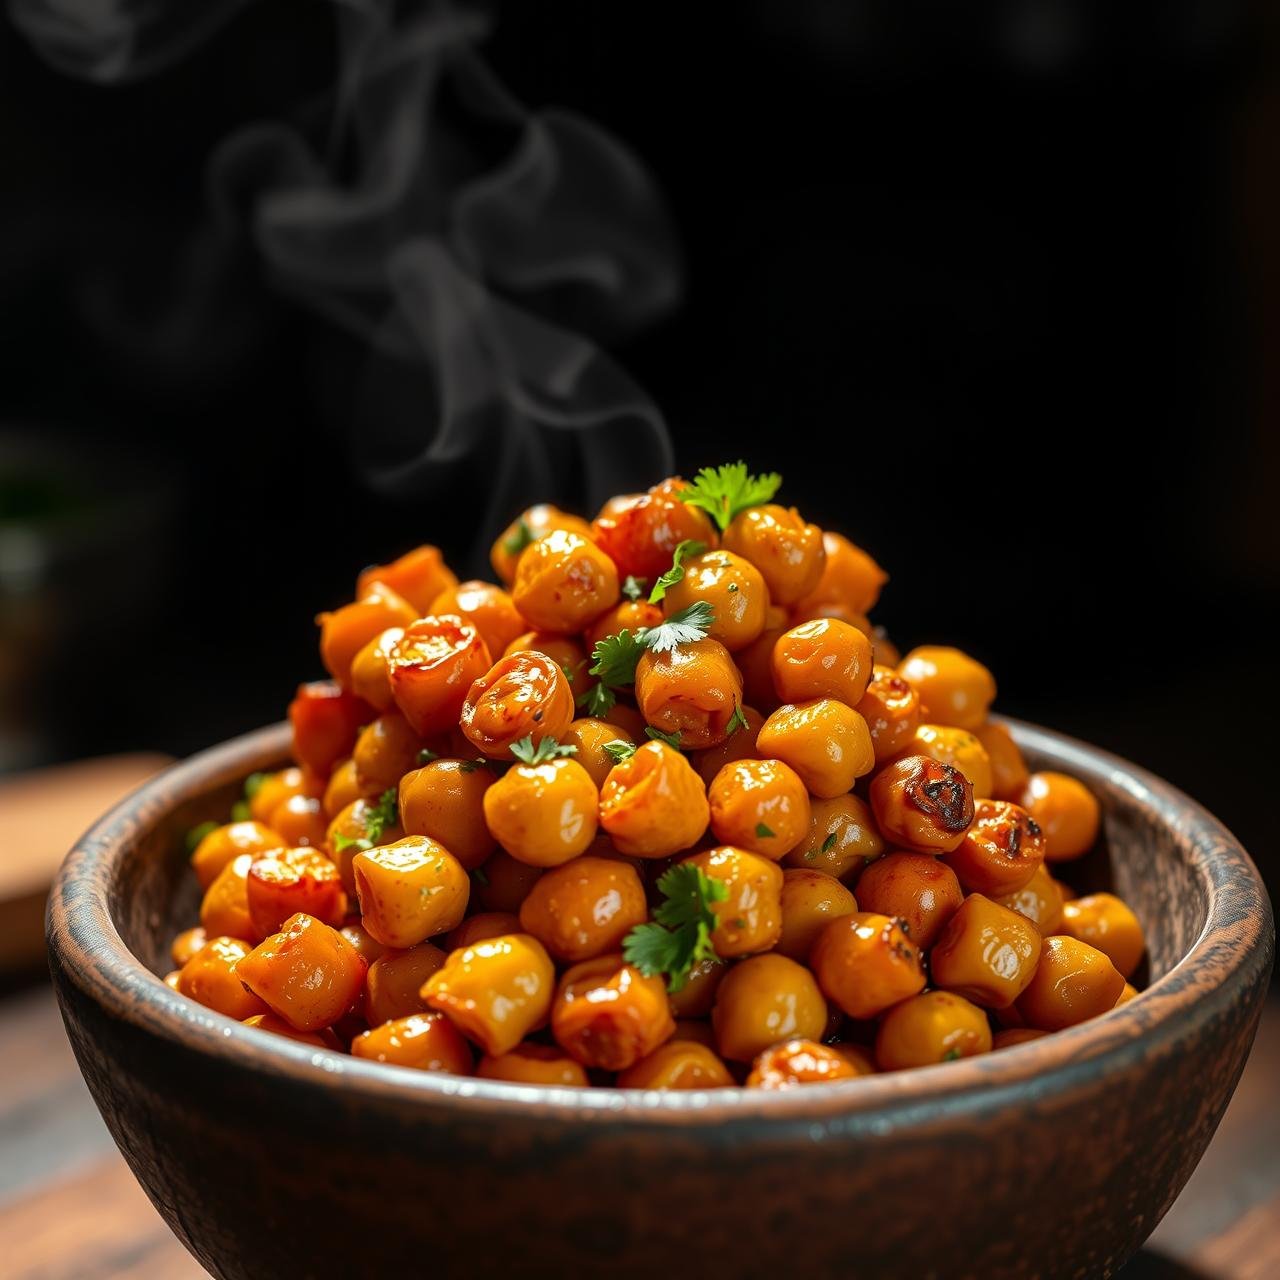
- Listen for the Crunch: You’ll know they’re done when they are a deep golden brown, feel dry to the touch, and make a rattling sound when you shake the pan. If you test one (after letting it cool for a minute!), it should be crispy all the way through, not soft in the center. If they’re not quite there, return them to the oven for another 5-10 minutes, watching carefully to prevent burning.
- Cool Completely: Remove the baking sheet from the oven. Let the chickpeas cool completely on the pan. They will continue to crisp up as they cool down. This is a vital final step, so resist the urge to eat them straight from the oven!
From the Chef’s Notebook: Pro-Tips for Unfailing Crunch

Even a simple recipe has nuances that can elevate it from good to great. Here are some insider tips I’ve gathered over years of perfecting this snack.
The Dryness Doctrine
I cannot overstate this: moisture is the enemy of crispiness. If you have the time, after patting the chickpeas dry, spread them on a baking sheet and let them air dry on the counter for an hour. The drier they are going in, the crispier they will be coming out.
The Skin Question
Some recipes insist on the tedious task of removing every single chickpea skin. Is it necessary? Not entirely, but it can help. The skins can sometimes trap steam. An easy way to do this is to roll the dry chickpeas between two kitchen towels; many of the skins will come loose and you can pick them out. However, you can still achieve a fantastic crunch with the skins on, so don’t let this step deter you if you’re short on time.
Low and Slow vs. Hot and Fast
Our recipe calls for 400°F, which is a great middle-ground. For an even deeper, almost brittle crunch, you can try a lower temperature for a longer time (e.g., 350°F for 40-50 minutes). This dehydrates them more slowly. Conversely, some air fryer methods use high heat for a short time. The oven method at 400°F provides the most reliable, chip-like texture.
Seasoning Strategy
Always mix your dry spices together before adding them to the chickpeas. This prevents clumps of one spice (like cayenne!) from clinging to a few unfortunate chickpeas. Also, apply spices after the oil. The oil acts as a primer, giving the seasoning something to stick to.
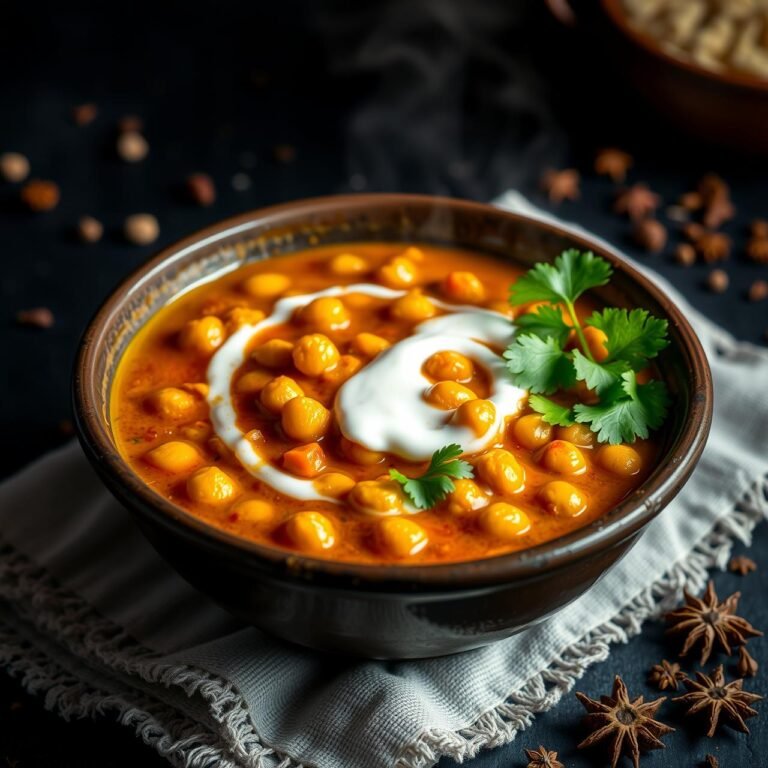
Beyond the Blaze: Creative Flavor Variations to Explore
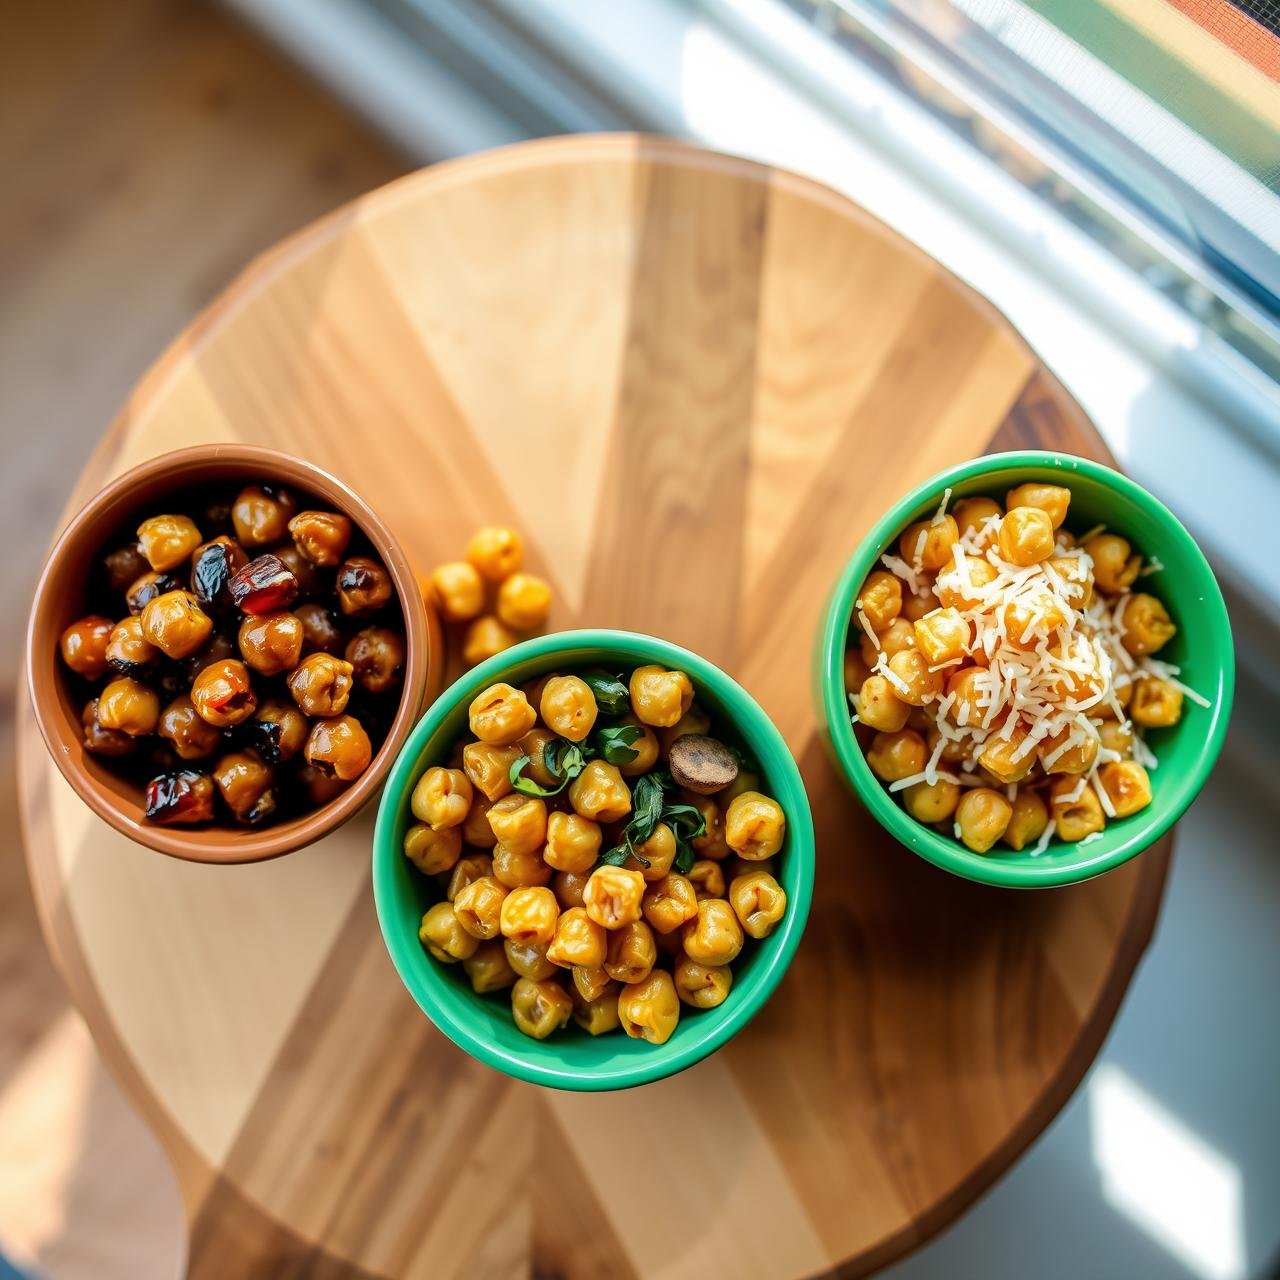
Once you’ve mastered the classic spicy blend, the world of flavor is your oyster. Roasted chickpeas are a blank canvas. Use the same method (dry, oil, season, roast) but swap out the spice blend for one of these mouth-watering variations:
Sweet & Smoky Maple Cinnamon
- 2 tbsp maple syrup
- 1 tbsp olive oil
- 1 tsp cinnamon
- 1/2 tsp smoked paprika
- A pinch of cayenne pepper
- A generous pinch of sea salt
Chef’s Note: If using a wet ingredient like maple syrup, toss it with the chickpeas in the last 5 minutes of roasting to prevent burning and create a delicious glaze.
Zesty Ranch & Dill
- 2 tbsp olive oil
- 1 tbsp dried dill
- 1 tsp garlic powder
- 1 tsp onion powder
- 1/2 tsp dried parsley
- 1/2 tsp sea salt
Italian-Inspired Parmesan & Herb
- 2 tbsp olive oil
- 1/4 cup finely grated Parmesan cheese
- 1 tsp dried oregano
- 1 tsp dried basil
- 1/2 tsp garlic powder
Chef’s Note: Add the Parmesan cheese in the last 5-10 minutes of baking to get it melted and crispy without burning.
A Snack with Substance: The Nutritional Power of Roasted Chickpeas

It’s a snack that tastes indulgent but is secretly working for you. This nutritional information is an estimate for a 1-ounce (approximately 1/4 cup) serving of our Spicy Roasted Chickpeas recipe. This can vary slightly based on the specific brands of ingredients used.
| Nutrient | Amount per 1-ounce Serving (Approx.) |
|---|---|
| Calories | 120-140 kcal |
| Total Fat | 5g |
| Saturated Fat | 0.5g |
| Sodium | 200-300mg |
| Total Carbohydrates | 15g |
| Dietary Fiber | 5g |
| Sugars | 1g |
| Protein | 6g |
| Iron | 10% of DV |
| Manganese | 40% of DV |
The high fiber and protein content is what makes this snack so satisfying. Unlike the empty calories in chips that can lead to overeating, the nutrients in chickpeas help you feel full and content with a reasonable portion size. They are a fantastic way to boost your daily fiber intake while satisfying that crunch craving.
Preserving the Crunch: Proper Storage and Serving Suggestions
You’ve gone to the trouble of creating the perfect crunch; the last thing you want is for your chickpeas to become soft and sad overnight. Proper storage is key.
Storage Instructions
Once the chickpeas are completely cool—and I mean room temperature through and through—transfer them to a storage container. Here’s the trick: you want a container that is not airtight. A glass jar with the lid slightly ajar, a paper bag, or a bowl loosely covered with a paper towel works best. An airtight container will trap any residual moisture and steam, softening the chickpeas. Stored this way at room temperature, they should stay crispy for up to 3-4 days.
Creative Ways to Enjoy Them
While they are a perfect snack on their own, don’t stop there! Think of them as a versatile, crunchy condiment.
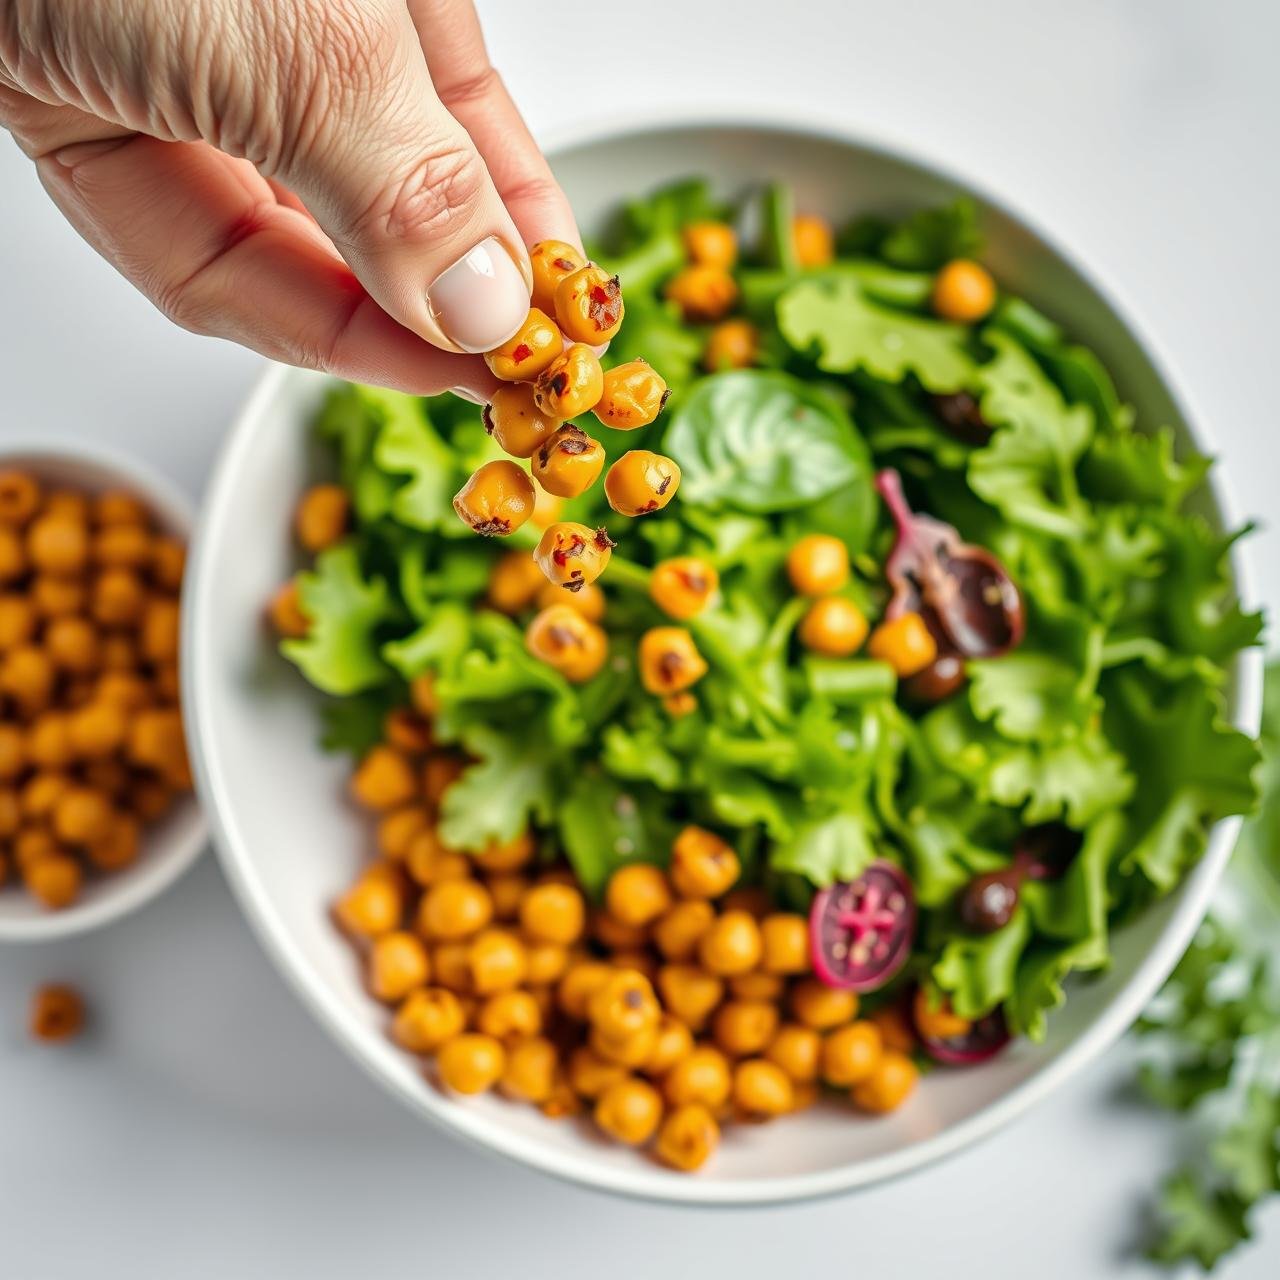
- Soup & Salad Topper: Use them in place of croutons on your favorite salads or sprinkle them over a creamy tomato soup for a delightful textural contrast.
- Trail Mix Component: Mix them with nuts, seeds, and dried fruit for a protein-packed, homemade trail mix.
- On a Grazing Board: Add a bowl to your next cheese or charcuterie board for a unique, gluten-free element.
- Taco & Bowl Garnish: Sprinkle over grain bowls, tacos, or chili for an extra layer of flavor and crunch.
Conclusion
The journey from a humble can of chickpeas to a bowl of irresistibly crispy, spicy, and satisfying snacks is a simple yet profound act of culinary alchemy. You’ve now learned the techniques not just to follow a recipe, but to understand the ‘why’ behind each step—from the critical importance of dryness to the art of balancing a spice blend. You are now empowered to step away from the chip aisle for good.
So, the next time that craving for a salty, crunchy snack hits, don’t reach for a bag of empty promises. Head to your pantry, grab a can of chickpeas, and create something truly special. It’s a snack that’s rustic, wholesome, and completely delicious—a testament to the fact that the most satisfying foods are often the ones we create with our own hands. Happy roasting!