Restaurant Quality Seared Ahi Tuna at Home (Low Carb High Protein)
There’s a certain magic to ordering seared ahi tuna at a fine dining restaurant. The plate arrives, a work of art showcasing a perfectly cooked tuna steak with a dark, crisp crust giving way to a cool, jewel-toned, ruby-red interior. It’s a dish that feels luxurious, complex, and perhaps, a little intimidating to recreate. But I’m here to let you in on a chef’s secret: creating this stunning, low-carb, high-protein masterpiece at home is not only possible, but it’s astonishingly simple and profoundly rewarding. You can achieve that same mouth-watering textural contrast—the warm, savory sear against the cool, buttery tenderness of the raw fish—without the restaurant price tag.
This guide will walk you through every step, from selecting the right cut of fish to achieving that flawless, lightning-fast sear. We’ll demystify the term ‘sushi-grade,’ craft a simple yet elegant sesame crust, and master the high-heat technique that is the key to success. Forget expensive nights out; tonight, we bring the gourmet experience home. Get ready to transform a beautiful piece of fish into an unforgettable meal that’s as nourishing as it is delicious.
The Ahi Tuna Allure: Why This Dish is a Culinary Masterpiece
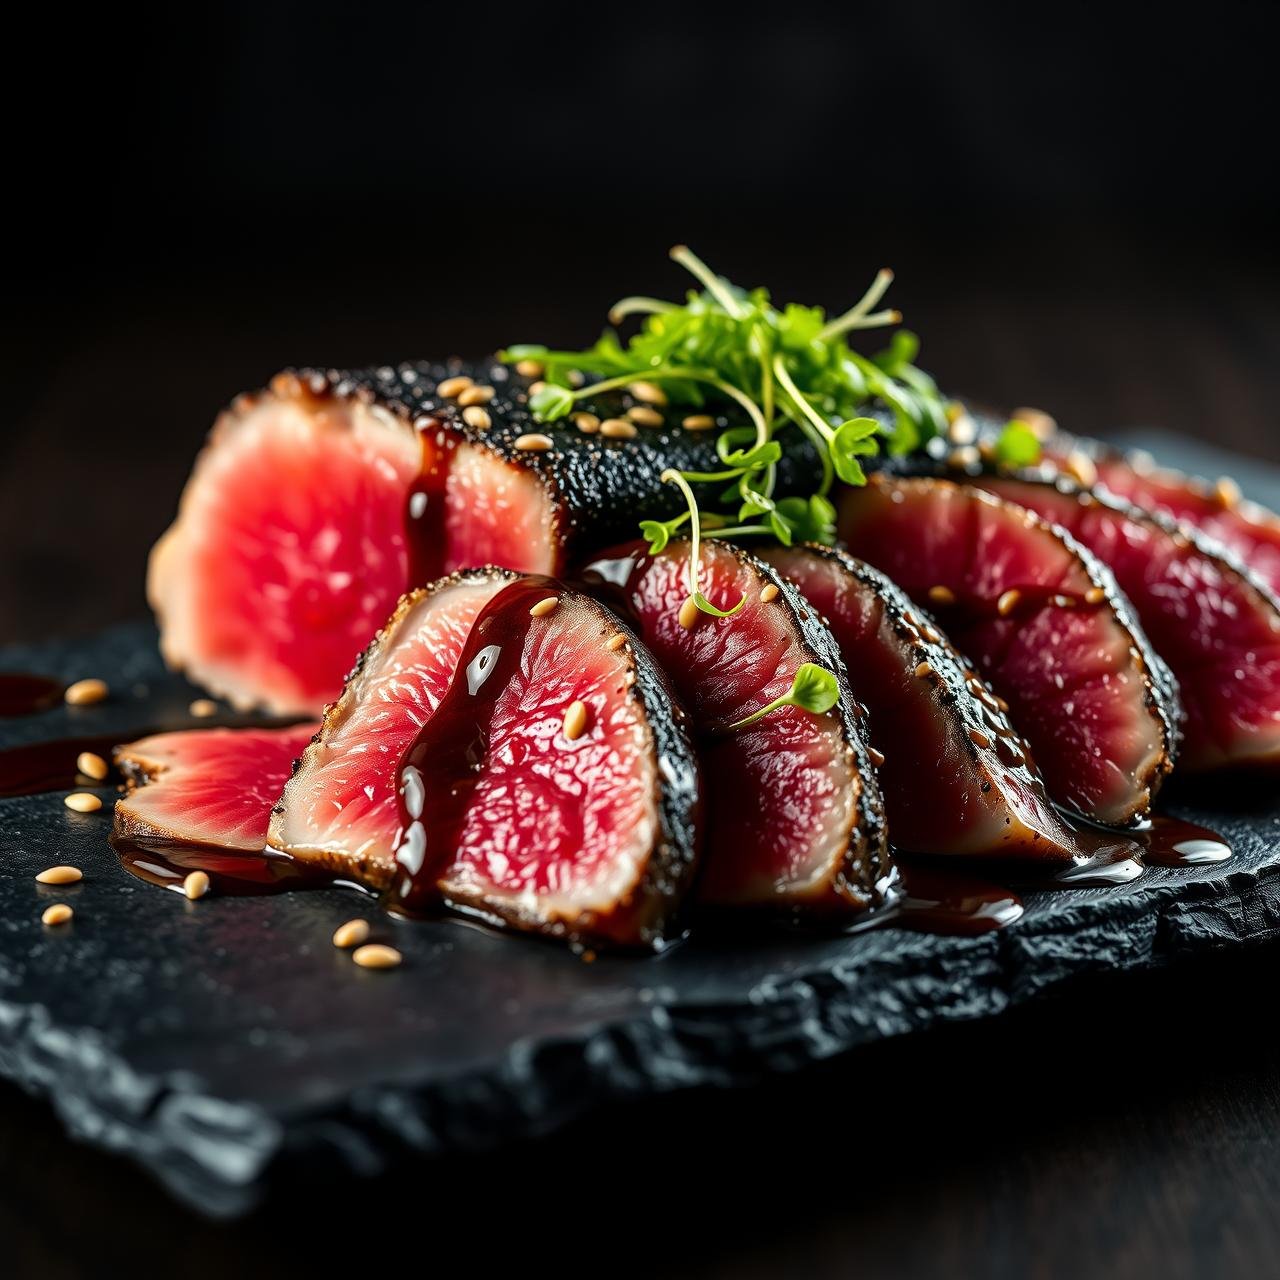
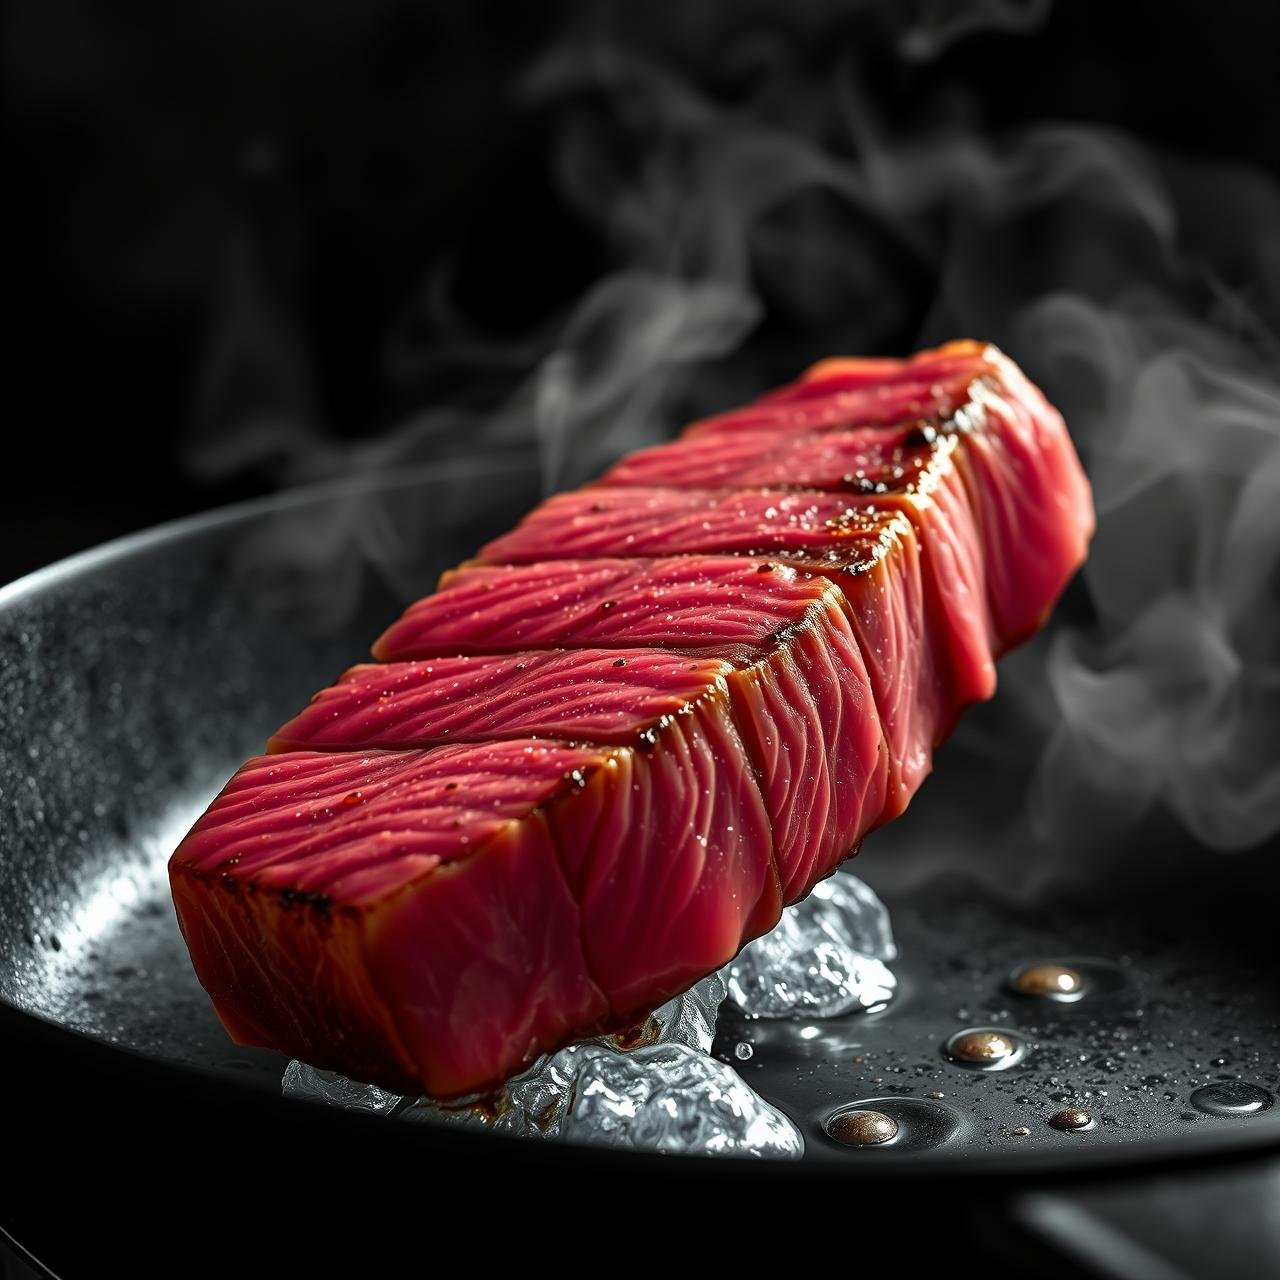
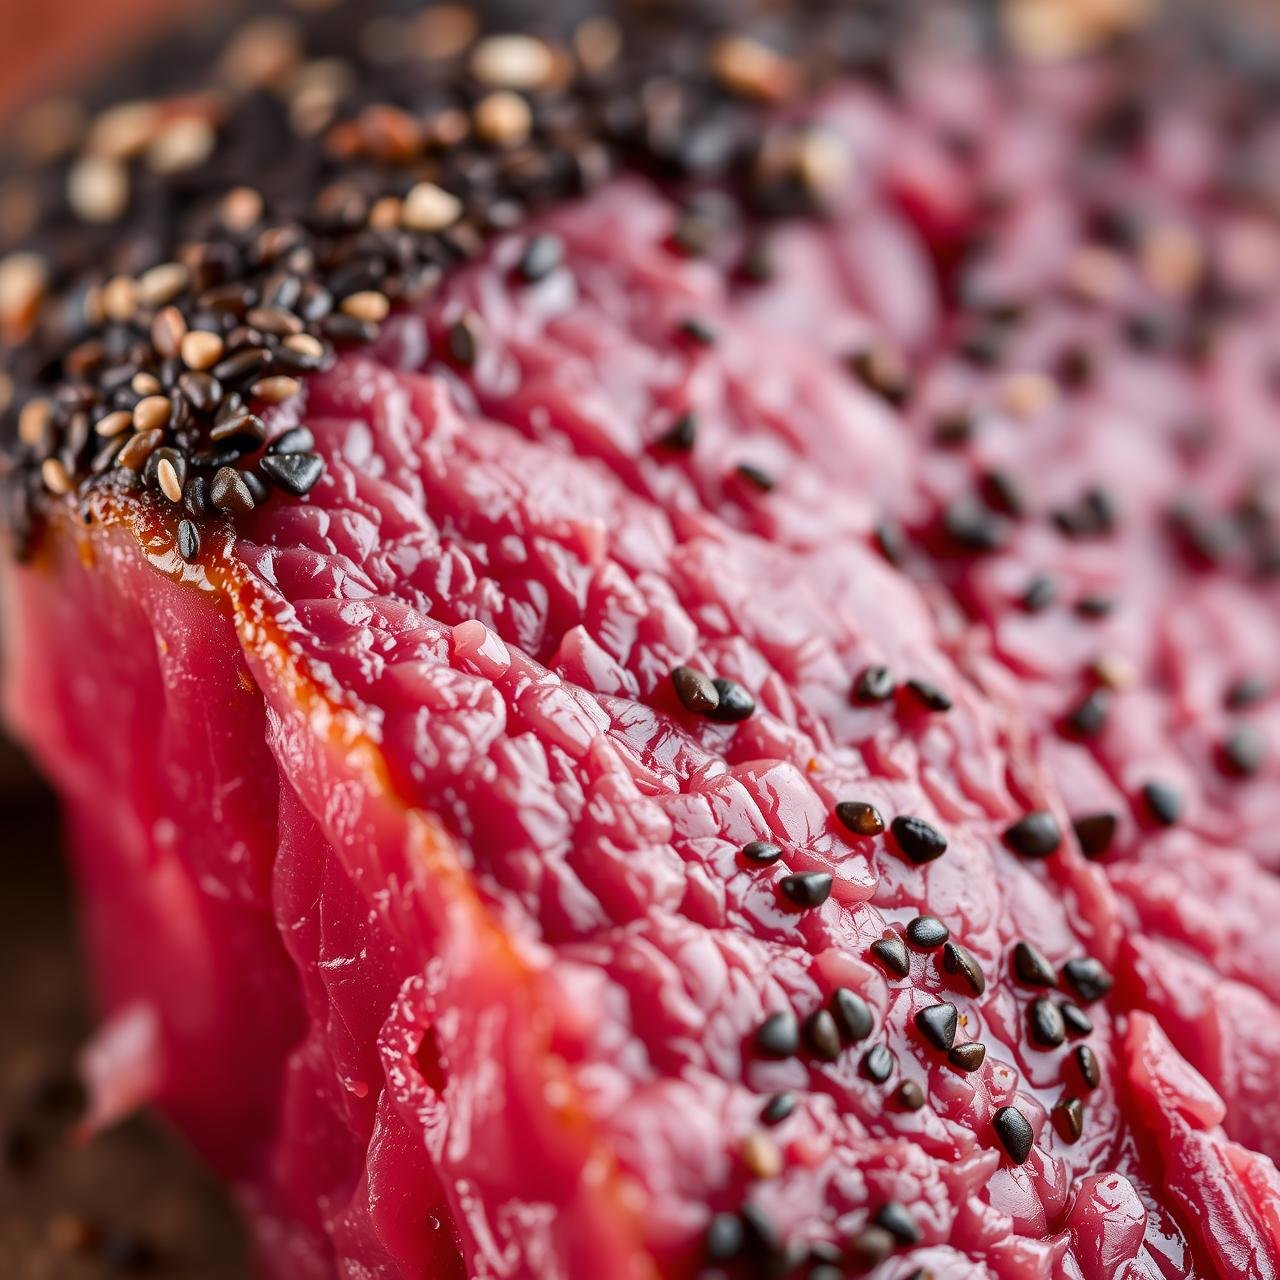
What elevates seared ahi tuna from just a piece of cooked fish to a true culinary event? It’s all about the symphony of contrasts. At its heart, this dish is a celebration of texture. The primary goal is to create a very thin, cooked layer on the outside of the tuna steak while leaving the vast majority of the interior raw, cool, and tender, much like a high-quality steak served blue rare. The exterior, coated in savory seasonings and sesame seeds, hits a searingly hot pan, and in less than a minute, a magnificent crust is formed through the Maillard reaction. This process creates hundreds of new aroma compounds, resulting in a deep, savory, and slightly nutty flavor.
Then comes the moment of truth: the slice. As your knife glides through the crust, it reveals the vibrant, translucent red flesh within. The first bite is a revelation. You experience the warmth and crunch of the sear, followed immediately by the cool, clean, and incredibly buttery texture of the high-quality raw tuna. It’s this delightful thermal and textural juxtaposition that makes each mouthful so exciting and satisfying. It’s a dish that feels both rustic in its simplicity and incredibly elegant in its execution, proving that sometimes the most memorable meals are the ones with the fewest ingredients, prepared with precision and care.
Demystifying ‘Sushi-Grade’: How to Choose the Perfect Tuna Steak

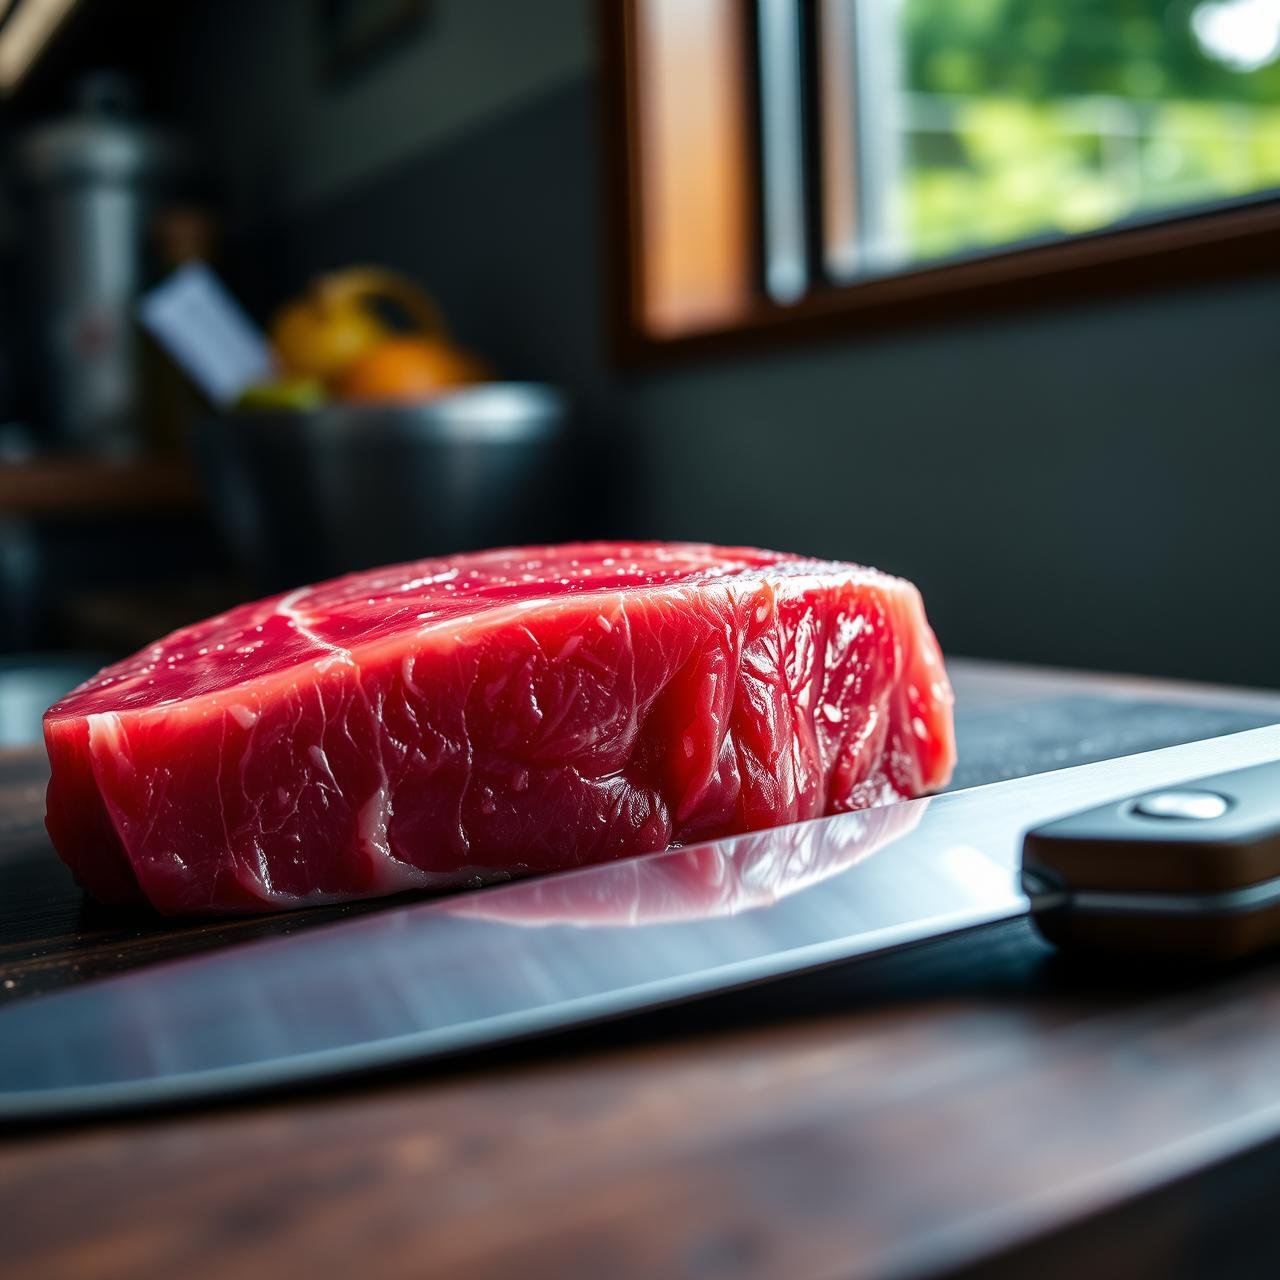
The most critical component of this dish is, without a doubt, the tuna itself. You’ll often see recipes call for “sushi-grade” or “sashimi-grade” tuna, which can be a source of confusion for home cooks. It’s important to understand that these are not officially regulated terms by the FDA. Instead, they are marketing terms used by fishmongers to indicate their freshest, highest-quality fish that they deem safe to be consumed raw.
So, how do you ensure you’re buying the right stuff? You must trust your senses and your source.
What to Look For:
- Color: Fresh, high-quality ahi tuna should have a deep, vibrant red or pinkish hue, similar to raw beef. Avoid tuna that looks dull, brown, or has iridescent patches, as these are signs of age and mishandling.
- Smell: Your tuna should smell clean and fresh, like a mild ocean breeze. It should never have a strong, overtly ‘fishy’ or ammonia-like odor. If it does, walk away.
- Texture: The flesh should look firm, dense, and almost glossy. When gently pressed, it should be resilient and bounce back. Avoid any cuts that appear mushy, flaky, or are weeping excess moisture.
- Cut: Look for steaks that are at least 1.5 to 2 inches thick. This thickness is crucial for achieving a good sear on the outside while keeping the inside beautifully rare. Thinner cuts will cook through too quickly.
Where to Buy:
Your best bet is a reputable, dedicated fish market or a high-end grocery store with a knowledgeable fishmonger. Tell them you are making seared ahi tuna and plan to eat it rare. They can guide you to the best cut. Don’t overlook the frozen seafood section! Many high-quality fish are flash-frozen at sea moments after being caught, which preserves their freshness perfectly. A properly thawed piece of frozen ahi can be just as good, if not better, than the ‘fresh’ fish that has been sitting in a display case for a day or two.
Your Culinary Toolkit: Essential Equipment
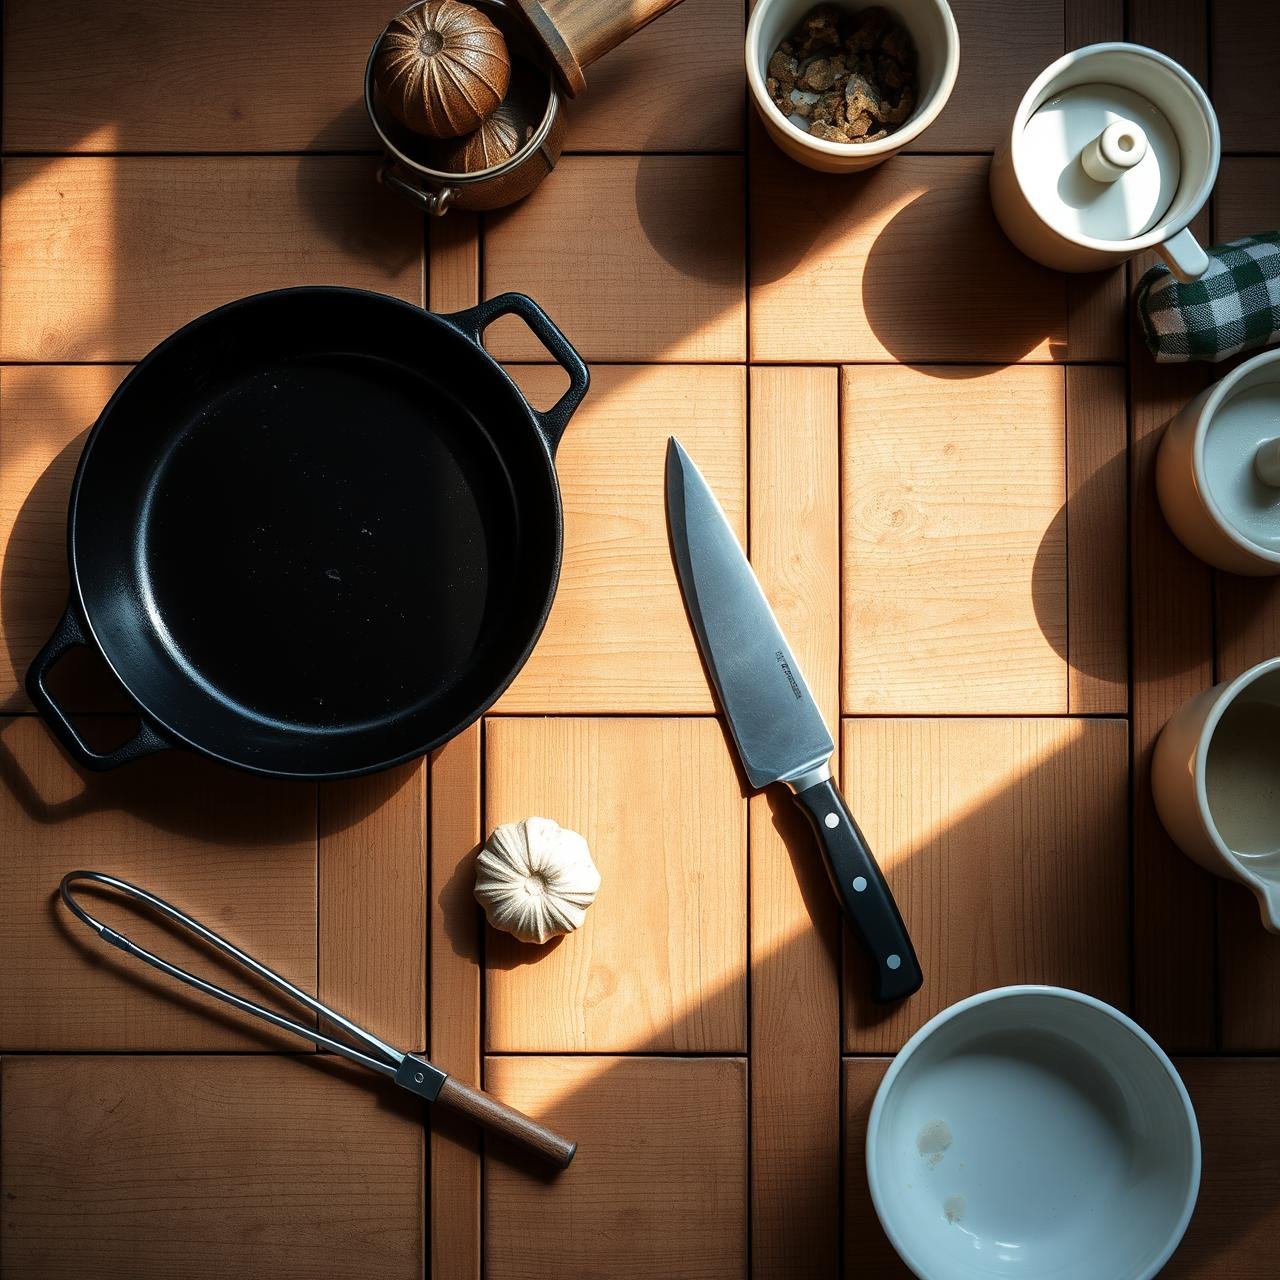
You don’t need a professional kitchen to achieve a professional-grade sear. The right tools, however, are non-negotiable for getting that perfect crust and rare center.
| Equipment | Why It’s Essential |
|---|---|
| Heavy-Bottomed Skillet | A cast-iron, carbon steel, or heavy stainless-steel skillet is crucial. These materials retain heat incredibly well, ensuring the pan stays screaming hot when the cool tuna hits it, which is key for a rapid, even sear. |
| Long-Handled Tongs | For safely placing the tuna in the hot pan and flipping it without piercing the flesh. Using a fork can create holes where moisture escapes, steaming the fish instead of searing it. |
| Sharp Slicing Knife | A very sharp chef’s knife or slicing knife is needed to cut the seared tuna into clean, beautiful slices without tearing the delicate crust or mushing the rare interior. |
| Shallow Dishes | You’ll need two: one for the marinade and another for the sesame seed coating. They make for an easy and clean dredging process. |
| Paper Towels | An unsung hero of the kitchen. Patting the tuna completely dry is arguably one of the most important steps for achieving a crisp, brown crust. |
The Perfect Marinade & Crust: A Symphony of Flavors
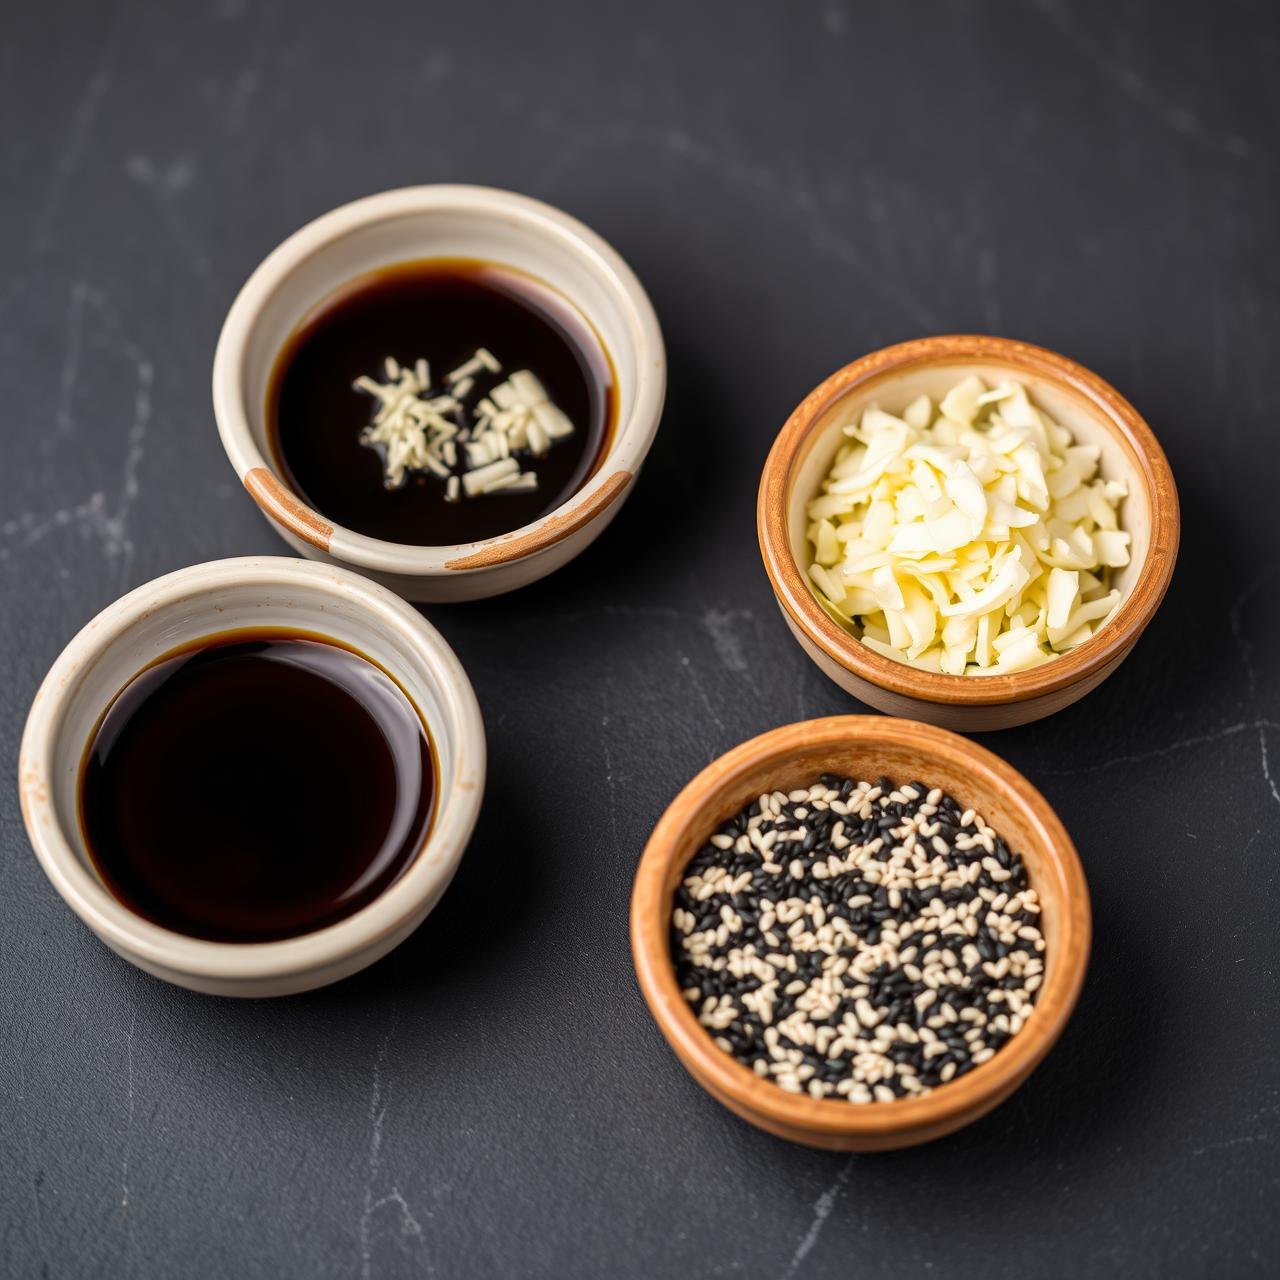
Our goal is to complement the rich, clean flavor of the tuna, not overpower it. This simple marinade adds a touch of savory umami, while the sesame crust provides a delightful nutty crunch and visual appeal.
For Two (6-ounce) Ahi Tuna Steaks:
- Low-Sodium Soy Sauce or Tamari: 2 tablespoons. This provides the salty, umami backbone. Tamari is a great gluten-free alternative.
- Toasted Sesame Oil: 1 teaspoon. A little goes a long way! It adds a deep, nutty aroma that pairs beautifully with the fish.
- Freshly Grated Ginger: 1 teaspoon. Adds a bit of warm, zesty spice to cut through the richness.
- Minced Garlic: 1 clove. For a subtle, aromatic depth of flavor.
- Black and White Sesame Seeds: 1/4 cup total. The combination looks beautiful, and the black seeds offer a slightly more robust flavor. Toasting them beforehand can amplify their nuttiness.
- Coarsely Ground Black Pepper: 1/2 teaspoon. Adds a pleasant, mild heat to the crust.
- High-Smoke-Point Oil: 1 tablespoon for searing. Avocado oil, grapeseed oil, or canola oil are excellent choices. Avoid olive oil, as it will smoke and burn at the high temperature required.
The Sear-iously Perfect Method: Step-by-Step Instructions
This is a fast-cooking process. Read through all the steps and have everything ready—your ingredients prepped, your pan chosen, your landing plate nearby—before you even think about turning on the stove. This is a dance of precision and heat.
- Prepare the Tuna: Remove the tuna steaks from the packaging and pat them completely dry with paper towels. I mean completely dry. Any surface moisture will steam the fish and prevent that beautiful, crisp crust from forming.
- Quick Marinate: In a shallow dish, whisk together the soy sauce, sesame oil, grated ginger, and minced garlic. Place the tuna steaks in the marinade, turning to coat all sides. Let them sit for just 5-10 minutes. We want to flavor the surface, not ‘cook’ the fish with acid or salt like a ceviche.
- Create the Crust: On a separate plate or shallow dish, combine the black and white sesame seeds with the coarsely ground black pepper. Remove the tuna from the marinade, allowing any excess to drip off. Press all sides of each steak firmly into the sesame seed mixture, ensuring a thick, even coating.
- Get the Pan Screaming Hot: Place your heavy-bottomed skillet over high heat. Let it heat up for a good 3-5 minutes. You want it incredibly hot. A good test is to flick a drop of water into the pan; it should sizzle and evaporate almost instantly.
- Sear with Precision: Add your high-smoke-point oil to the hot pan. It should shimmer immediately. Carefully place the sesame-crusted tuna steaks in the skillet. You should hear a loud, aggressive sizzle. This is the sound of success.
- The Timed Sear: Cook the tuna for approximately 45-60 seconds per side for a truly rare center. For medium-rare, aim for 90 seconds per side. This will cook the outer 1/4 inch, leaving the inside tender and raw. Use your tongs to sear the edges as well, holding the steaks on their sides for about 15-20 seconds each. Do not overcook! The biggest mistake is leaving it in the pan for too long.
- Rest is Best: Immediately remove the tuna from the pan and place it on a clean cutting board. Let it rest for 3-5 minutes. This crucial step allows the juices to redistribute and the residual heat to gently finish the cooking process.
- Slice and Serve: Using your sharpest knife, slice the tuna against the grain into 1/4 to 1/2-inch thick pieces. Arrange the slices on a plate, fanning them out to showcase that stunning color contrast. Serve immediately.
Chef’s Secrets for Flawless Ahi Tuna
The recipe is simple, but technique makes it perfect. Here are the pro tips that separate a good seared tuna from a great one.
Don’t Fear the Heat
Timid heat is the enemy of a good sear. A lukewarm pan will slowly cook the tuna from the outside in, resulting in a dry, grey, and disappointing steak. You need blazing, almost smoking-hot heat to instantly form a crust on the exterior before the interior has a chance to cook. Get your pan hotter than you think you need it.
The Dryness Doctrine
We’ve said it before, but it bears repeating: a bone-dry surface is non-negotiable. Moisture is the enemy of browning. The energy from the hot pan will be wasted turning that water into steam instead of creating the flavorful, brown crust we’re after via the Maillard reaction.
Timing is Everything
This is not the time to walk away and check your email. Seared tuna cooks in moments. Stand by the stove, use a timer, and trust the clock. For a 1.5-inch thick steak, 60 seconds per side is a perfect starting point for rare. The sides of the steak are your best visual cue; watch the opaque, cooked color creep up the sides, and flip when it reaches about 1/8 to 1/4 of an inch.
The Slice is Right
Don’t ruin your perfect sear with a dull knife. A dull blade will mash the steak, ruining the clean lines between the crust and the raw center. A sharp knife will glide through, preserving the integrity of each slice. Always slice against the grain for the most tender bite.
Serving Suggestions & Perfect Pairings
Once you’ve mastered the sear, the fun continues with plating and pairing. This versatile protein can be the star of many different meals.
- Classic Entrée: Serve the fanned-out slices alongside a mound of creamy wasabi mashed potatoes or coconut rice and a side of blanched asparagus or sautéed baby bok choy. Drizzle with a simple soy-ginger reduction or a dot of sriracha aioli.
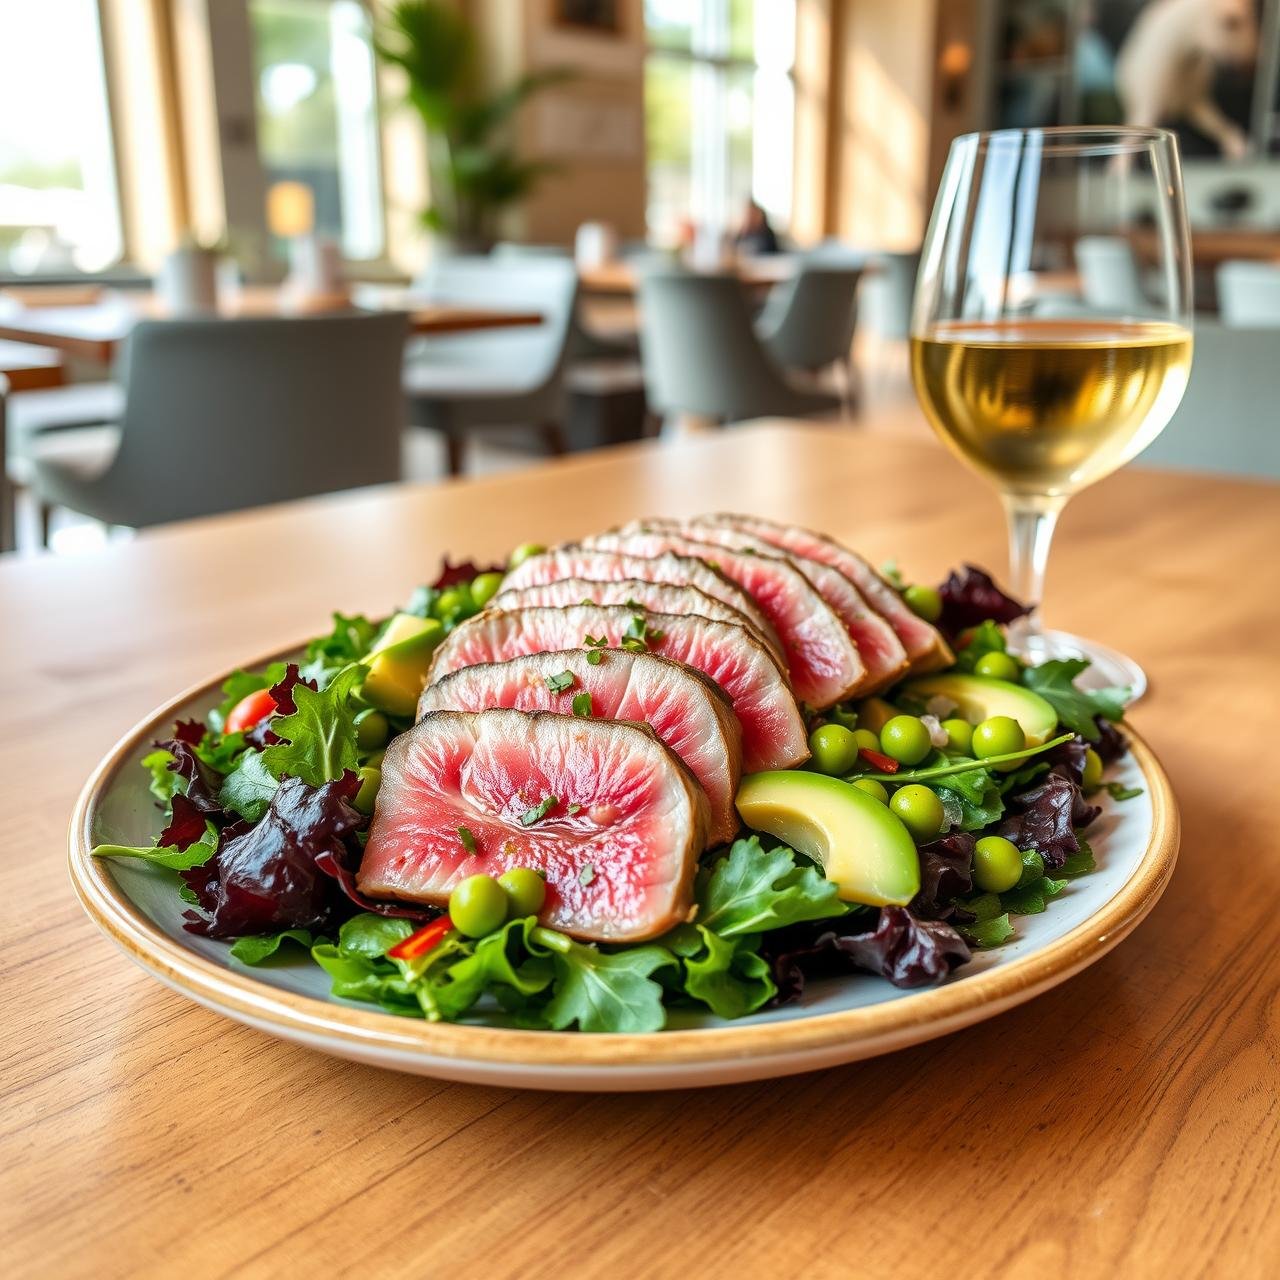
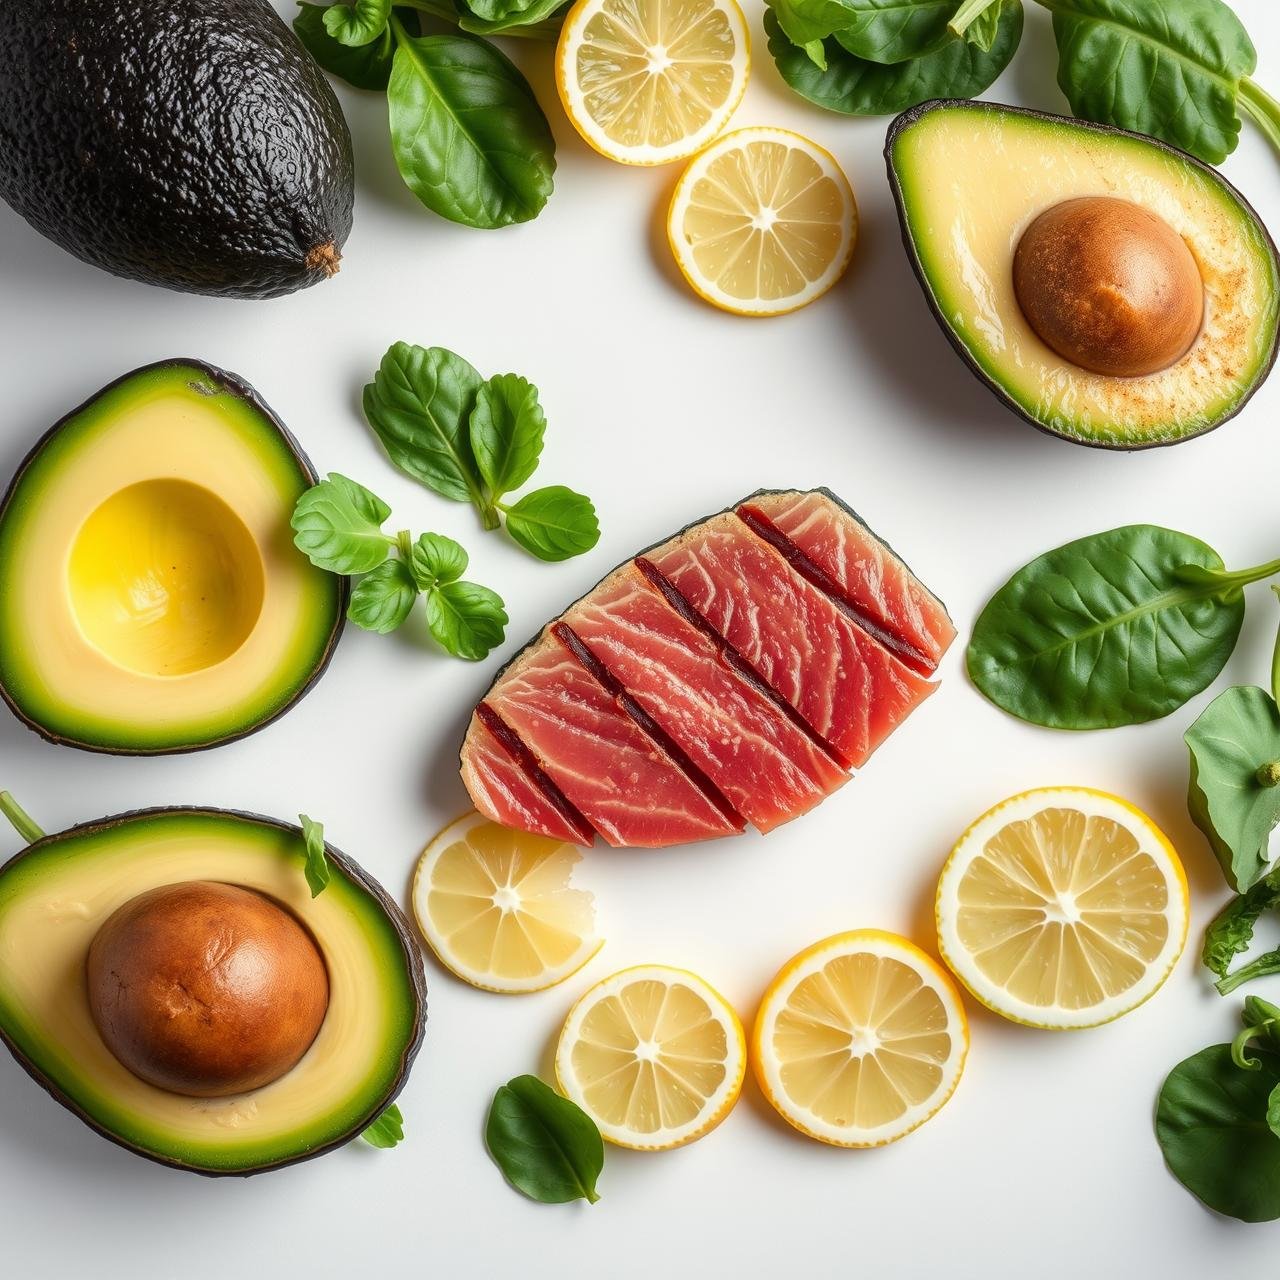
- Ahi Tuna Salad: For a light, healthy, and incredibly satisfying low-carb meal, lay the warm tuna slices over a bed of mixed greens, arugula, or seaweed salad. Add sliced avocado, edamame, cucumber ribbons, and a light miso-ginger or sesame vinaigrette.
- Tuna Poke Bowl: While not traditional poke, you can create a delicious bowl. Cube the seared tuna after it rests and serve it over cauliflower rice (for low-carb) or sushi rice with your favorite poke toppings like pickled ginger, mango, and a drizzle of spicy mayo.
- Wine Pairings: The richness of the tuna and the umami of the marinade pair beautifully with a crisp white wine like a Sauvignon Blanc or a dry Riesling. For red wine lovers, a light-bodied Pinot Noir with its bright acidity and subtle earthiness is a fantastic match.
Nutritional Powerhouse: The Benefits of Ahi Tuna
Ahi tuna isn’t just delicious; it’s a nutritional champion, especially for those following a low-carb, high-protein lifestyle. It’s a clean, lean protein source that fuels your body and satisfies your appetite.
This dish is packed with high-quality protein, which is essential for muscle repair, immune function, and maintaining a healthy metabolism. It’s also an excellent source of Omega-3 fatty acids (EPA and DHA), renowned for their anti-inflammatory properties and crucial roles in brain health and heart function. Furthermore, ahi tuna provides essential nutrients like selenium, a powerful antioxidant, and Vitamin B12, which is vital for energy production. Its naturally low carbohydrate and fat content makes it a perfect fit for Keto, Paleo, and generally health-conscious diets.
| Nutrient | Amount per 6oz Serving (approx.) |
|---|---|
| Calories | 250 kcal |
| Protein | 40 g |
| Fat | 8 g |
| Saturated Fat | 2 g |
| Carbohydrates | 2 g |
| Sodium | 450 mg (will vary with soy sauce) |
| Omega-3s | ~1500 mg |
Storing & Repurposing Leftovers
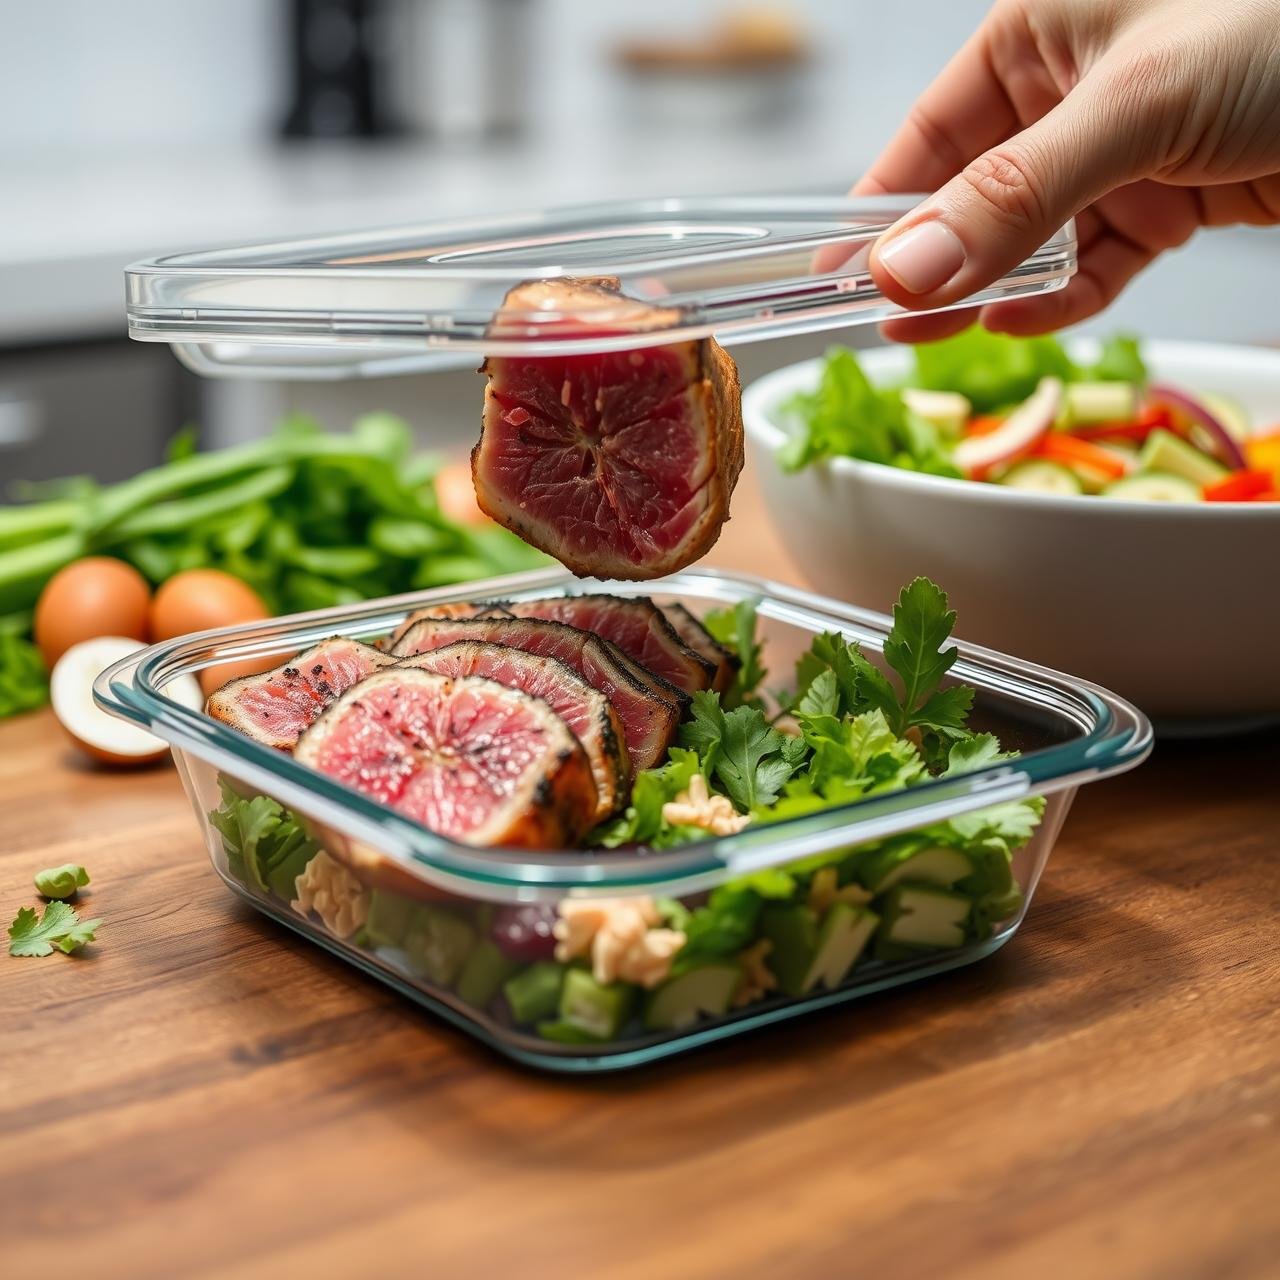
Seared ahi tuna is unequivocally best enjoyed immediately after cooking to appreciate the warm-cool temperature contrast. However, if you do have leftovers, they can still be delicious when handled correctly.
Storage:
Allow the tuna to cool completely to room temperature. Store it in an airtight container in the refrigerator for up to 2 days. Do not try to reheat the tuna in a microwave or pan, as this will cook it through and ruin the rare texture, making it dry and tough.
Creative Leftover Ideas:
Enjoy the leftovers cold to preserve their texture.
- Tuna Salad Sandwich (Upgraded): Flake the cold, leftover tuna and mix it with a high-quality mayonnaise or a healthier alternative like mashed avocado with a squeeze of lime. Add celery, red onion, and herbs for a gourmet tuna salad. Serve on toasted sourdough or with crackers.
- Quick and Healthy Wraps: Slice the cold tuna and place it in a large lettuce wrap or a low-carb tortilla with mixed greens, shredded carrots, and a drizzle of your favorite Asian-inspired dressing.
- Protein-Packed Snack: Simply enjoy the cold slices on their own with a side of soy sauce and wasabi for a quick, high-protein snack.
Conclusion
You have now journeyed from the fish counter to a fine-dining plate, all within the comfort of your own kitchen. As you’ve seen, creating restaurant-quality seared ahi tuna isn’t about complex techniques or obscure ingredients; it’s about respecting a high-quality product and mastering the simple, powerful application of high heat. By understanding how to choose the best tuna, the importance of a dry surface, and the necessity of a screaming-hot pan, you’ve empowered yourself to create a meal that is elegant, incredibly delicious, and profoundly healthy.
So the next time a craving for that perfect sear strikes, remember this guide. Embrace the sizzle, trust the process, and take pride in the stunning, mouth-watering dish you’ve created. We encourage you to experiment with different spices in your crust or create your own signature dipping sauce. Happy searing!