Ditch The Tortilla: Giant Collard Green Wraps Detailed Recipe
There’s a quiet revolution happening in the world of healthy eating, a shift away from processed grains and towards the vibrant, nutrient-dense offerings of the earth. At the forefront of this movement is the humble, yet mighty, collard green. Forget flimsy lettuce and carb-heavy tortillas; we’re here to introduce you to your new favorite vessel for all things delicious: the Giant Collard Green Wrap. This isn’t just a recipe; it’s a technique, a gateway to a world of fresh, clean, and incredibly satisfying meals. Imagine a wrap that doesn’t get soggy, holds its contents with impressive strength, and delivers a satisfying, toothsome crunch with every bite. It’s a canvas for your culinary creativity, packed with vitamins A, C, and K, fiber, and a host of antioxidants. In this detailed guide, we will walk you through every step, from selecting the perfect leaves to mastering the blanching technique and creating a filling so mouth-watering, you’ll forget tortillas ever existed. Prepare to transform your lunch game and embrace the rustic, homestyle goodness of a meal that truly nourishes from the inside out.
Why Your Kitchen Needs a Collard Green Makeover
Before we dive into the ‘how,’ let’s talk about the ‘why.’ Why choose a sturdy leaf over a familiar flour tortilla? The answer lies in a beautiful blend of flavor, function, and phenomenal health benefits. Collard greens are a cruciferous vegetable, a cousin to kale and broccoli, renowned for their robust structure and earthy, slightly sweet flavor that complements a vast array of fillings. Unlike tortillas, they won’t overpower the delicate taste of your ingredients; instead, they enhance them.
Nutritional Powerhouse
From a health perspective, it’s no contest. A single large collard leaf contains a fraction of the calories and carbohydrates of even the ‘healthiest’ whole wheat tortilla. They are an exceptional source of dietary fiber, promoting digestive health and keeping you feeling full and satisfied for longer. This makes them a dream come true for anyone on a low-carb, keto, paleo, or gluten-free diet, as well as for health enthusiasts looking to increase their vegetable intake in a delicious way.
Unbeatable Structure
Functionally, a properly prepared collard leaf is superior. A quick blanch renders it pliable and easy to roll, yet it retains an incredible durability. Say goodbye to the dreaded wrap explosion! These verdant blankets hold even the heartiest of fillings without tearing or becoming a soggy mess, making them perfect for on-the-go lunches and meal prepping for the week.
Gather Your Culinary Tools
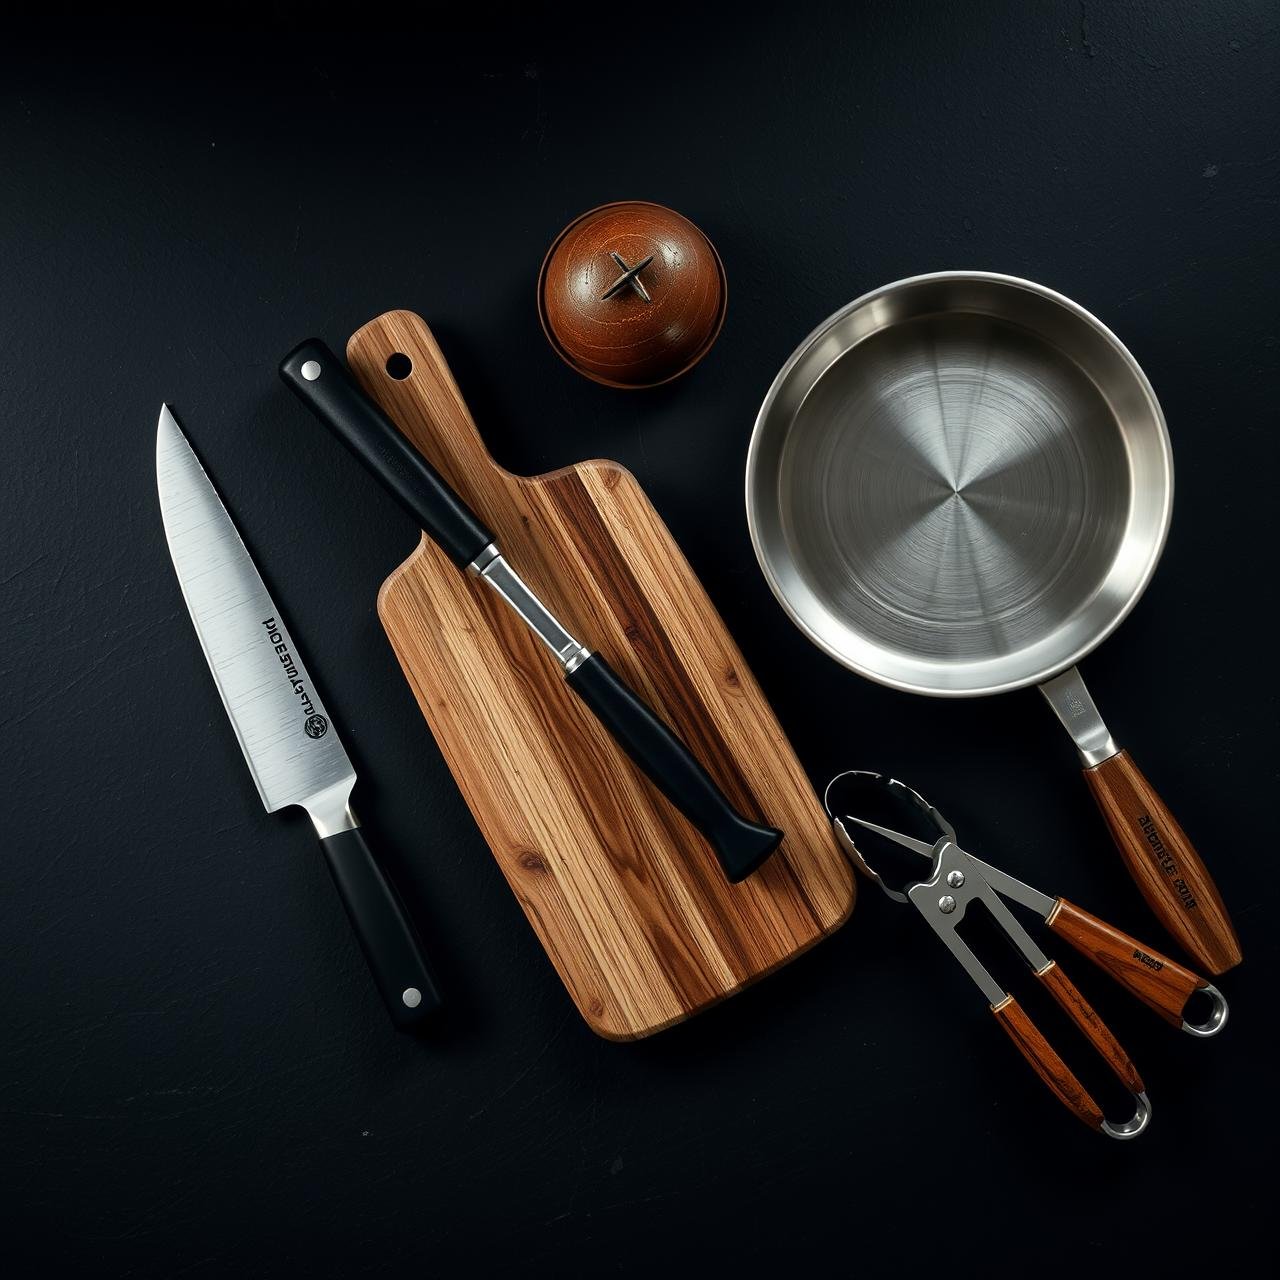
A great chef is only as good as their tools. For this recipe, you don’t need anything overly fancy, just a few kitchen staples that will make the process smooth and enjoyable. Having everything ready before you begin is a classic chef’s technique called ‘mise en place,’ and it’s the secret to a stress-free cooking experience.
| Tool | Purpose |
|---|---|
| Large Pot or Dutch Oven | For blanching the collard leaves. It needs to be wide enough for the leaves to lay flat. |
| Large Bowl (for ice bath) | Crucial for shocking the leaves after blanching to stop the cooking process and lock in that vibrant green color. |
| Tongs | For safely handling the hot collard leaves. |
| Large Skillet | For cooking the delicious turkey and quinoa filling. |
| Chef’s Knife & Cutting Board | For prepping all the vegetables and de-stemming the collard greens. A sharp knife is a safe knife! |
| Mixing Bowls | For combining your filling ingredients. |
| Kitchen Towels or Paper Towels | Essential for patting the collard leaves completely dry before wrapping. |
A Symphony of Fresh Ingredients
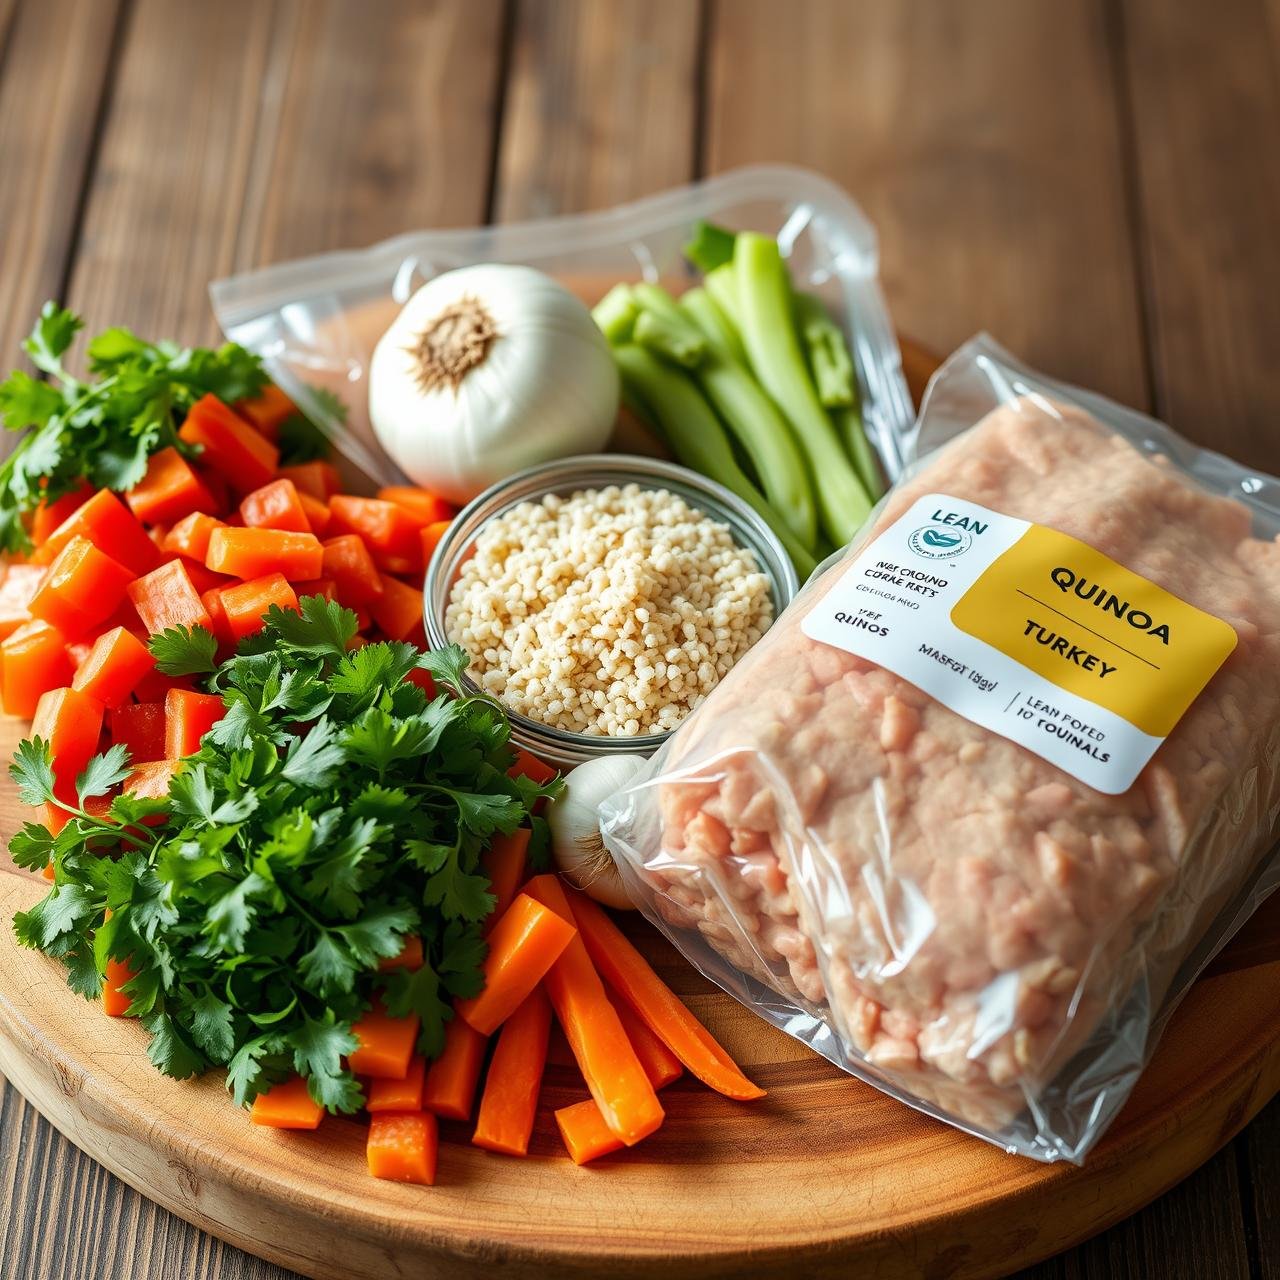
The beauty of these wraps is their versatility, but this signature filling is a perfect place to start. It’s a balanced, protein-packed, and flavor-forward combination that will have you coming back for more. We emphasize fresh, whole ingredients for the cleanest taste and best nutritional profile.
For the Wraps:
- 6-8 large, vibrant collard green leaves, with no yellowing or blemishes
For the Vibrant Turkey & Quinoa Filling:
- 1 lb lean ground turkey (93/7 is a great choice)
- 1 tbsp avocado oil or olive oil
- 1 medium yellow onion, finely diced
- 2 cloves garlic, minced
- 1 red bell pepper, finely diced
- 1 cup cooked quinoa, cooled (any color works!)
- 1/2 cup shredded carrots
- 1/4 cup fresh cilantro, chopped
- 1/4 cup chicken or vegetable broth
- 2 tbsp tamari or low-sodium soy sauce
- 1 tbsp rice vinegar
- 1 tsp toasted sesame oil
- 1/2 tsp ground ginger
- Salt and freshly ground black pepper to taste
Optional for Serving:
- Avocado slices
- Sriracha or your favorite hot sauce
- A creamy tahini or peanut dipping sauce
Mastering the Leaf: How to Prep and Blanch Collard Greens
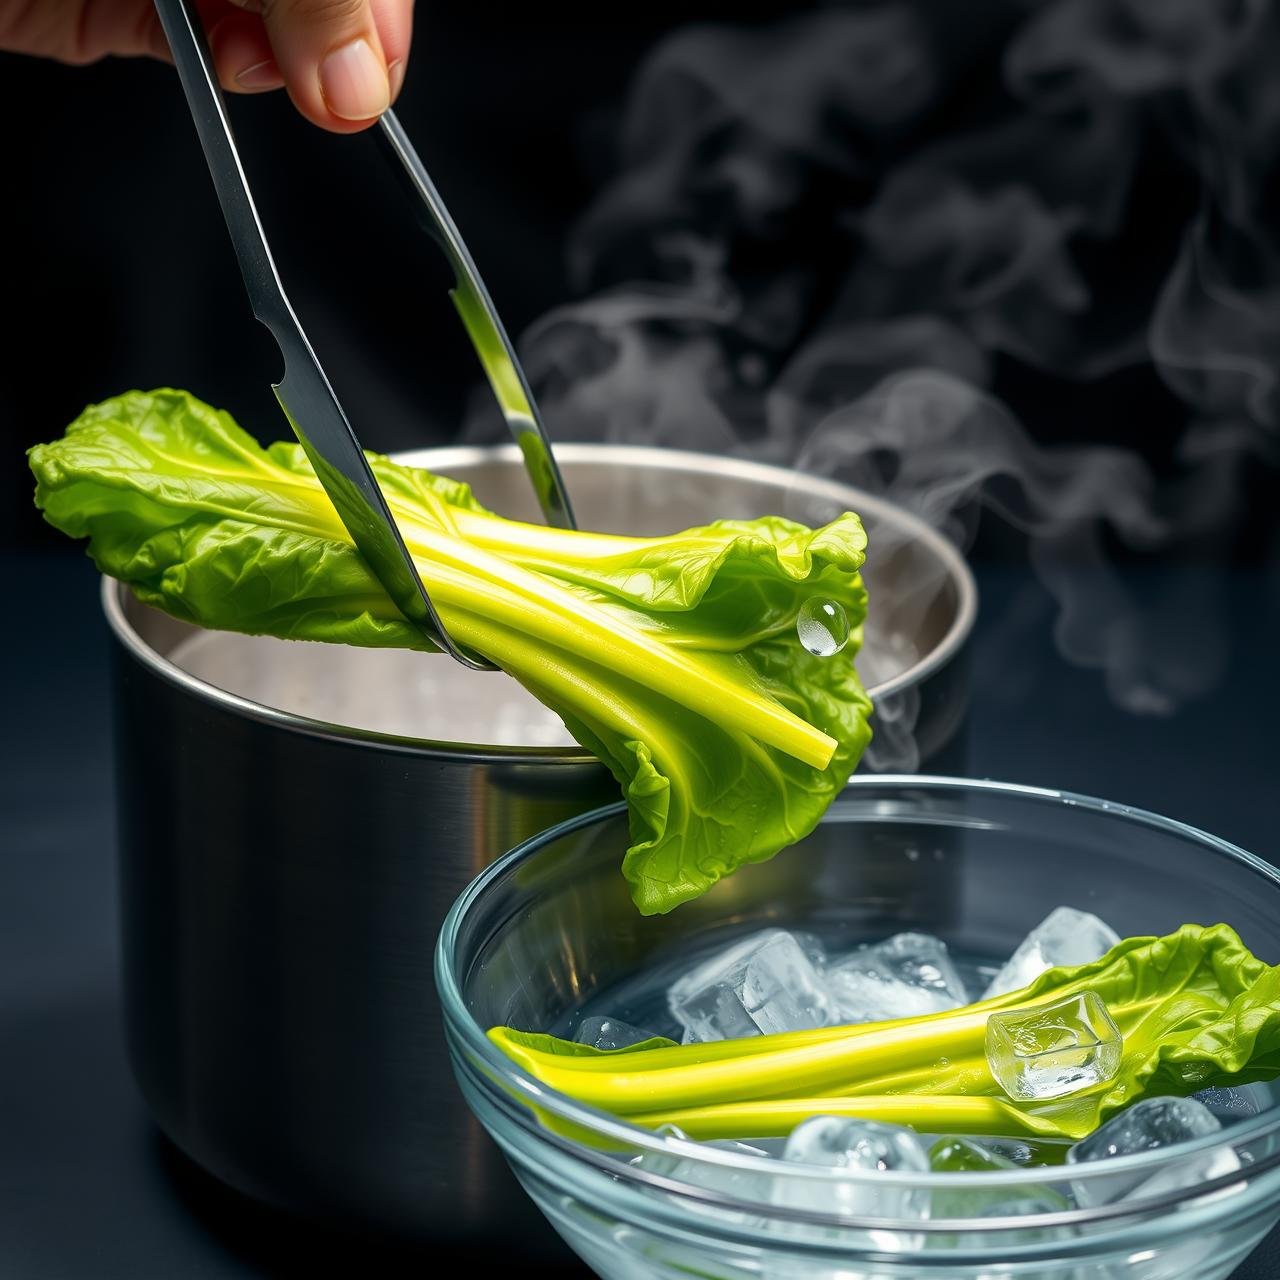
This is the most critical step in creating a wrap that is both pliable and strong. Don’t be intimidated; it’s a simple technique that yields transformative results. Blanching quickly cooks the leaves to make them tender, enhances their brilliant green color, and makes them easier to digest.
-
Prepare the Station:
Bring a large pot of water to a rolling boil. While it heats, prepare a large bowl of ice water (an ice bath). This is for ‘shocking’ the leaves to halt the cooking process instantly.
-
Wash and Trim:
Thoroughly wash your collard leaves under cool running water. Lay each leaf flat on your cutting board. Using a sharp paring knife, carefully shave down the thickest part of the stem on the back of the leaf. You want to make it flush with the rest of the leaf without cutting all the way through. This removes the tough, fibrous spine and creates a flat surface for rolling.
-
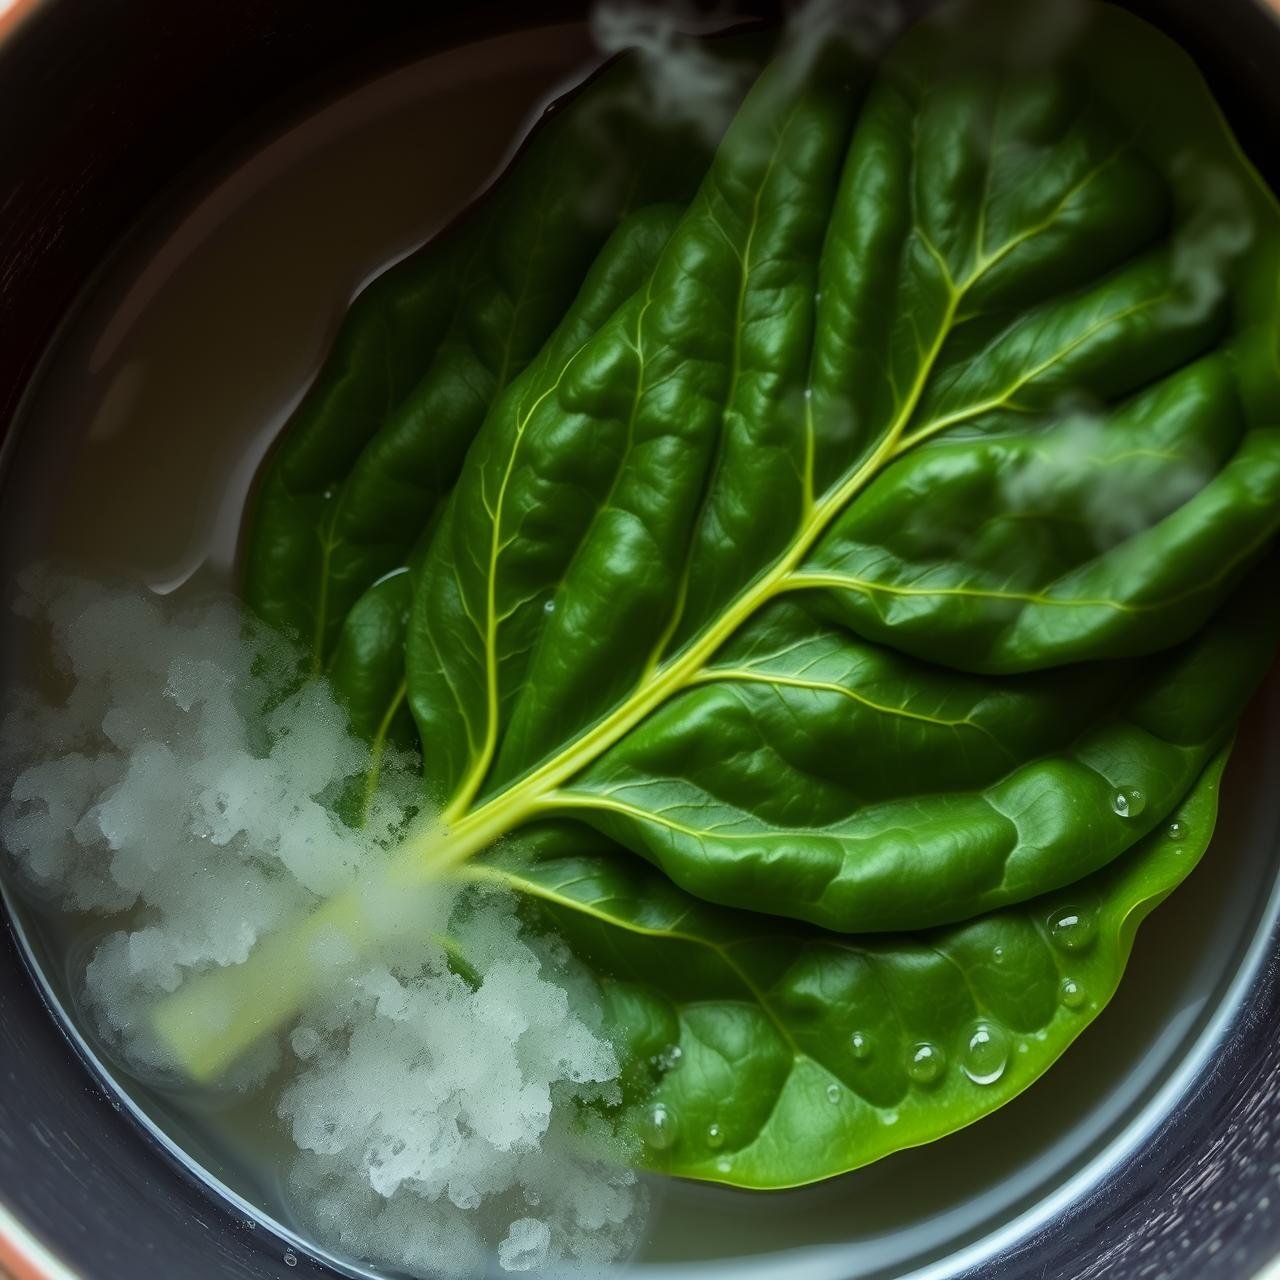
The Blanch:
Using tongs, gently place one or two leaves into the boiling water. Do not overcrowd the pot. Let them cook for just 30-60 seconds. You’ll see them turn a brilliant, jewel-toned green. Any longer, and they risk becoming too soft.
-
The Shock:
Immediately remove the leaves from the boiling water with your tongs, allowing excess water to drip off, and plunge them directly into the ice bath. Let them sit in the cold water for about 30 seconds until completely cooled.
-
Dry Thoroughly:
Remove the leaves from the ice bath and lay them flat on a clean kitchen towel or a layer of paper towels. Gently pat them completely dry on both sides. This step is crucial; a wet leaf will lead to a soggy wrap. Repeat this process for all your leaves.
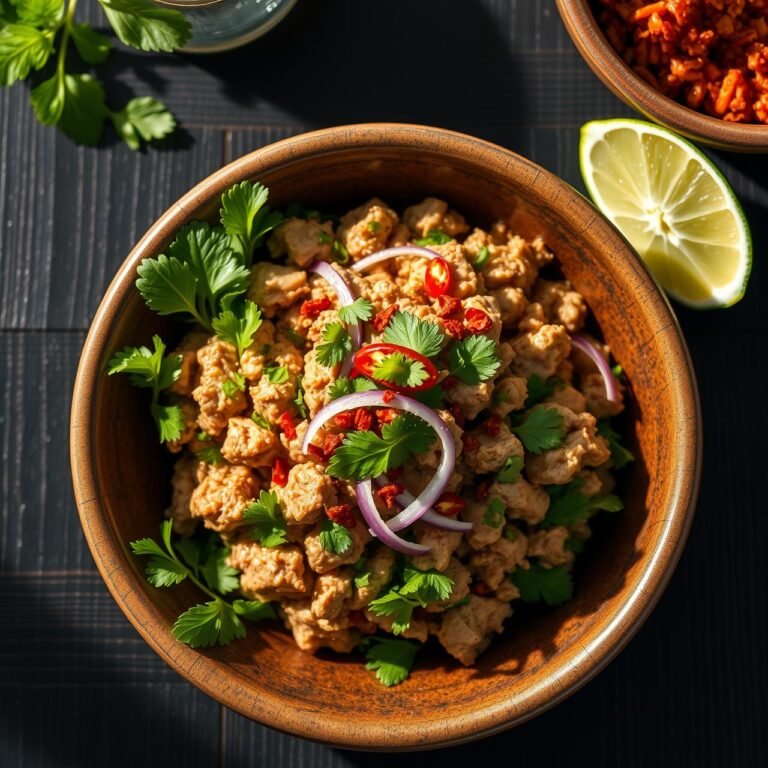
Crafting the Hearty & Flavorful Filling
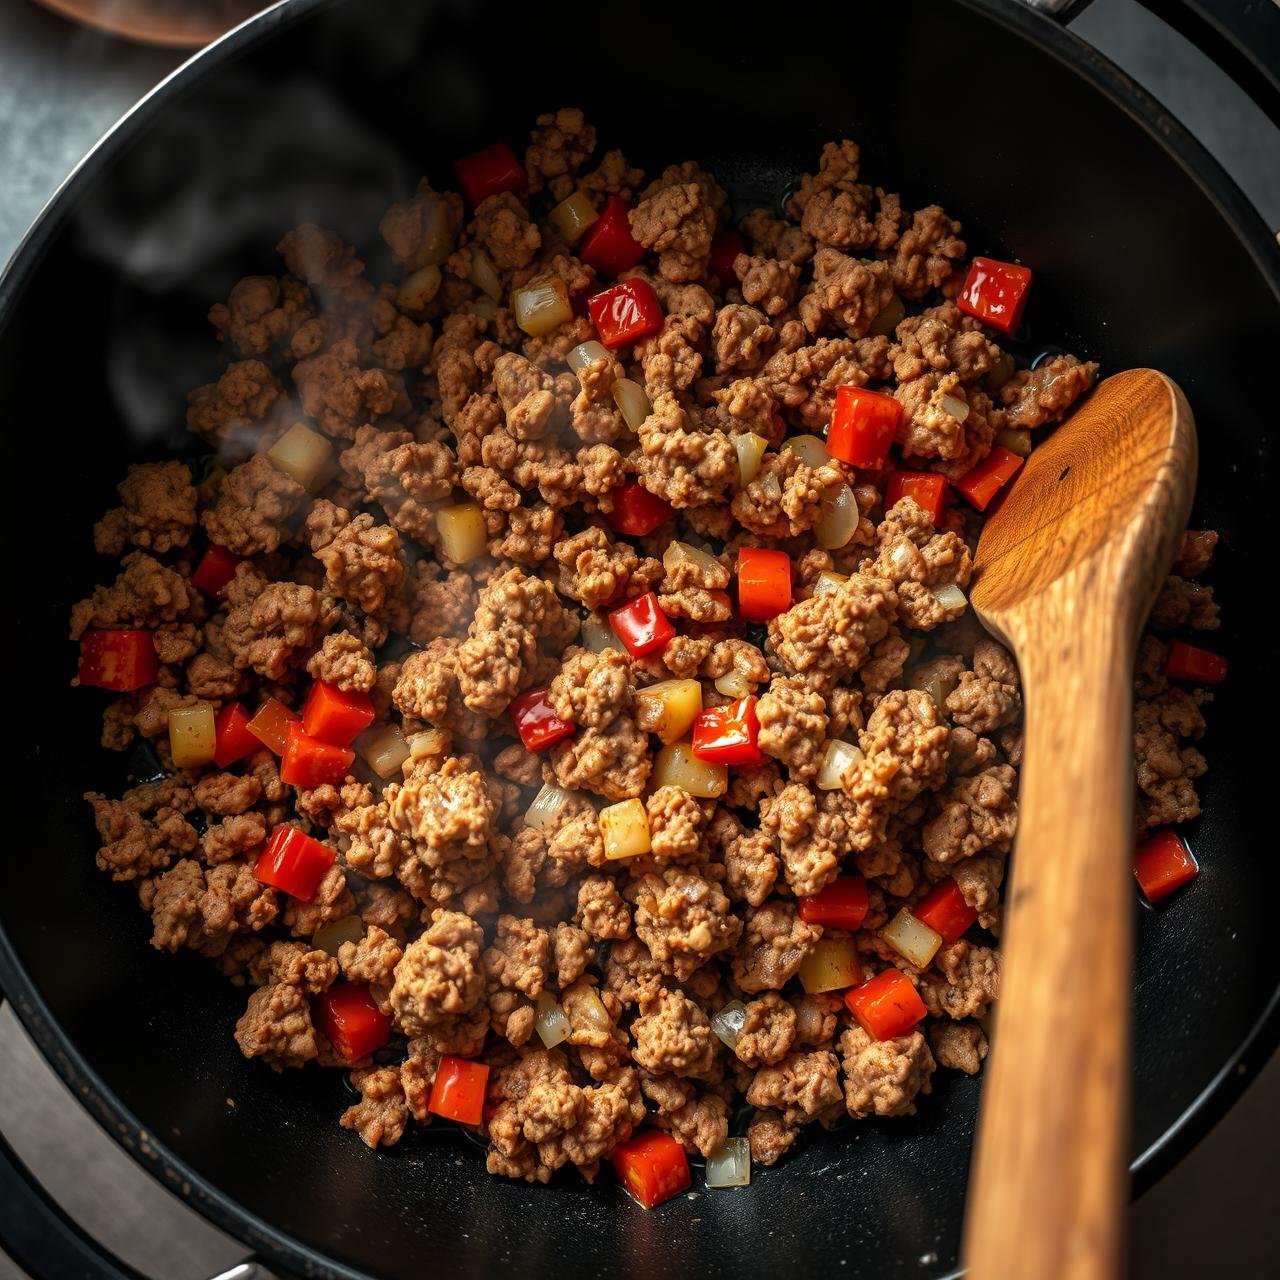
With your leaves prepped and ready, it’s time to create the delicious heart of our wraps. This filling is designed for a perfect balance of savory, sweet, and umami notes, with a satisfying texture from the quinoa and vegetables.
-
Sauté the Aromatics:
Heat the avocado oil in a large skillet over medium-high heat. Add the diced yellow onion and cook until softened and translucent, about 4-5 minutes. Add the minced garlic and ground ginger and cook for another minute until fragrant.
-
Brown the Turkey:
Add the ground turkey to the skillet. Use a wooden spoon to break it up into crumbles. Cook until it’s browned all over and cooked through, about 7-8 minutes. Drain off any excess fat if necessary.
-
Incorporate the Vegetables:
Stir in the diced red bell pepper and shredded carrots. Cook for another 3-4 minutes, until the pepper is slightly tender but still has a bit of a crunch.
-
Build the Sauce:
In a small bowl, whisk together the chicken broth, tamari (or soy sauce), rice vinegar, and toasted sesame oil. Pour this sauce mixture into the skillet with the turkey and vegetables. Stir everything to combine and let it simmer for 2-3 minutes, allowing the flavors to meld and the sauce to slightly reduce.
-
Final Touches:
Remove the skillet from the heat. Fold in the cooked quinoa and the freshly chopped cilantro. Season with salt and black pepper to your liking. Give it one final stir to ensure everything is well combined. Allow the filling to cool slightly before assembling the wraps.
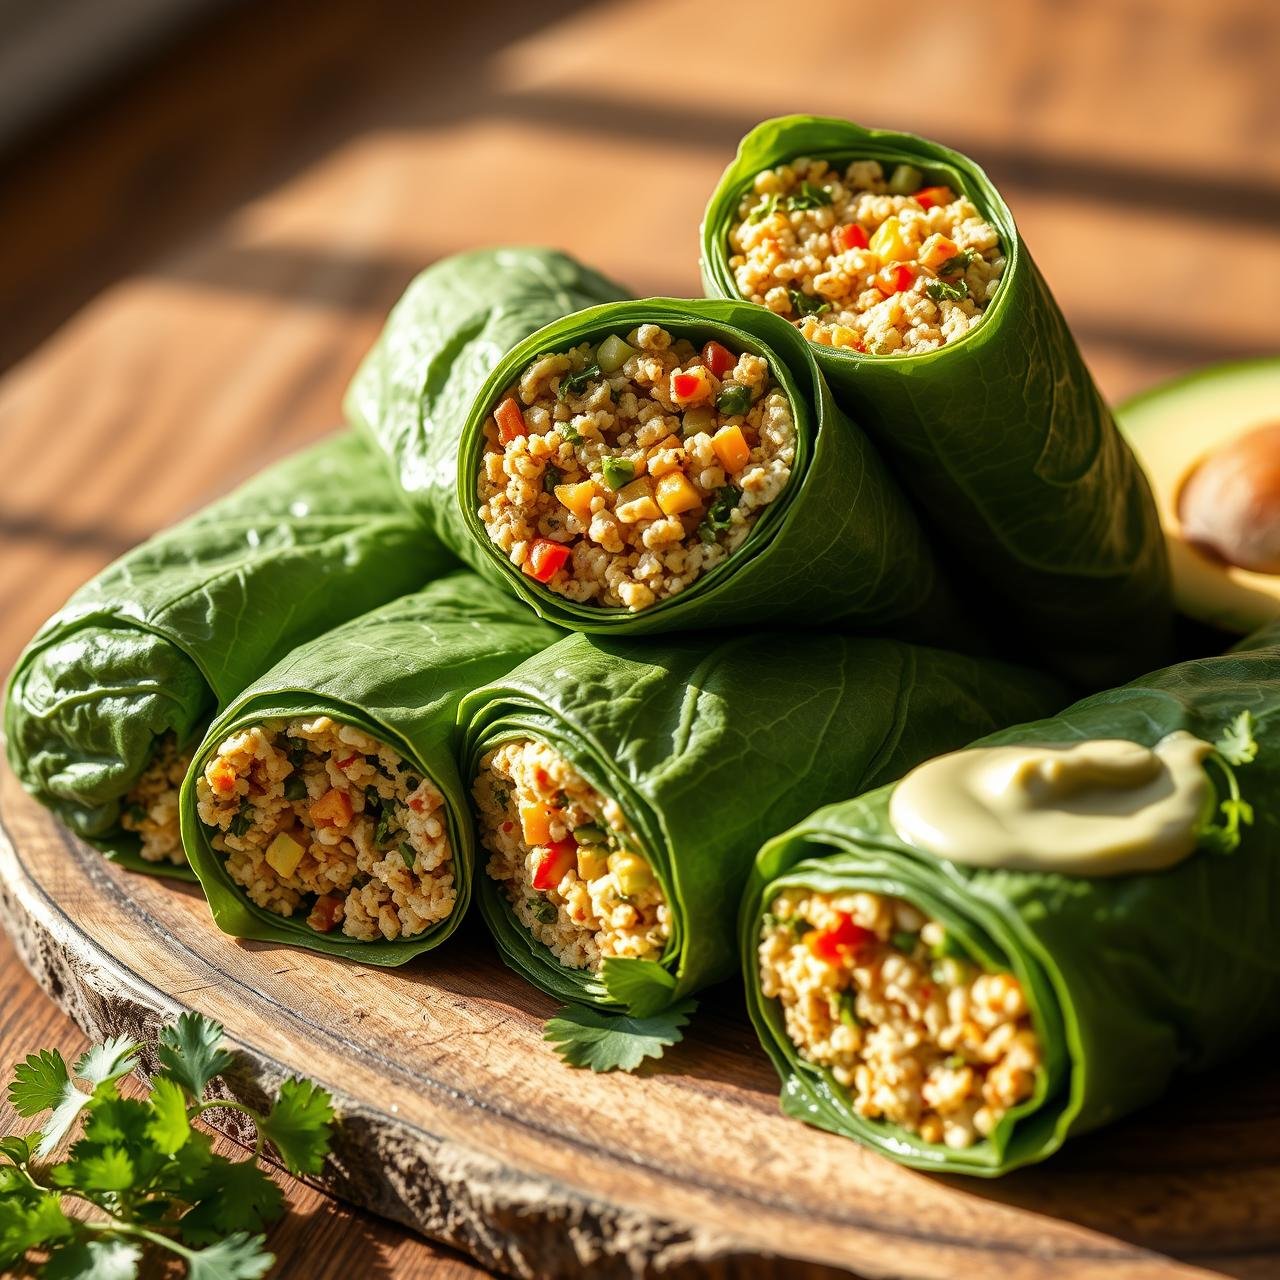
The Art of the Roll: Assembling Your Collard Green Wraps
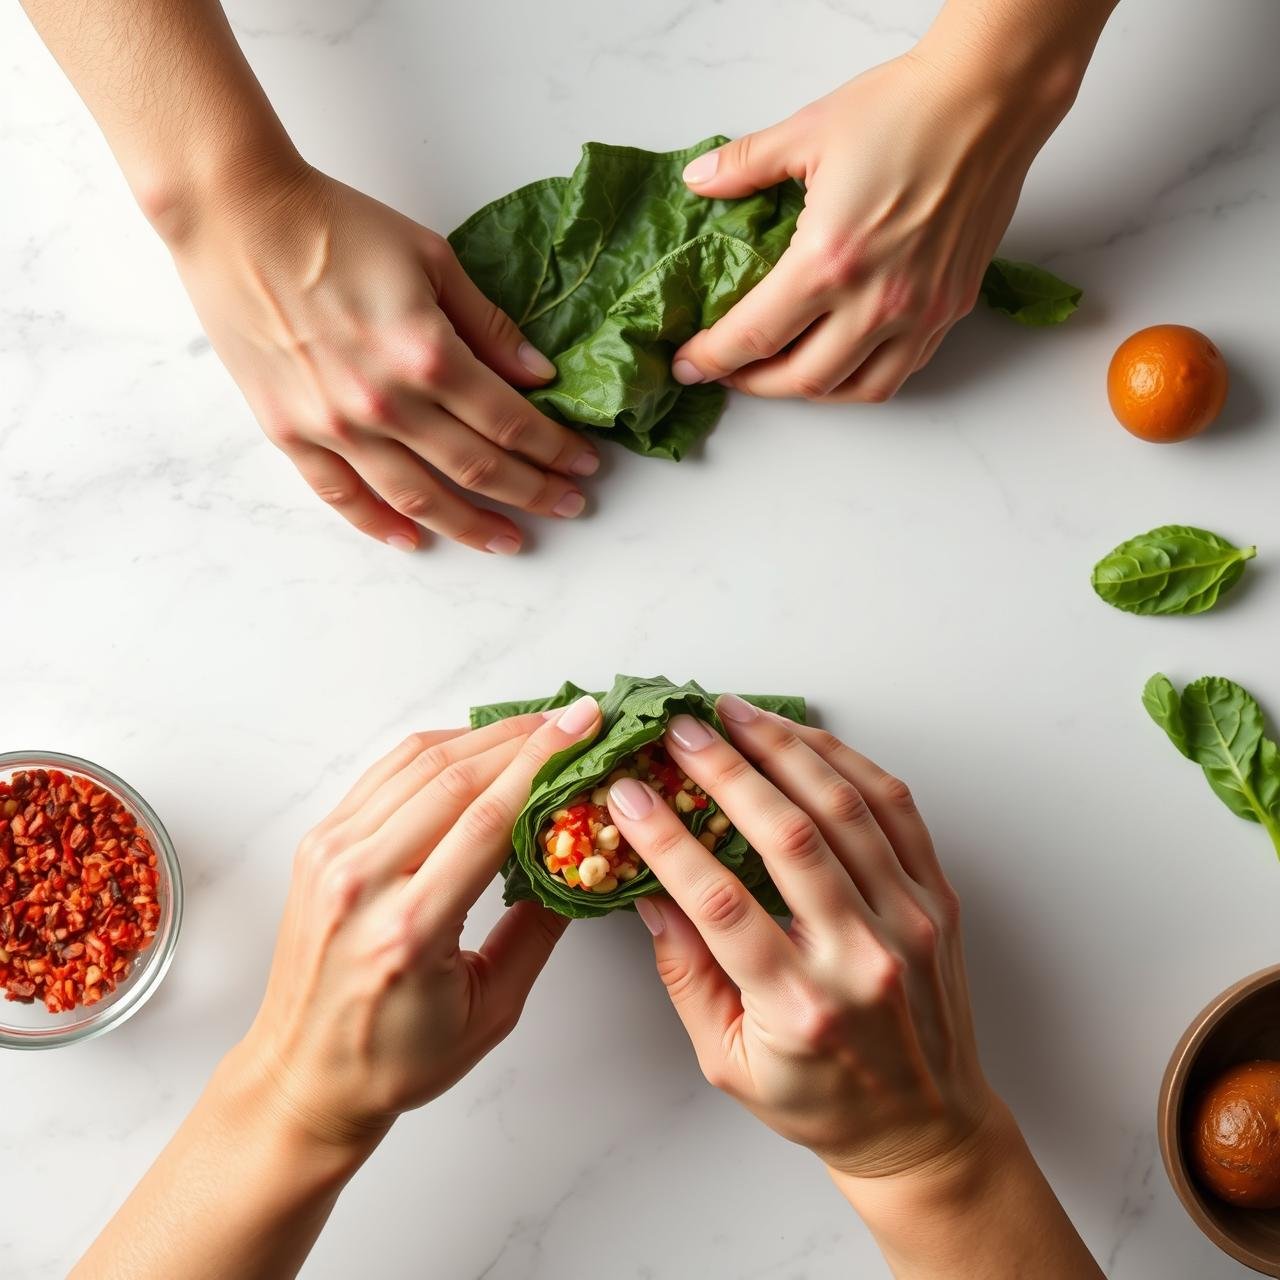
This is where your preparation comes together. Think of it like rolling a burrito, but with a fresh, vibrant, and much healthier wrapper. Work with one wrap at a time for the best results.
-
Lay the Foundation:
Place one prepared, dry collard leaf on your work surface with the shaved-down stem side facing up. The top of the leaf should be pointing away from you.
-
Portion the Filling:
Spoon about 1/2 to 3/4 cup of the turkey and quinoa filling onto the center of the leaf, shaping it into a horizontal log. Be careful not to overfill, especially on your first try. Leave a generous border of about 2 inches on all sides.
-
The First Fold:
Fold the bottom edge of the collard leaf (the part closest to you) up and over the filling, tucking it in snugly.
-
Fold the Sides:
Just like a burrito, fold the left and right sides of the leaf in towards the center, over the filling.
-
The Final Roll:
Continue to roll the wrap away from you, keeping it tight and compact, until you have a neat, secure parcel. The natural moisture of the leaf should help it seal.
-
Serve or Store:
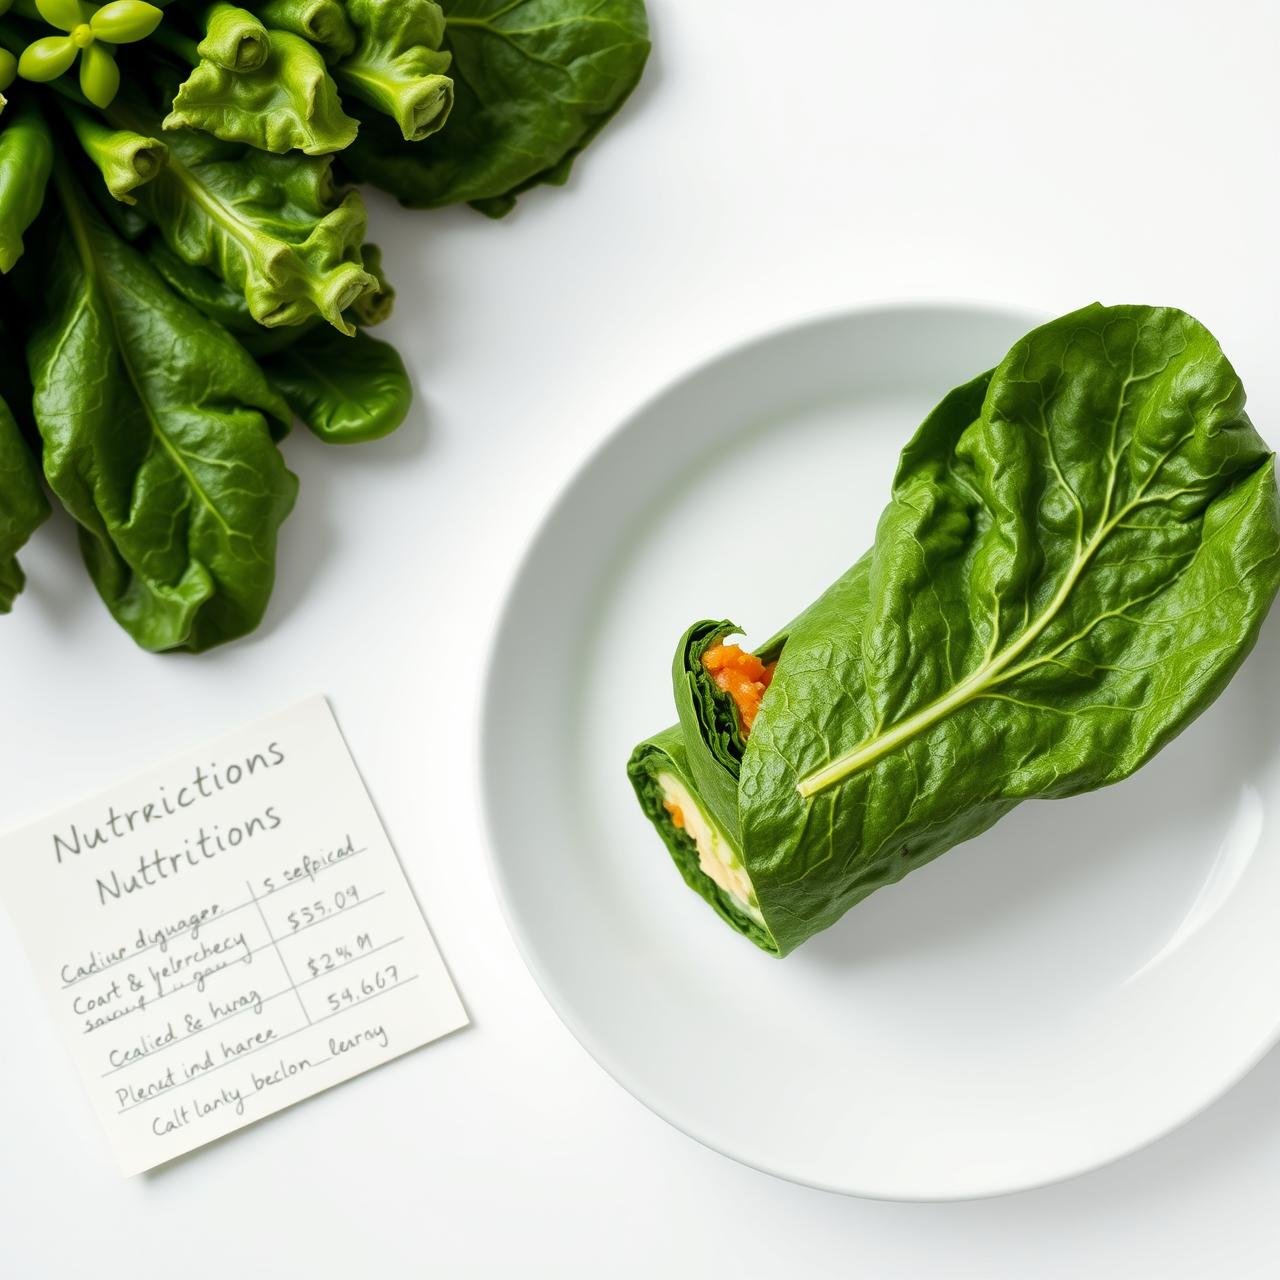
You can serve the wraps immediately, whole, or slice them in half on a diagonal to showcase the beautiful filling. Repeat the process with the remaining leaves and filling.
From the Chef’s Notebook: Tips for Wrap Perfection
Even the most detailed recipe can benefit from a few insider tips. Here are some secrets I’ve learned over the years to guarantee your collard green wraps are a stunning success every single time.
- Leaf Selection is Key: Look for the largest, freshest leaves you can find. They should be flexible and free of any tears or holes. The bigger the leaf, the easier it is to roll.
- Don’t Skip the Stem Shave: That thick central stem is the biggest obstacle to a good roll. Taking the extra minute to shave it down makes a world of difference in flexibility and eating experience.
- Dryness is Godliness: I cannot stress this enough—pat your leaves completely dry after the ice bath. Water is the enemy of a crisp wrap and can make your filling soggy.
- Cool Your Filling: Don’t try to assemble your wraps with a piping hot filling. It can wilt the leaf and make it tear. Let it cool to at least room temperature for the best results.
- Filling Variations: This is where you can get creative! Try a chickpea salad, a spicy black bean and corn mix, a curried chicken salad, or even classic tuna salad. The collard leaf is a neutral canvas.
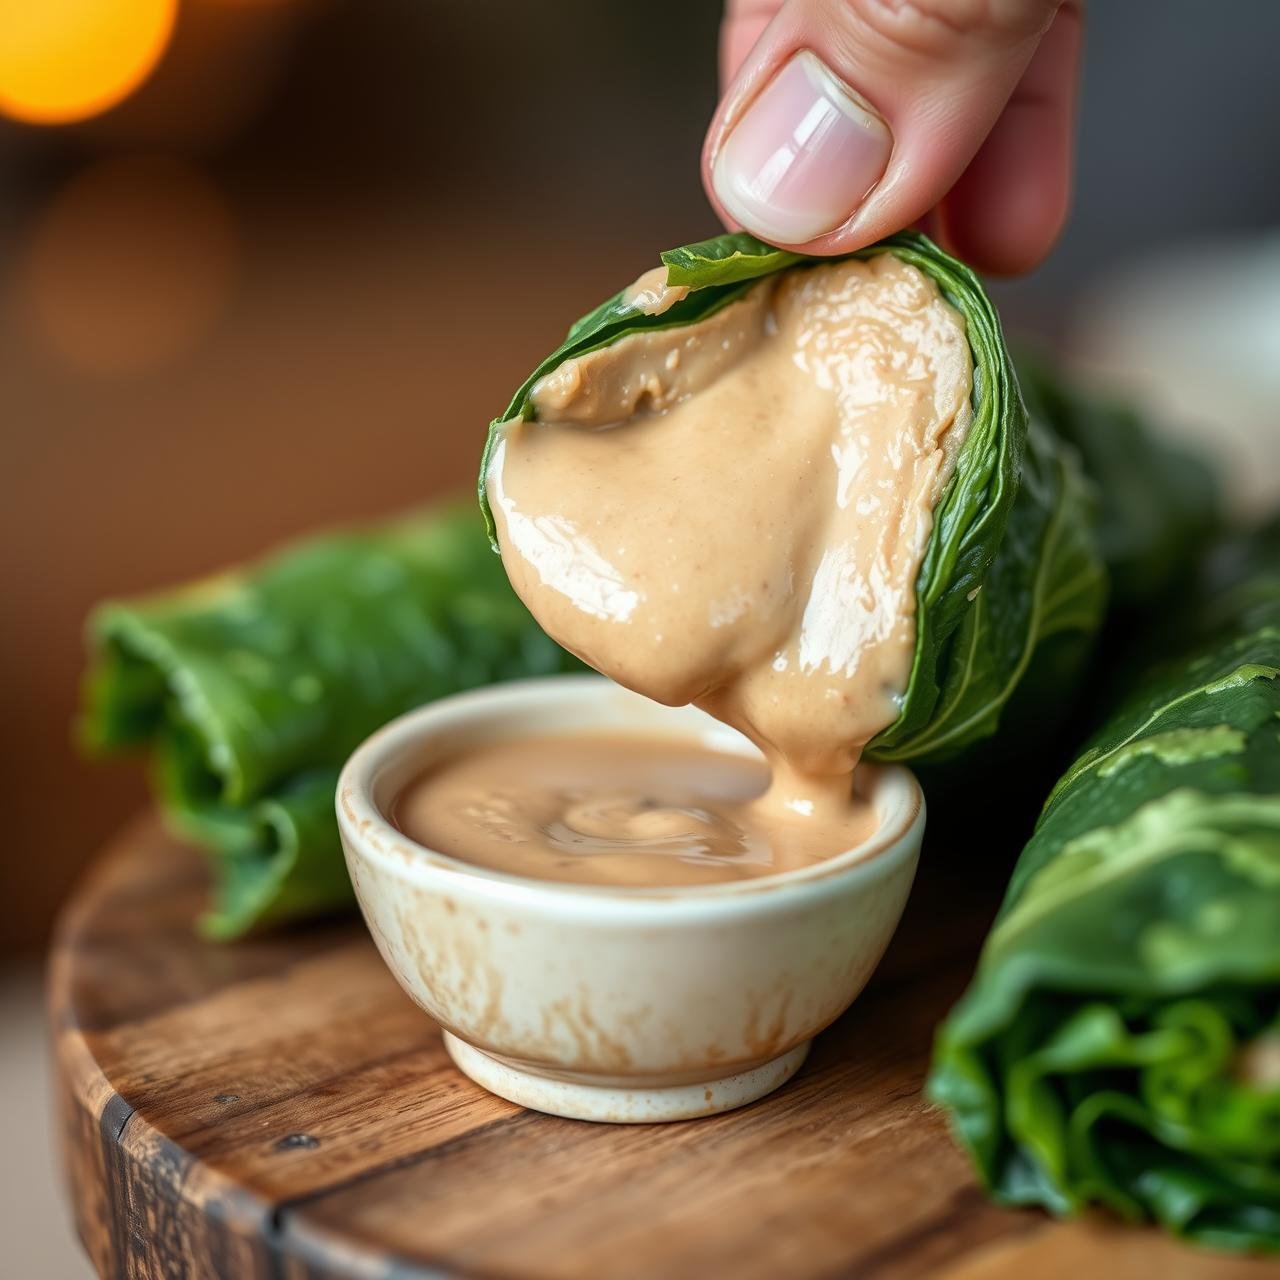
- Dipping Sauce Magic: A great dipping sauce elevates these wraps from a healthy meal to a gourmet experience. A simple peanut sauce (peanut butter, tamari, lime juice, a little water) or a creamy avocado-lime crema are fantastic options.
Nutritional Information (Per Wrap)
This is an approximate nutritional breakdown based on the recipe making 6 wraps. Actual values may vary based on specific ingredients used.
| Nutrient | Amount |
|---|---|
| Calories | ~250 kcal |
| Protein | ~25 g |
| Fat | ~12 g |
| Carbohydrates | ~10 g |
| Fiber | ~4 g |
| Sugar | ~4 g |
| Vitamin A | High |
| Vitamin C | High |
| Vitamin K | Very High |
| Iron | Good Source |
Savor Now, Save for Later: Storage Solutions
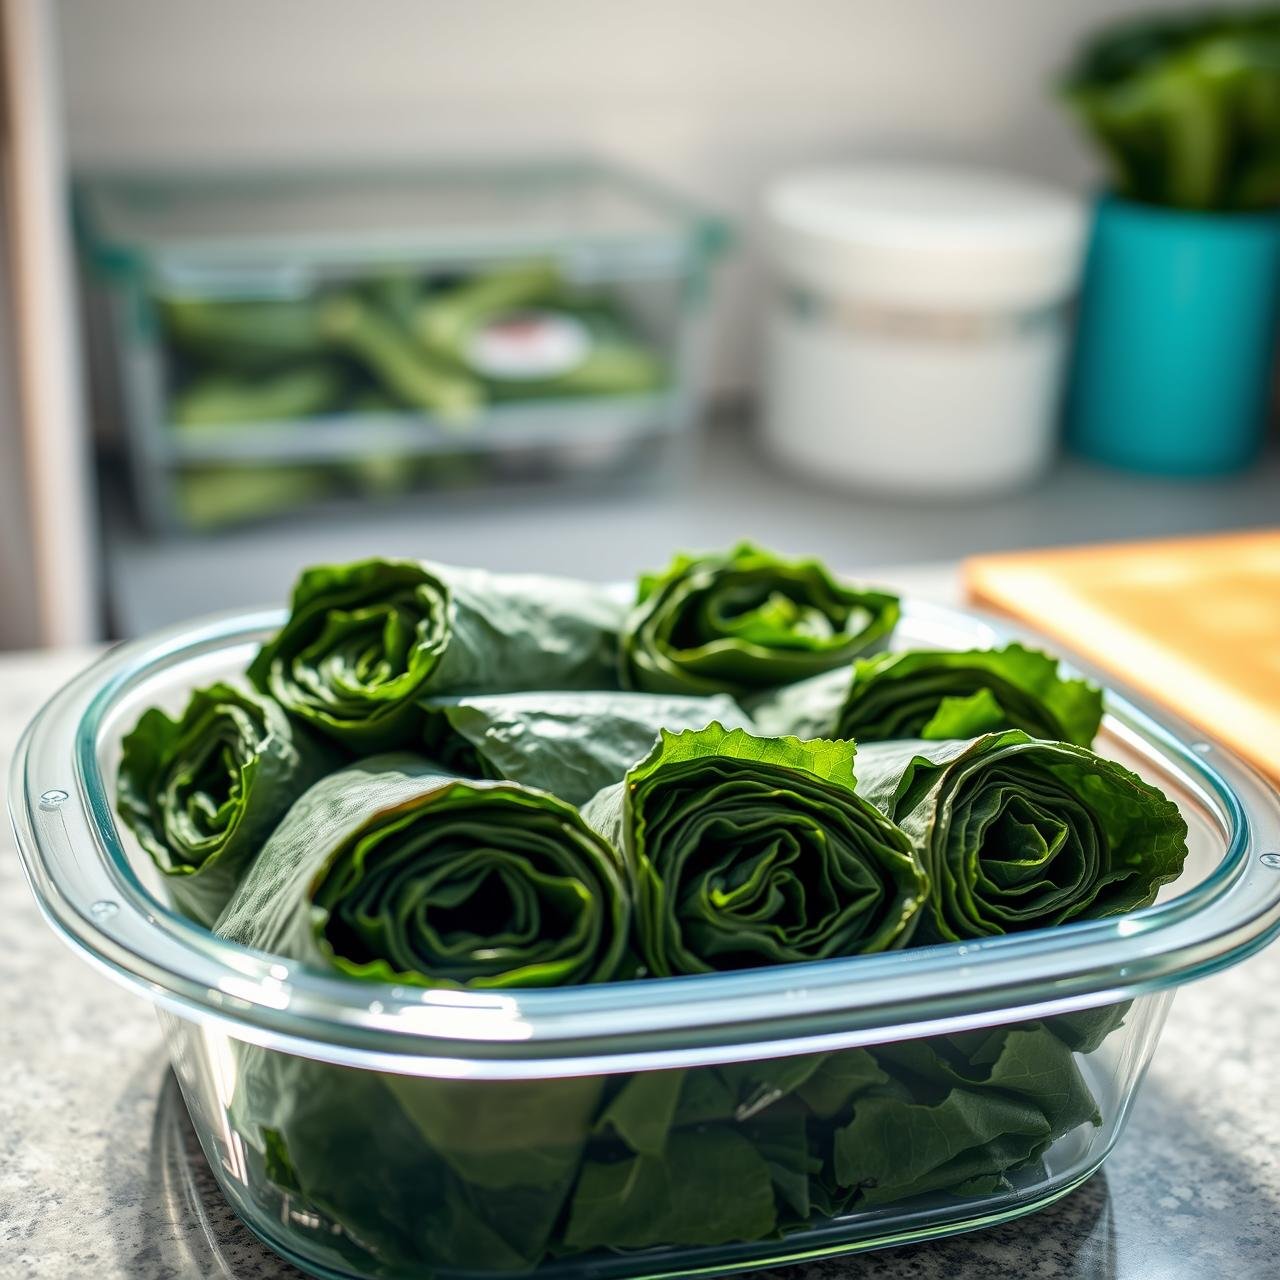
One of the best things about these wraps is their incredible durability, making them ideal for meal prep. To store them, wrap each individual collard wrap tightly in plastic wrap or beeswax wrap. This prevents them from drying out and helps them maintain their shape. Place the wrapped rolls in an airtight container in the refrigerator.
They will stay fresh and delicious for up to 3-4 days. The collard leaf holds up remarkably well and, unlike bread or tortillas, will not become soggy. They are a perfect grab-and-go lunch for busy weekdays. I do not recommend freezing the assembled wraps, as the texture of the collard leaf can change upon thawing.
Conclusion
Embracing the collard green wrap is more than just trying a new recipe—it’s about adopting a fresh perspective on what a meal can be. It’s about finding joy in simple, whole ingredients and discovering how incredibly satisfying clean eating can be. You’ve now learned the chef’s techniques for transforming a humble leaf into a sturdy, delicious, and versatile vessel for your favorite fillings. Whether you’re a seasoned health enthusiast or just beginning your journey into healthier cooking, these wraps are a delicious step in the right direction. So go ahead, ditch the tortilla, and wrap your world in green. We promise you’ll be delighted by the crunch, the flavor, and the vibrant energy you feel after enjoying a meal that is as good for you as it is to eat.