Leaner Than Beef: Juicy Bison Burger Lettuce Wraps (No Fluff)
Tired of the post-burger slump? That heavy, over-stuffed feeling that often follows a classic beef burger and bun? We’ve all been there. But what if you could capture all the savory, juicy satisfaction of a gourmet burger in a package that’s lean, clean, and energizing? Enter the Bison Burger Lettuce Wrap. This isn’t just a healthier alternative; it’s an upgrade. We’re trading greasy, calorie-dense beef for richly flavored, nutrient-dense bison. We’re swapping the empty carbs of a doughy bun for the crisp, refreshing crunch of cool butter lettuce. The result is a perfectly balanced, deeply flavorful meal that satisfies your cravings and fuels your body. This recipe is all about pure, unadulterated flavor and wholesome ingredients—no fluff, no fillers, just a straightforward guide to crafting the most succulent, memorable burger you’ve ever made at home.
Why Bison is Your New Burger Best Friend
The Superior Choice for Flavor and Health
For too long, beef has dominated the burger world. It’s time to explore a protein that’s native to our lands and superior in many ways: bison. If you’ve never tried it, you’re in for a revelation. Bison has a slightly sweeter, richer flavor than beef, without any of the gaminess you might expect. It’s a clean, robust taste that stands up beautifully to bold seasonings.
But the real magic lies in its nutritional profile. Bison is a powerhouse of lean protein, iron, and vitamin B12. It’s naturally leaner than beef, with significantly less fat and fewer calories per serving. This means you get more pure, muscle-building protein in every bite. Because it’s so lean, the key to a perfect bison burger is technique—which we’ll masterfully cover. Let’s look at a direct comparison:
| Nutrient (per 4oz serving, cooked) | Ground Bison (90/10) | Ground Beef (90/10) |
|---|---|---|
| Calories | ~195 kcal | ~215 kcal |
| Protein | ~24 g | ~22 g |
| Total Fat | ~10 g | ~13 g |
| Saturated Fat | ~4 g | ~5 g |
| Iron | High | Moderate |
| Flavor Profile | Rich, slightly sweet, clean | Familiar, savory, can be greasy |
Furthermore, bison are often raised more sustainably. They typically graze on open pastures, which is better for the environment and results in healthier meat. By choosing bison, you’re not just making a better choice for your body; you’re often supporting more responsible ranching practices. It’s a win-win that tastes absolutely incredible.
Essential Equipment for Flawless Bison Burgers
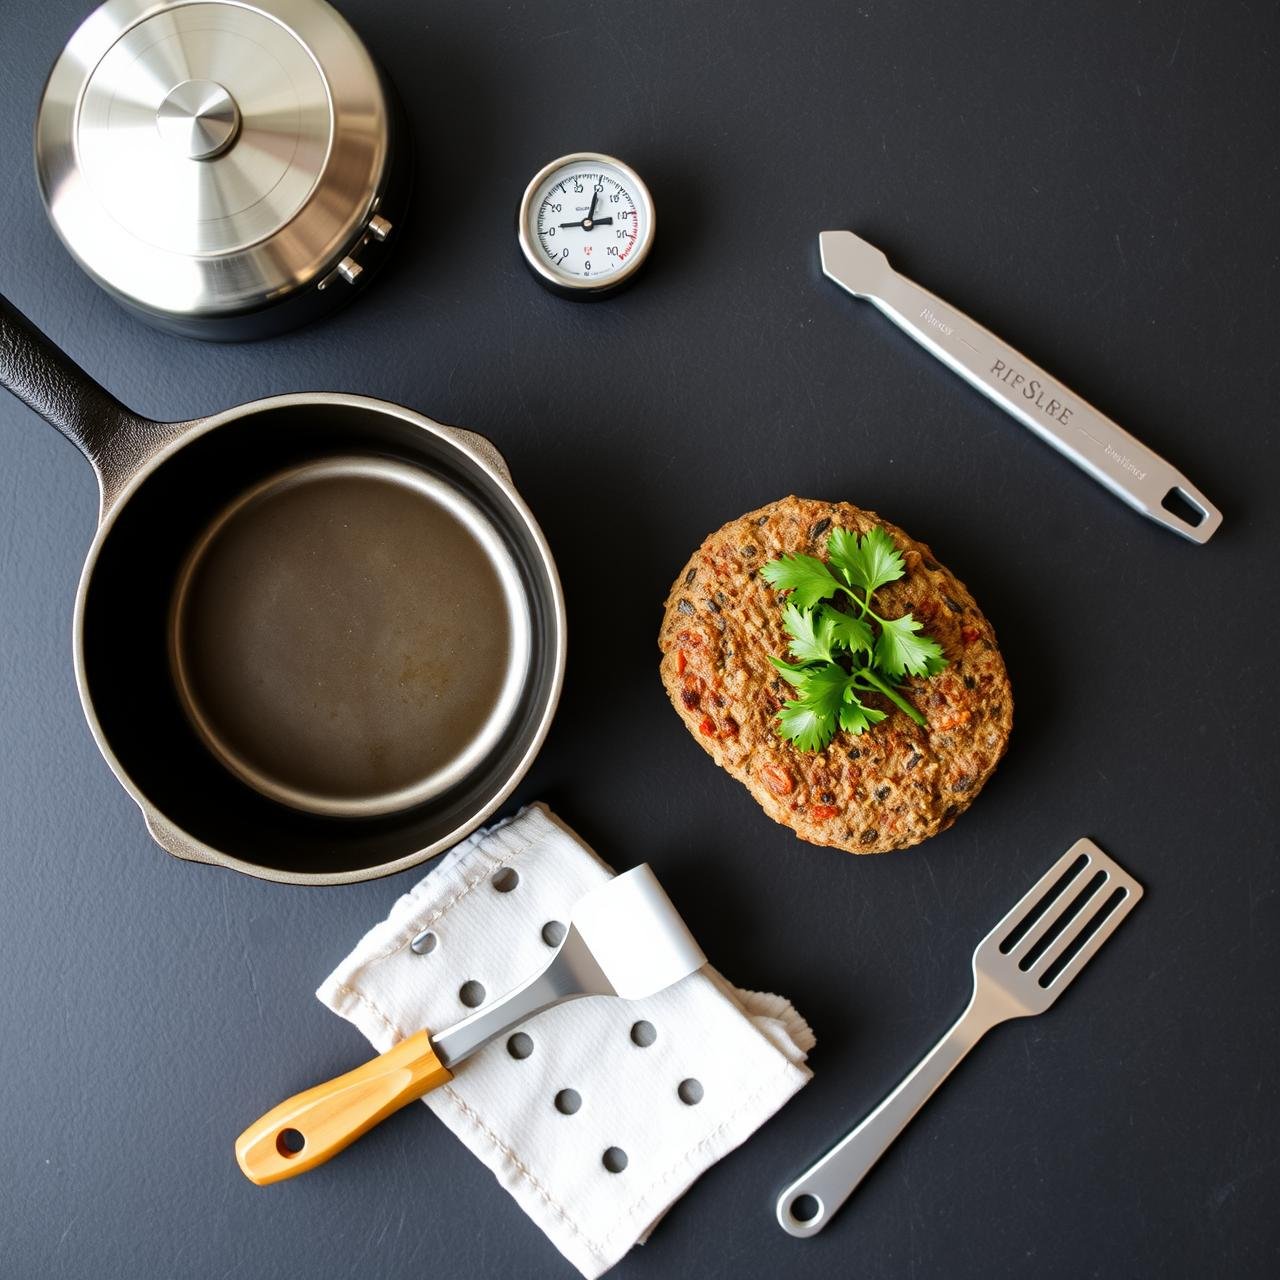
You don’t need a professional kitchen to achieve burger perfection. The right tools, however, make the process smoother and yield better results. Here’s the simple arsenal you’ll need to create these rustic, homestyle patties.
| Tool | Chef’s Note |
|---|---|
| Large Mixing Bowl | Provides ample space to gently combine ingredients without overworking the meat. |
| Cast-Iron Skillet (or Grill) | A heavy-bottomed skillet is non-negotiable for achieving that perfect, deeply caramelized crust (the Maillard reaction). A grill works beautifully for a smoky flavor. |
| Digital Meat Thermometer | The single most important tool for cooking lean protein. It’s the only way to guarantee a juicy, perfectly cooked interior without guesswork. |
| Wide Spatula | Essential for flipping the burgers without breaking them apart. |
| Measuring Spoons & Cups | For accurate seasoning. Consistency is key to a repeatable, delicious recipe. |
Anatomy of the Perfect Bison Wrap: Ingredients
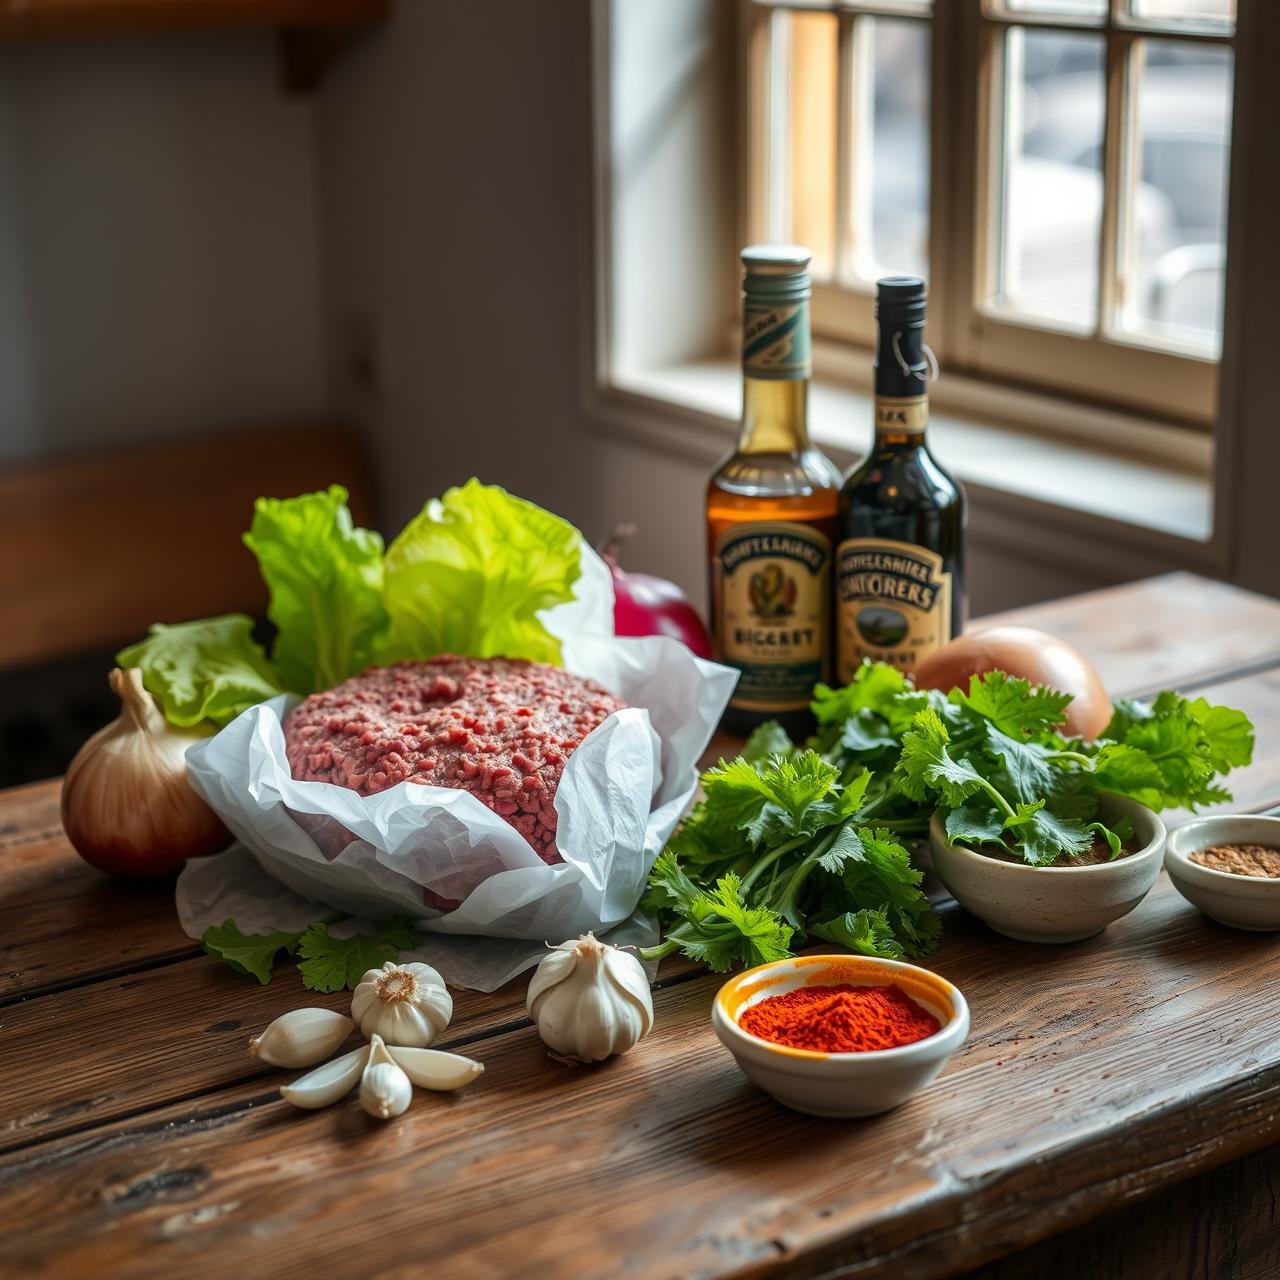
The beauty of this recipe lies in its simplicity and the quality of its components. We’re using a few key ingredients to enhance the natural, rich flavor of the bison, not to mask it.
For the Bison Patties:
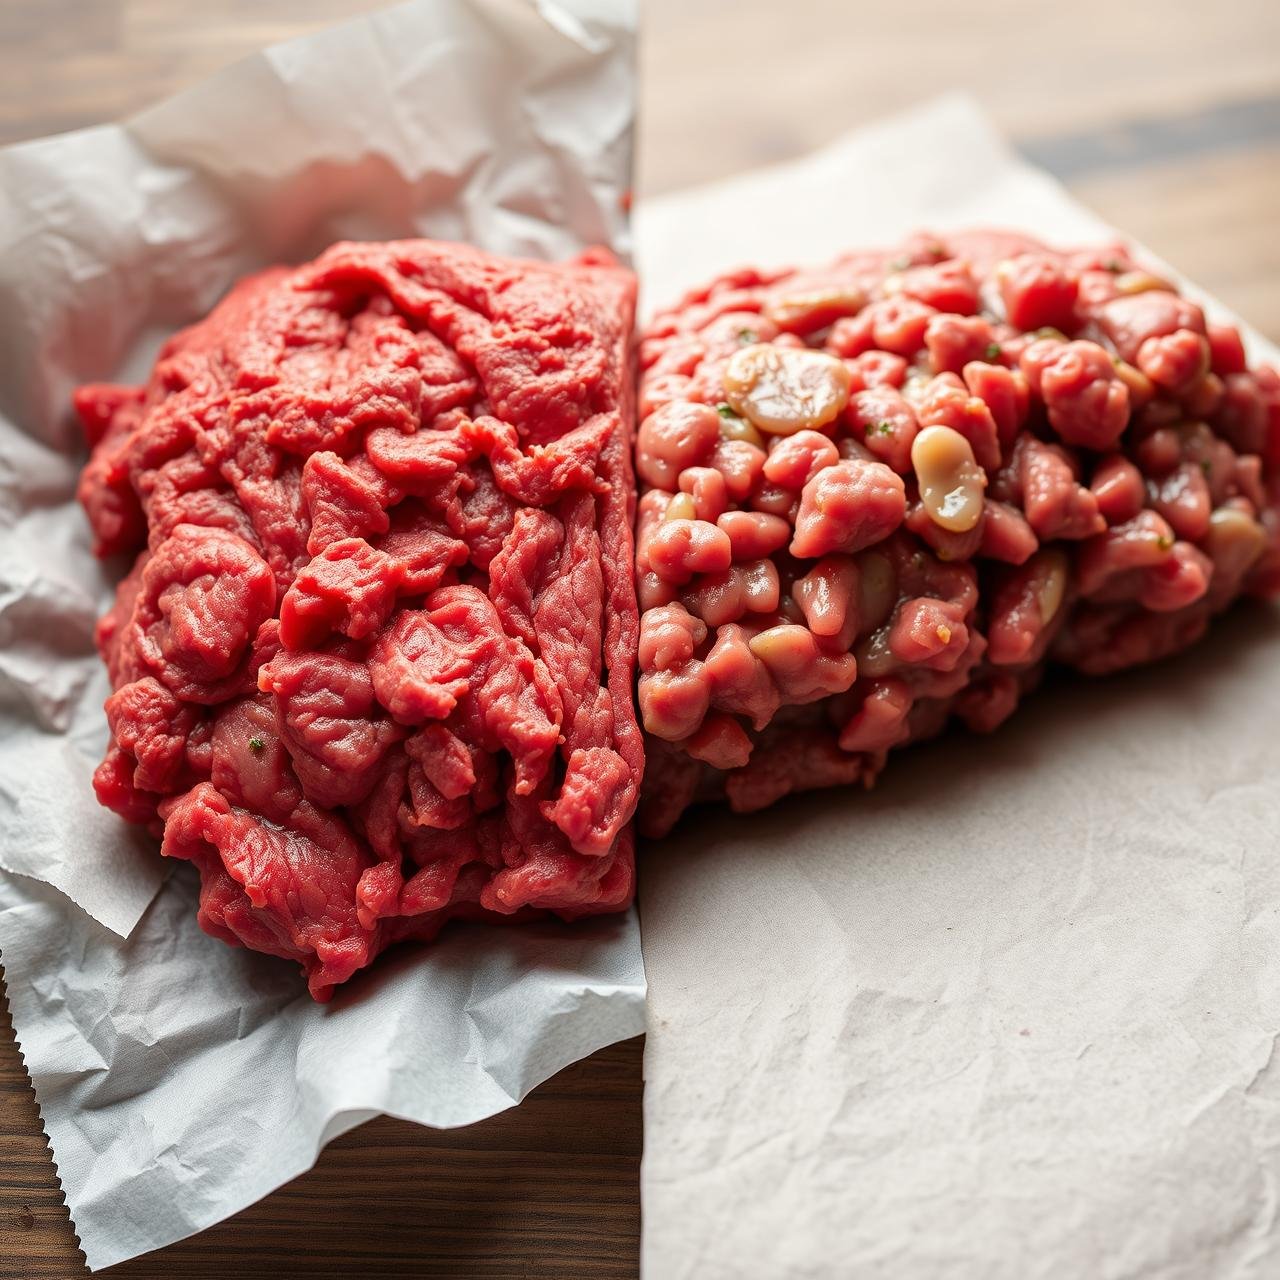
- 1 lb ground bison, preferably 90/10 lean
- 1/4 cup finely minced yellow onion
- 2 cloves garlic, minced to a paste
- 1 tbsp Worcestershire sauce (for a deep umami kick)
- 1 tsp smoked paprika
- 1/2 tsp onion powder
- 1/2 tsp fine sea salt
- 1/2 tsp freshly cracked black pepper
- 1 tbsp avocado oil or ghee, for cooking
For Assembly & Toppings:
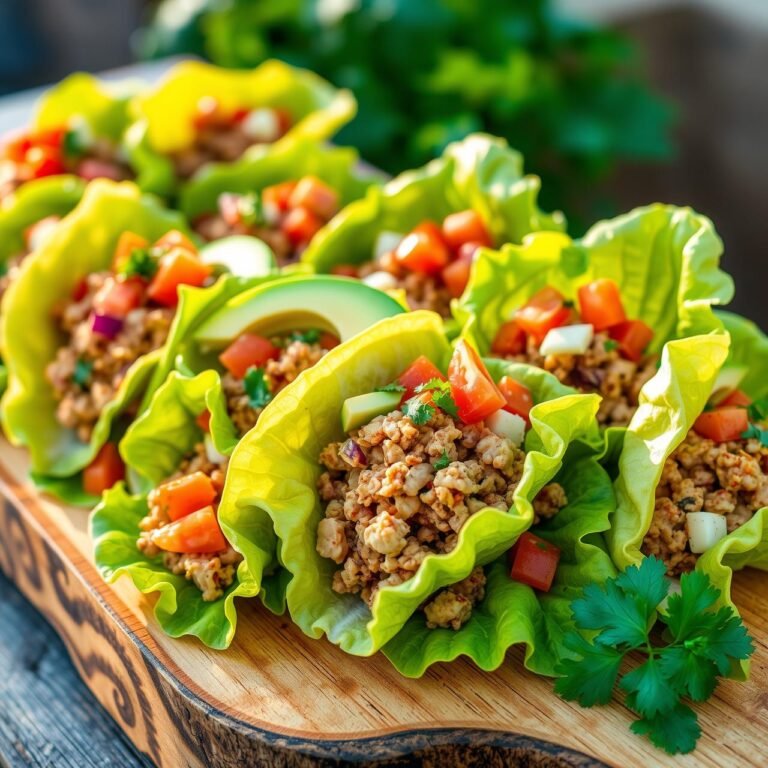
- 1 head of butter lettuce or iceberg lettuce, leaves separated, washed, and dried
- 1 large ripe tomato, sliced
- 1/2 red onion, thinly sliced
- 1 avocado, sliced or mashed
- Optional: Pickles, mustard (Dijon or stone-ground), or a simple homemade aioli.
Mastering the Method: Step-by-Step Instructions
Follow these steps closely to ensure your bison burgers are juicy and flavorful, never dry or tough. The key is a gentle hand and precise cooking.
-
Prepare the Lettuce Cups
First, prepare your ‘buns’. Carefully separate the leaves from the head of lettuce, wash them under cold water, and pat them thoroughly dry with a clean kitchen towel or use a salad spinner. You want them crisp and dry. Set them aside in the refrigerator to stay chilled.
-
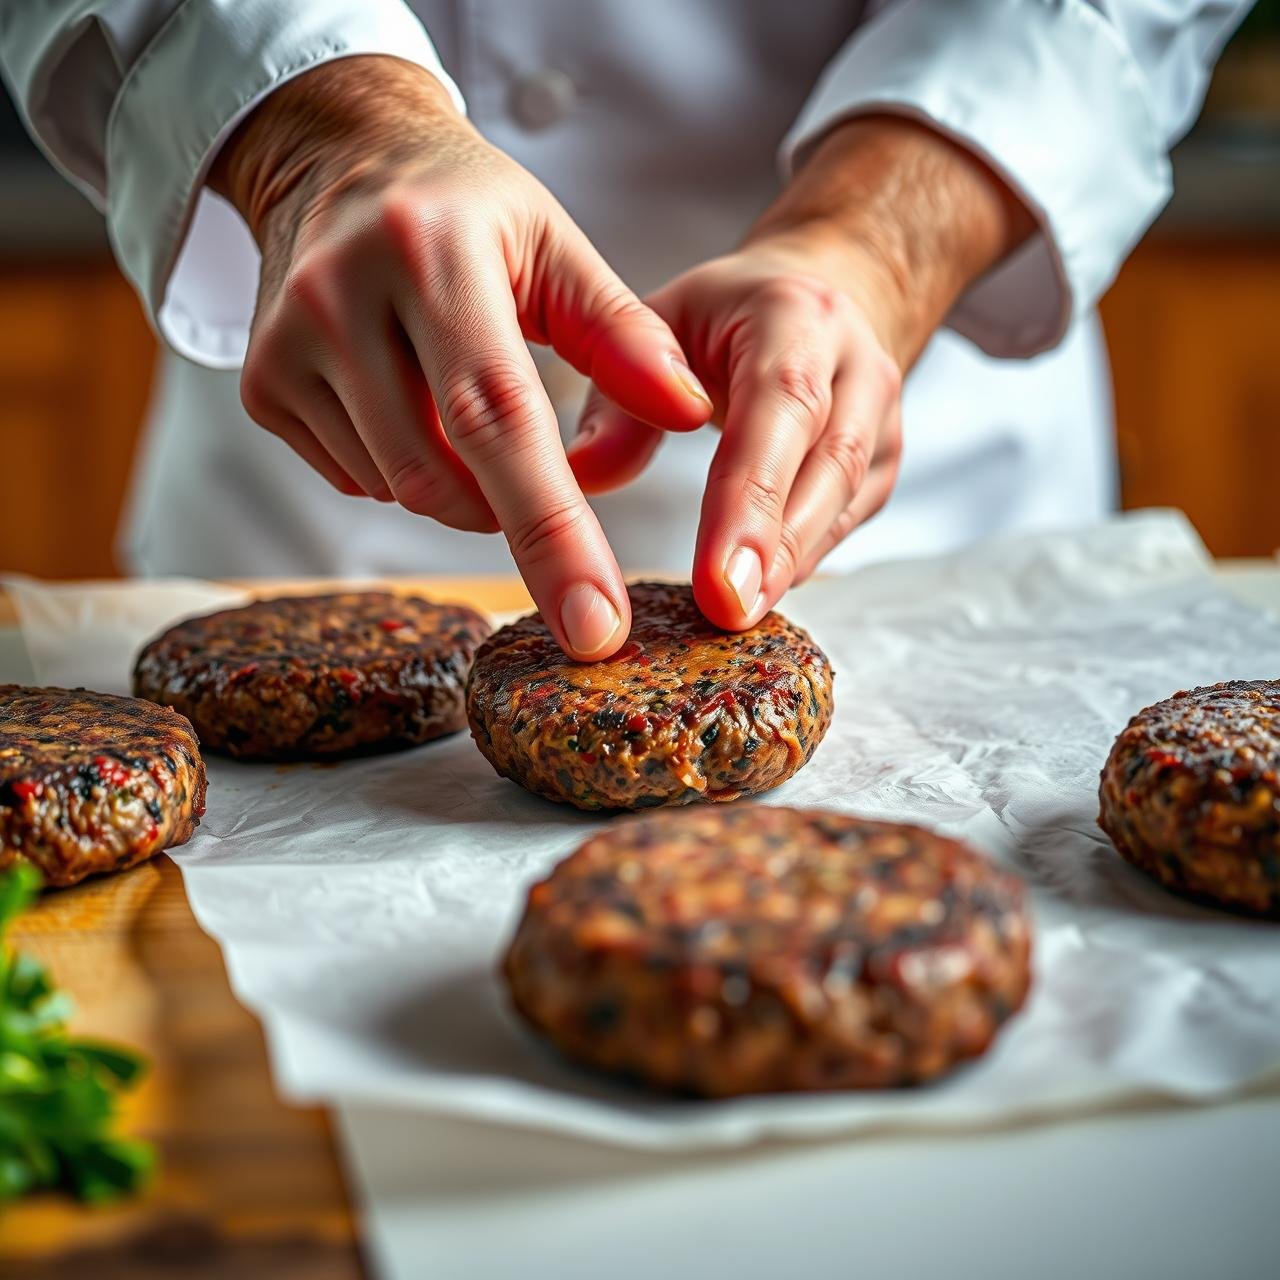
Combine the Burger Mixture
In a large mixing bowl, add the ground bison. On top of the meat, add the minced onion, garlic paste, Worcestershire sauce, smoked paprika, onion powder, salt, and pepper. Using your hands, gently mix the ingredients until they are just combined. Crucial Tip: Do not overmix! Overworking the lean meat will result in tough, dense burgers. Mix only until the seasonings are evenly distributed.
-
Form the Patties
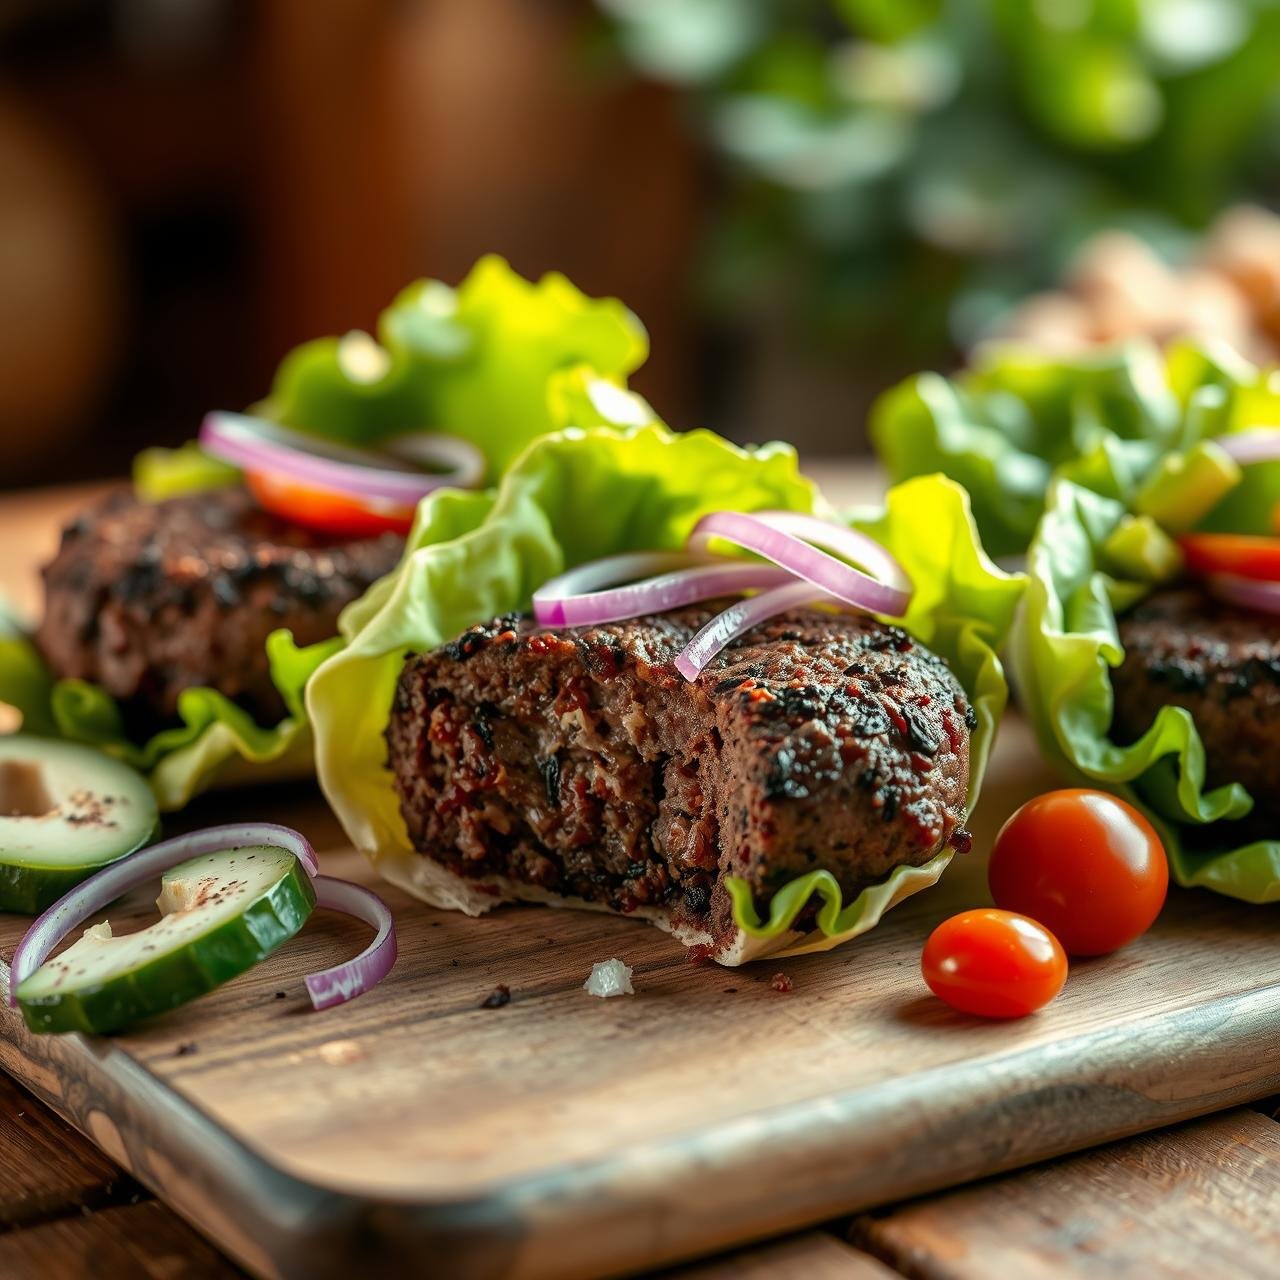
Divide the mixture into four equal portions (about 4 oz each). Gently roll each portion into a ball and then flatten it into a patty about 3/4-inch thick. Make them slightly wider than you think you’ll need, as they will shrink during cooking. Press a small, shallow indent into the center of each patty with your thumb. This prevents them from puffing up into a dome shape and helps them cook more evenly.
-
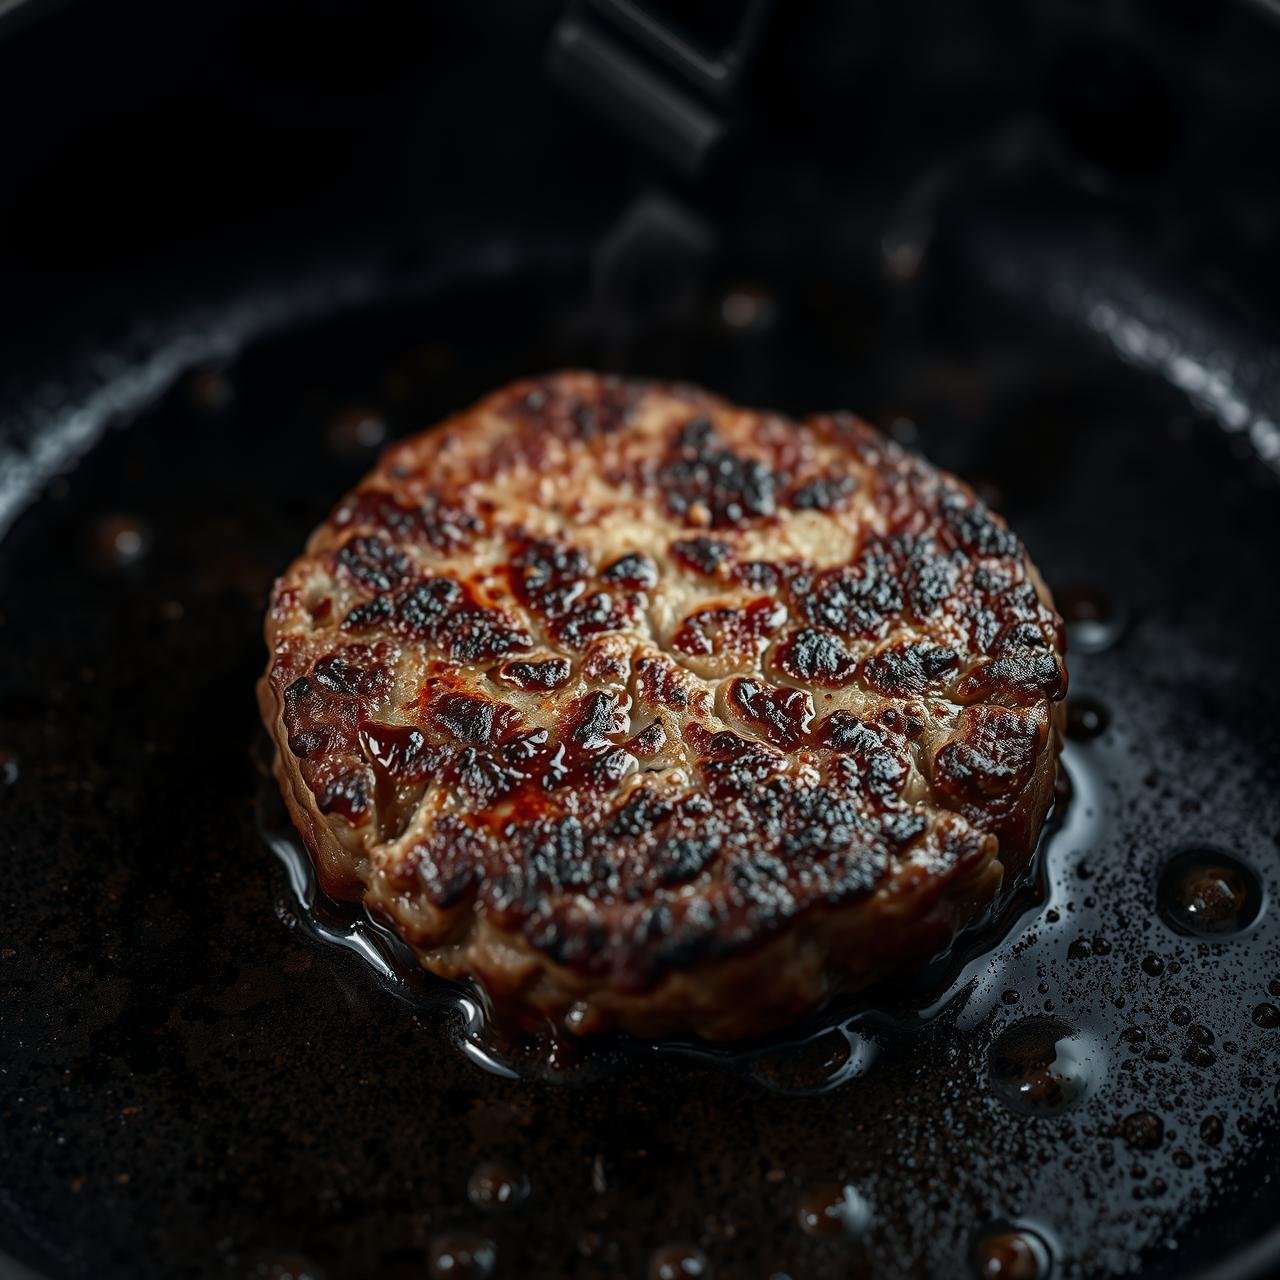
Cook the Burgers
Heat the avocado oil or ghee in your cast-iron skillet over medium-high heat. The pan should be hot but not smoking. Carefully place the patties in the skillet, ensuring not to overcrowd it (cook in batches if necessary). Let them cook undisturbed for 3-4 minutes on the first side, until a deep brown crust has formed. Do not press down on the burgers with your spatula—this squeezes out the precious juices.
-
Flip and Finish
Flip the burgers once and cook for another 3-5 minutes on the second side. This timing is for a medium-rare to medium finish, which is ideal for bison. Use a meat thermometer to be certain: 130-135°F for medium-rare, 140-145°F for medium. Avoid cooking bison past medium, as its leanness makes it prone to drying out.
-
Rest the Patties
Once cooked to your desired temperature, transfer the burgers to a clean plate or cutting board. Let them rest for at least 5 minutes. This allows the juices to redistribute throughout the meat, ensuring every bite is succulent.
Chef’s Secrets for the Juiciest Bison Burgers
From Good to Gourmet
Even the best ingredients can fall flat without the right technique. Here are the professional secrets that separate a dry, forgettable burger from a juicy, memorable one.
- Keep It Cold: Start with cold meat and cold hands. Warmth from your hands can begin to melt the fat in the meat prematurely, which can lead to a tougher burger. If your kitchen is warm, you can even chill your mixing bowl for a few minutes before you start.
- The Gentle Touch: I cannot stress this enough—be gentle when mixing and forming the patties. The more you compact the meat, the tougher the final product will be. Think of it as gently persuading the meat into a patty shape rather than forcing it.
- The Dimple is Non-Negotiable: That thumbprint you made in the center of the patty? It’s a game-changer. As the proteins in the meat cook, they contract and pull the edges inward, causing the center to bulge. The dimple counteracts this, giving you a perfectly flat, evenly cooked burger every time.
- High Heat, Short Time: Lean meats benefit from a quick, hot sear. This locks in the juices by creating a delicious crust. A screaming hot cast-iron skillet is your best friend here. Don’t be afraid of the sizzle!
- Trust the Thermometer, Not Time: Cooking times are always an estimate. The thickness of your patty, the starting temperature of the meat, and the exact heat of your pan all play a role. A reliable instant-read thermometer is the only way to know for sure when your burger is done. For bison, pulling it off the heat a few degrees before your target temperature is a good idea, as it will continue to cook as it rests.
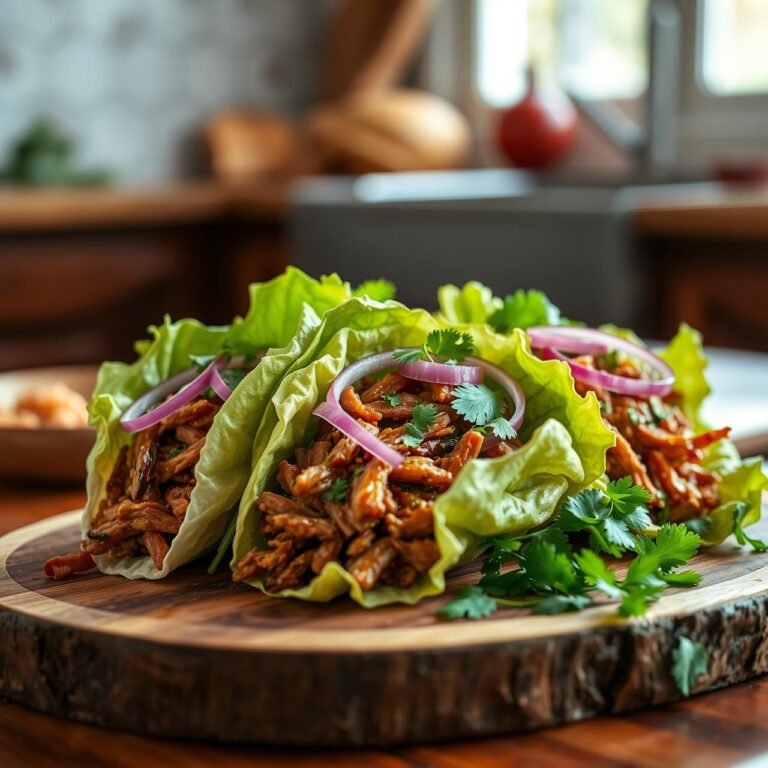
Assembly & Topping: Building Your Masterpiece
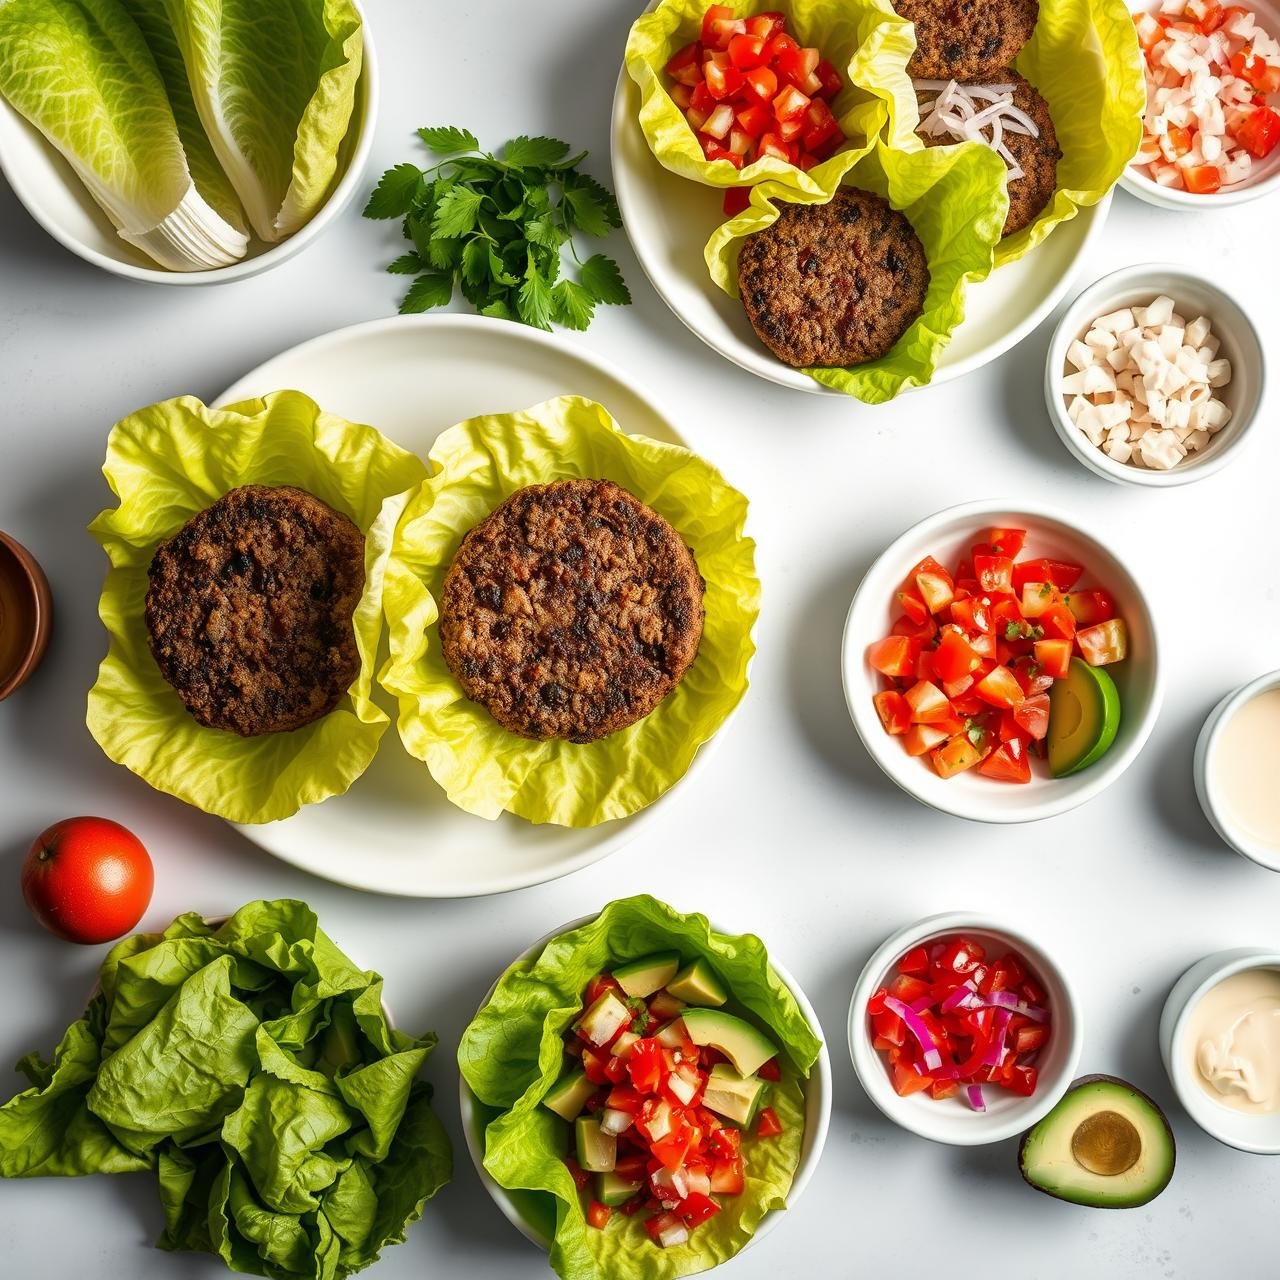
Now for the fun part. Assembling your lettuce wrap is an art. The goal is a sturdy, flavorful package that delivers the perfect bite every time.
- Create a Strong Base: Use two lettuce cups for each burger, overlapping them slightly to create a stronger, more durable ‘bun’ that won’t fall apart.
- Sauce First (Optional): If you’re using mustard, aioli, or another sauce, spread a thin layer directly onto the lettuce. This acts as a barrier and adds flavor from the first bite.
- Place the Patty: Nestle the rested, juicy bison patty into the center of your lettuce cups.
- Layer the Toppings: Add your toppings in a logical order. Sliced tomatoes can go on the patty, followed by the thinly sliced red onion for a sharp bite. Finish with creamy avocado slices on top.
- Fold and Enjoy: Gently fold the lettuce around the fillings like a taco or a wrap. Eat immediately while the patty is warm and the lettuce is cold and crisp. The temperature and texture contrast is absolutely divine.
Creative Topping Ideas:
- Spicy Southwest: Add a slice of pepper jack cheese in the last minute of cooking, and top with pickled jalapeños and a dollop of Greek yogurt mixed with lime juice and cilantro.
- Mushroom & Swiss: Sauté sliced cremini mushrooms in butter and garlic until golden. Melt a slice of Swiss cheese over the patty and top with the mushrooms.
- Mediterranean Twist: Top with crumbled feta cheese, sliced Kalamata olives, and a spoonful of tzatziki sauce.
Storage and Meal Prep Solutions
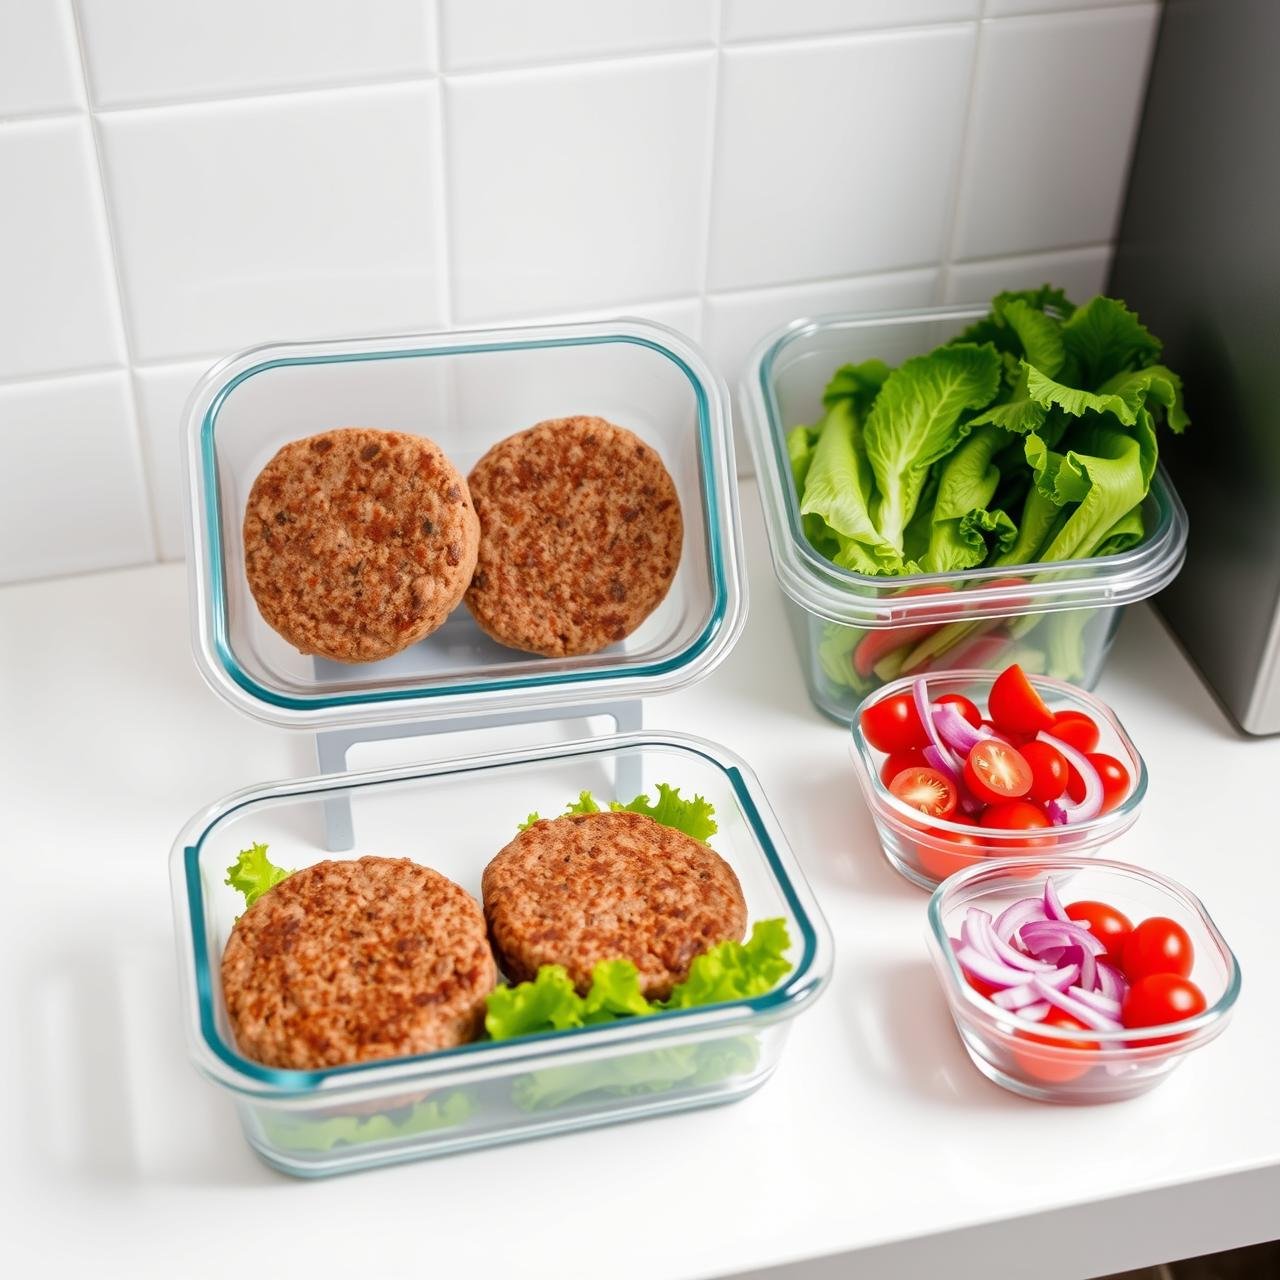
This recipe is perfect for a quick weeknight dinner, but it’s also wonderfully suited for meal prepping. Here’s how to do it right.
Storing Leftovers:
Cooked bison patties can be stored in an airtight container in the refrigerator for up to 3 days. To reheat, place them in a skillet over medium-low heat for a few minutes per side until warmed through. Avoid the microwave, as it can make them rubbery.
Meal Prep Strategy:
For a grab-and-go lunch, you can prep all the components separately.
- Patties: Mix and form the raw patties, placing them on a parchment-lined tray separated by small squares of parchment paper. Store them in an airtight container in the fridge for up to 2 days before cooking, or freeze them for up to 3 months.
- Lettuce: Wash, dry, and separate your lettuce cups. Store them in a container lined with a paper towel to absorb excess moisture. They’ll stay crisp for days.
- Toppings: Slice your onions and tomatoes and store them in separate airtight containers. Wait to slice the avocado until just before serving to prevent browning.
When you’re ready to eat, simply cook a patty and assemble your fresh wrap in minutes. It’s a fantastic way to ensure you have a healthy, high-protein meal ready to go.
Conclusion
You’ve now unlocked the secret to a burger that’s both incredibly delicious and impressively healthy. These Juicy Bison Burger Lettuce Wraps prove that you don’t need a heavy bun or fatty meat to satisfy a serious burger craving. By embracing the rich, clean flavor of bison and the refreshing crunch of lettuce, you create a meal that’s rustic, wholesome, and completely guilt-free. It’s a testament to the power of high-quality ingredients and proper technique. We invite you to step away from the ordinary, fire up your skillet, and discover your new favorite way to enjoy a burger. It’s a clean, satisfying, and flavorful revolution, one juicy bite at a time.