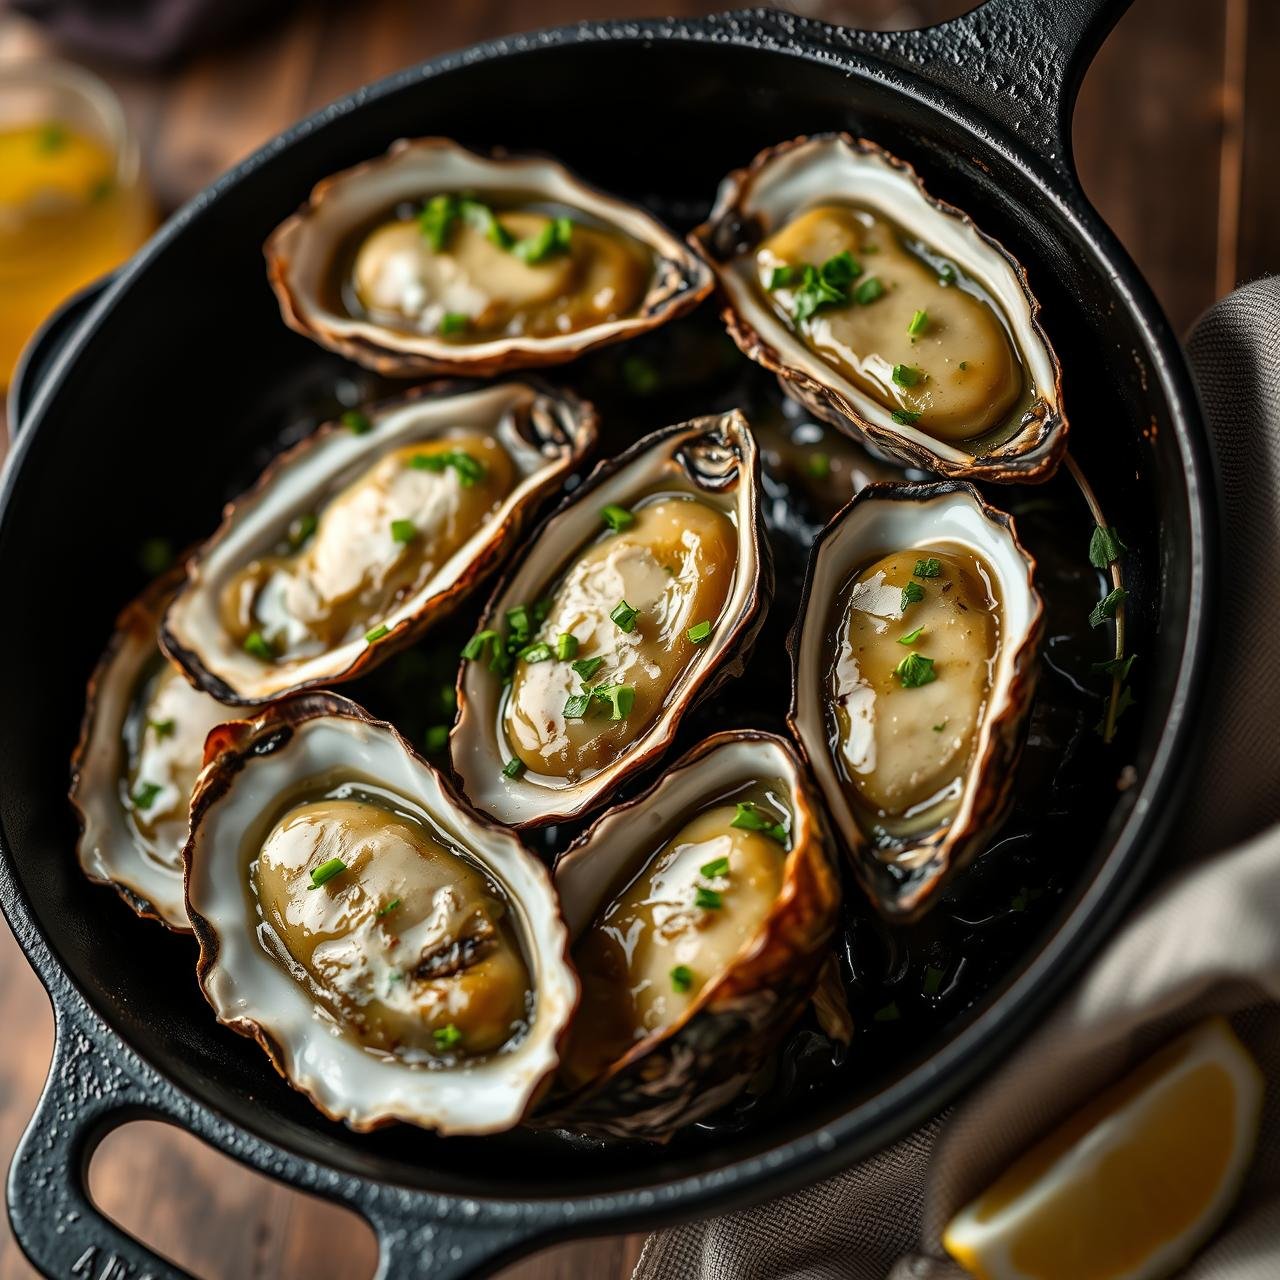
Oven Roasted Oysters With Garlic Herbs: A Luxury Low Calorie Snack
There’s a certain magic to oysters. They taste of the ocean itself—briny, clean, and invigorating. While often enjoyed raw on the half shell, a ritual in itself, something truly special happens when they meet the heat of an oven. The oyster plumps up, its texture becomes tender and creamy, and its subtle sweetness is drawn to the forefront. When bathed in a pool of sizzling, aromatic garlic-herb butter, they transform into an appetizer of pure, unadulterated luxury. This recipe for Oven-Roasted Oysters with Garlic and Herbs is your guide to creating that five-star restaurant experience right in your own kitchen. It’s a dish that feels incredibly indulgent yet remains a wonderfully light, low-calorie, and nutrient-dense snack. Forget the idea that elegance requires complexity; this recipe is a testament to the profound beauty of simple, high-quality ingredients prepared with care.
Why You’ll Fall in Love with This Roasted Oyster Recipe
Beyond the incredible taste, there are so many reasons to make this recipe a staple in your culinary repertoire. It’s the perfect bridge between sophisticated and simple, making it ideal for both seasoned gourmands and novice home cooks.
A Symphony of Flavor and Texture
Roasting coaxes out a different personality from the oyster. The intense heat gently cooks the oyster in its own liquor and the added butter, resulting in a texture that is unbelievably tender and succulent, a far cry from the sometimes-chewy texture they can take on with other cooking methods. The garlic becomes sweet and fragrant, the herbs lend a fresh, earthy brightness, and a hint of red pepper flake provides a gentle warmth that cuts through the richness of the butter. It’s a perfectly balanced bite every single time.
Effortless Elegance
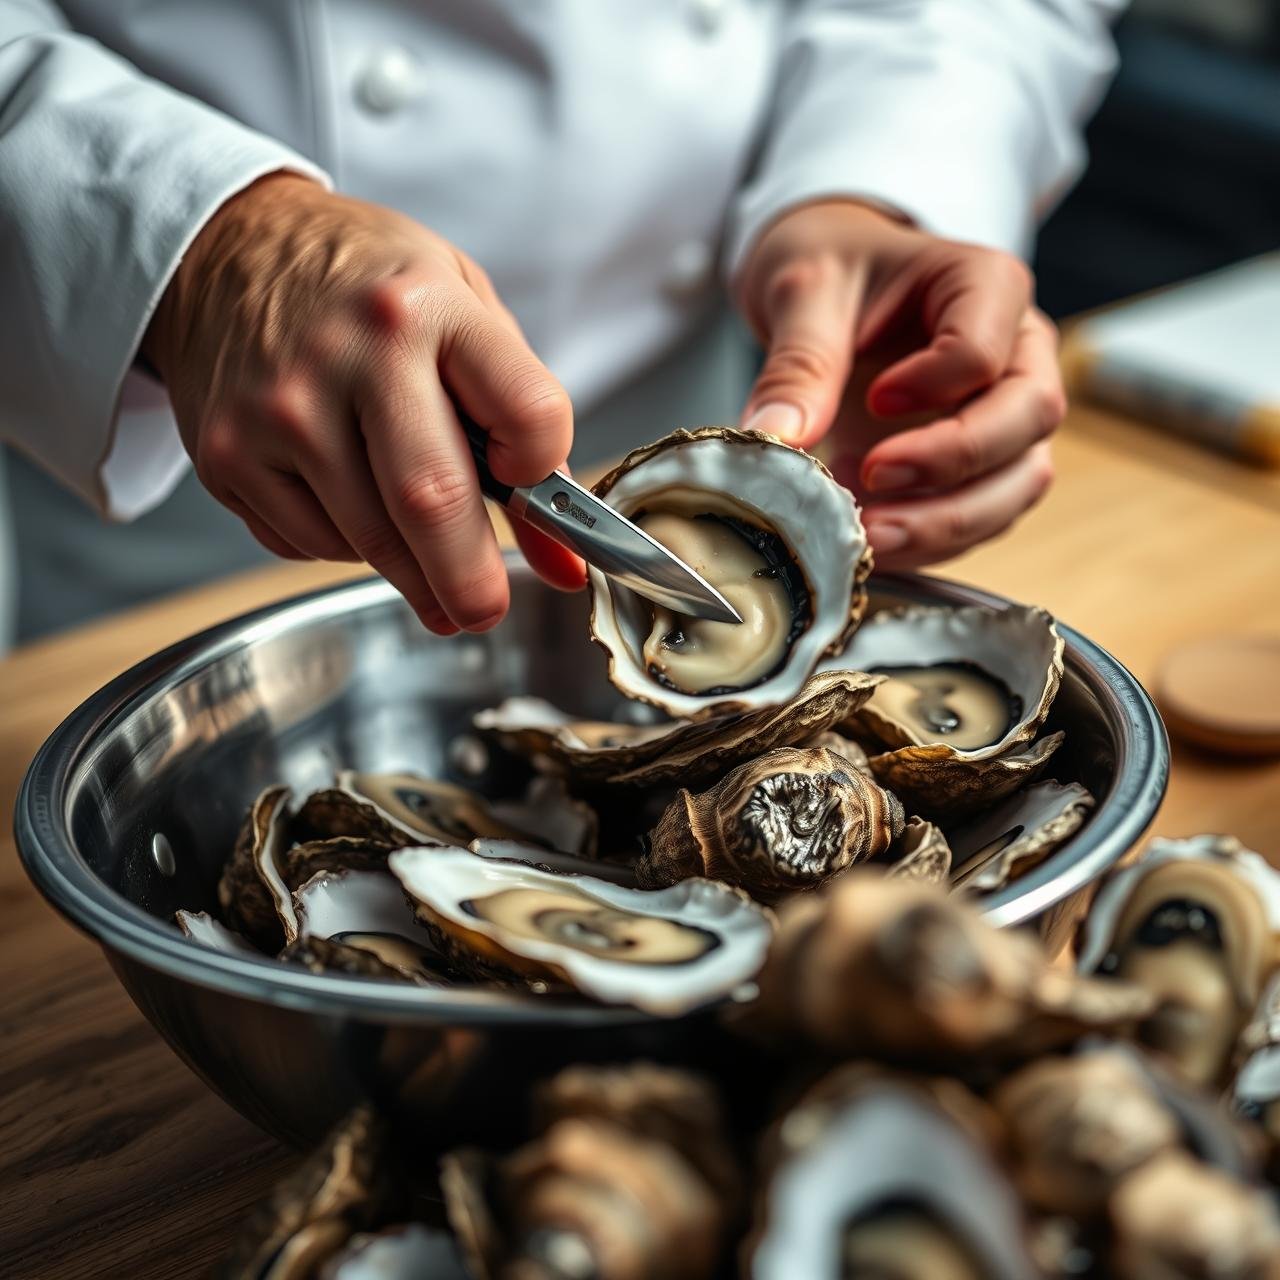
Imagine presenting a sizzling platter of these beauties at your next dinner party. It’s a dish that commands attention and admiration, yet it comes together in under 30 minutes. The most hands-on part is shucking the oysters, a skill that is immensely satisfying to learn. Once that’s done, it’s a simple process of topping and baking. It’s the ultimate high-reward, low-effort appetizer.
A Healthy Indulgence
For the health-conscious foodie, this recipe is a dream. Oysters are a nutritional powerhouse, packed with protein, omega-3 fatty acids, and essential minerals like zinc, iron, and selenium. By roasting them with a modest amount of high-quality butter and fresh herbs, you create a snack that is both deeply satisfying and remarkably low in calories and carbohydrates. It’s a guilt-free luxury that nourishes the body while delighting the palate, fitting seamlessly into keto, paleo, and low-carb lifestyles.
The Cast of Characters: Ingredients & Tools
Great cooking starts with great ingredients and the right tools for the job. This recipe celebrates simplicity, so sourcing the best possible components will make all the difference.
Essential Equipment
Having these tools ready will make the process smooth and enjoyable. You don’t need a professional kitchen, just a few key items.
| Tool | Purpose |
|---|---|
| Oyster Knife | Crucial for safely and effectively opening the oyster shells. A table knife will not work and is dangerous. |
| Thick Kitchen Towel or Glove | Protects your hand while holding the oyster during shucking. |
| Large Rimmed Baking Sheet | To hold the oysters and catch any delicious butter that might bubble over. |
| Small Bowl | For mixing the glorious garlic-herb butter. |
| Cutting Board & Sharp Knife | For mincing garlic and chopping fresh herbs. |
Ingredient Breakdown
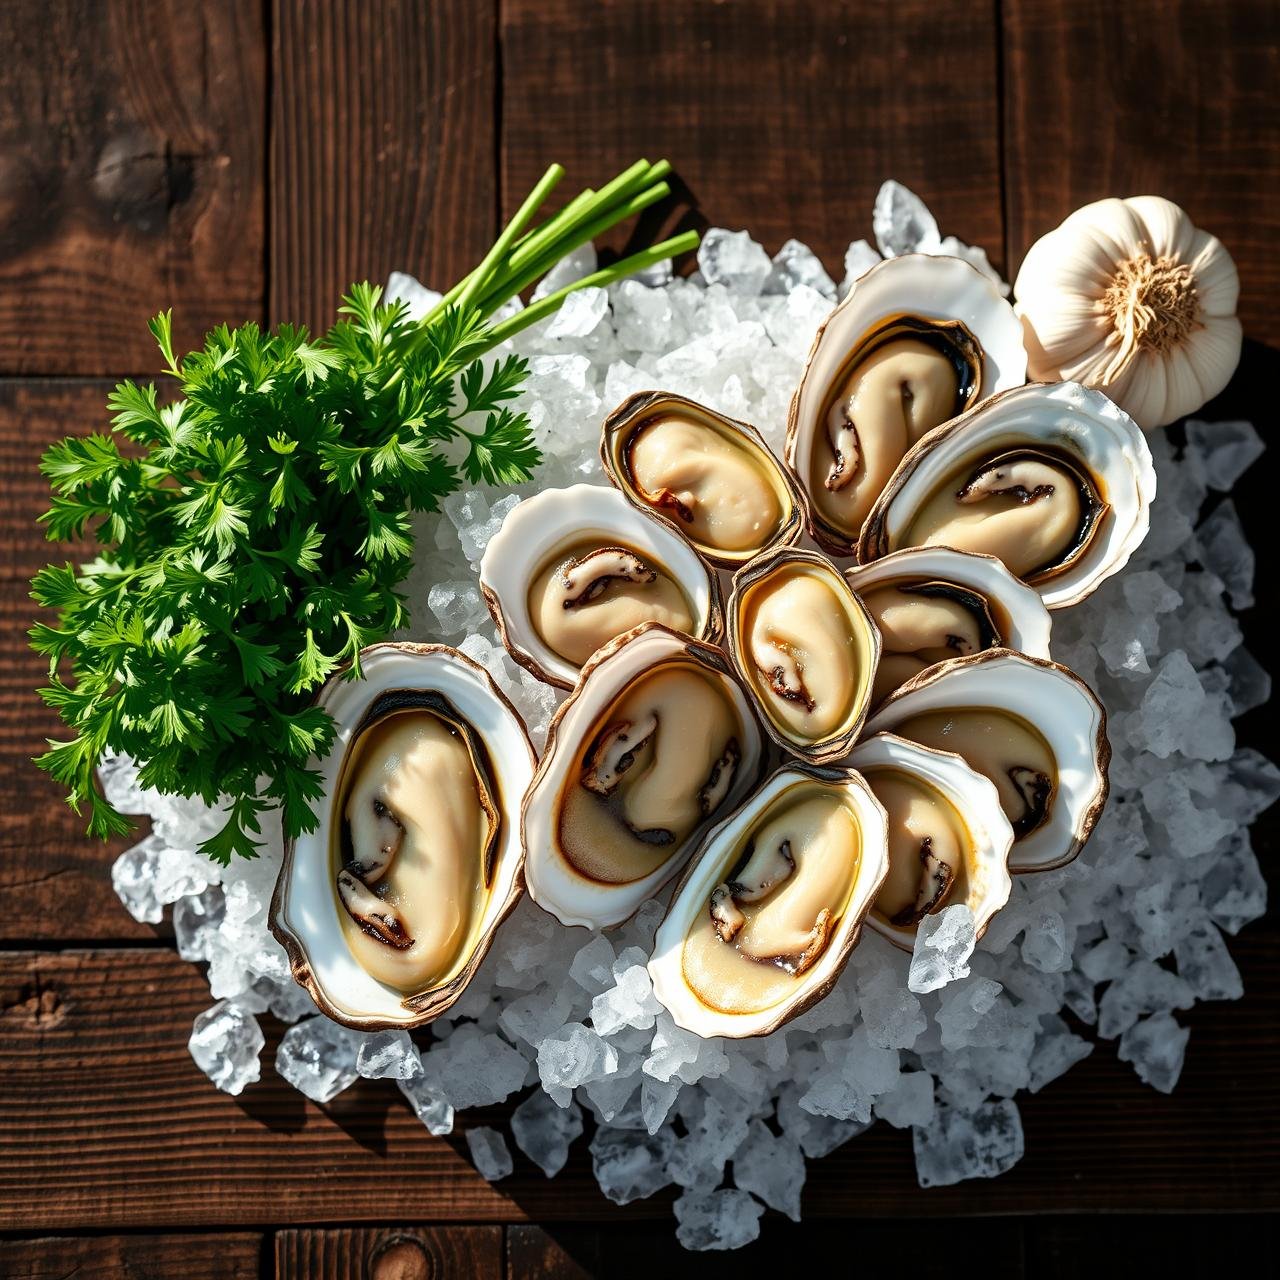
Quality is paramount. Fresh oysters and fresh herbs are non-negotiable for achieving that sublime, ocean-fresh flavor.
- 12 fresh, large oysters: Look for oysters with tightly closed shells that feel heavy for their size. Varieties like Bluepoints, Malpeques, or Kumamotos are excellent for roasting as they have deep cups to hold the butter. Ensure they have been scrubbed clean under cold water.
- 4 tablespoons unsalted butter: Use a good quality butter, as it’s a primary flavor component. It should be softened to room temperature for easy mixing.
- 3-4 cloves garlic: Freshly minced garlic provides a pungent, aromatic flavor that mellows beautifully in the oven. Avoid pre-minced jarred garlic.
- 2 tablespoons finely chopped fresh parsley: Adds a clean, peppery freshness that cuts through the richness.
- 1 tablespoon finely chopped fresh chives: Provides a delicate, mild onion flavor.
- 1/2 teaspoon fresh lemon zest: Brightens all the flavors and adds a lovely citrus aroma without making it sour.
- Pinch of red pepper flakes: Optional, but highly recommended for a subtle background warmth.
- Freshly ground black pepper: To taste.
- Rock salt or kosher salt (for the pan): Optional, but this creates a stable bed for the oysters on the baking sheet, preventing them from tipping over and spilling their precious liquor and butter.
- Lemon wedges: For serving. A final squeeze of fresh lemon juice at the end is essential.
Crafting the Perfect Roasted Oysters: A Step-by-Step Guide

Follow these steps closely to achieve oyster perfection. The process is quick, so have everything prepped and ready to go before you begin. This is a dance of assembly and heat, and timing is key.
- Prepare the Oven and Baking Sheet: First, position a rack in the upper third of your oven and preheat it to a robust 425°F (220°C). This high heat ensures the oysters cook quickly, staying tender without becoming rubbery. If using, spread a layer of rock salt or kosher salt on your rimmed baking sheet. This little trick is a professional secret; it creates a custom, stable bed for each oyster, preventing them from wobbling and spilling.
- Shuck the Oysters: This is the most technical step. Place a folded kitchen towel on your work surface and put an oyster, cup-side down, on top. Use the towel to hold it firmly. Insert the tip of your oyster knife into the hinge at the back of the oyster. Gently but firmly twist and wiggle the knife until you feel a ‘pop’ as the hinge releases. Slide the knife along the inside of the top shell to sever the adductor muscle, then remove and discard the top shell. Be very careful to keep the oyster level to preserve the delicious natural liquor inside. Run the knife under the oyster meat in the bottom shell to detach it completely, which makes for easier eating. Arrange the shucked oysters on your prepared baking sheet.
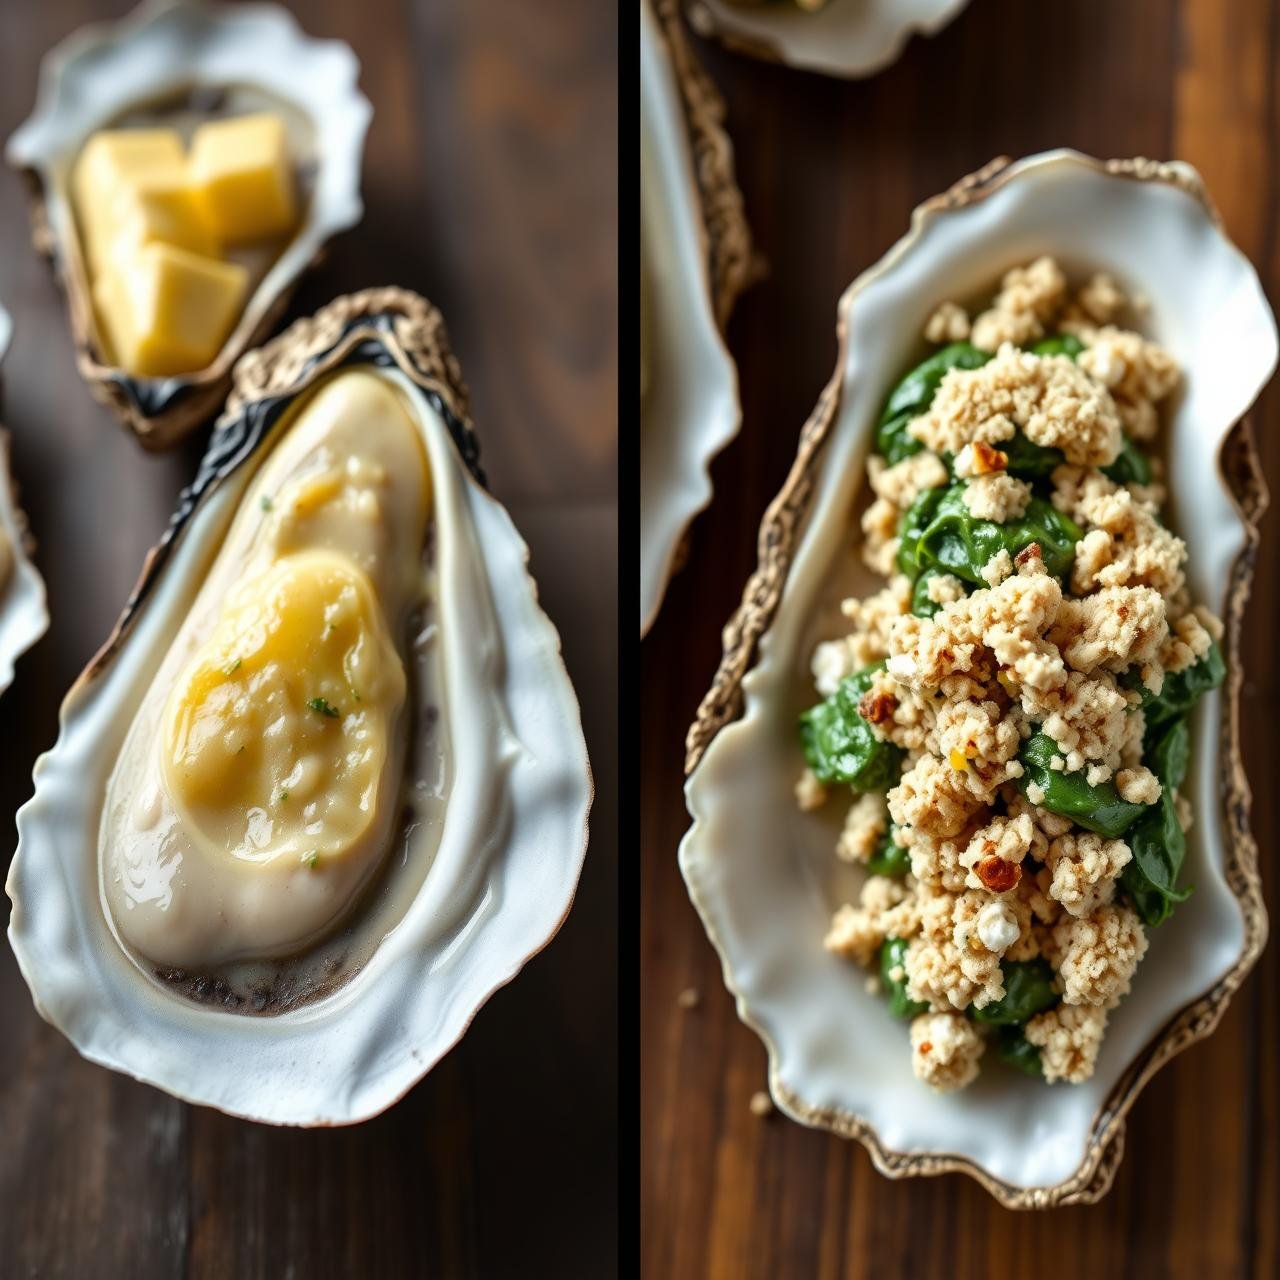
- Create the Garlic-Herb Butter: In your small bowl, combine the 4 tablespoons of softened unsalted butter, 3-4 minced garlic cloves, 2 tablespoons of chopped parsley, 1 tablespoon of chopped chives, the lemon zest, and the pinch of red pepper flakes. Mash everything together with a fork until it’s well incorporated into a beautiful, speckled compound butter. Season with a few grinds of black pepper.
- Top the Oysters: With a small spoon, carefully place a dollop of the garlic-herb butter onto each oyster. Aim for about 1 teaspoon per oyster, ensuring it nestles right on top of the meat. Don’t be shy; as it melts, this butter will mingle with the oyster liquor to create an unforgettable sauce.
- Roast to Perfection: Place the baking sheet into the preheated oven on the upper rack. Roast for 8 to 10 minutes. You’ll know they’re done when the butter is completely melted and bubbling furiously, and the edges of the oysters have just begun to curl and firm up. Be vigilant here—overcooking is the enemy of a tender oyster.
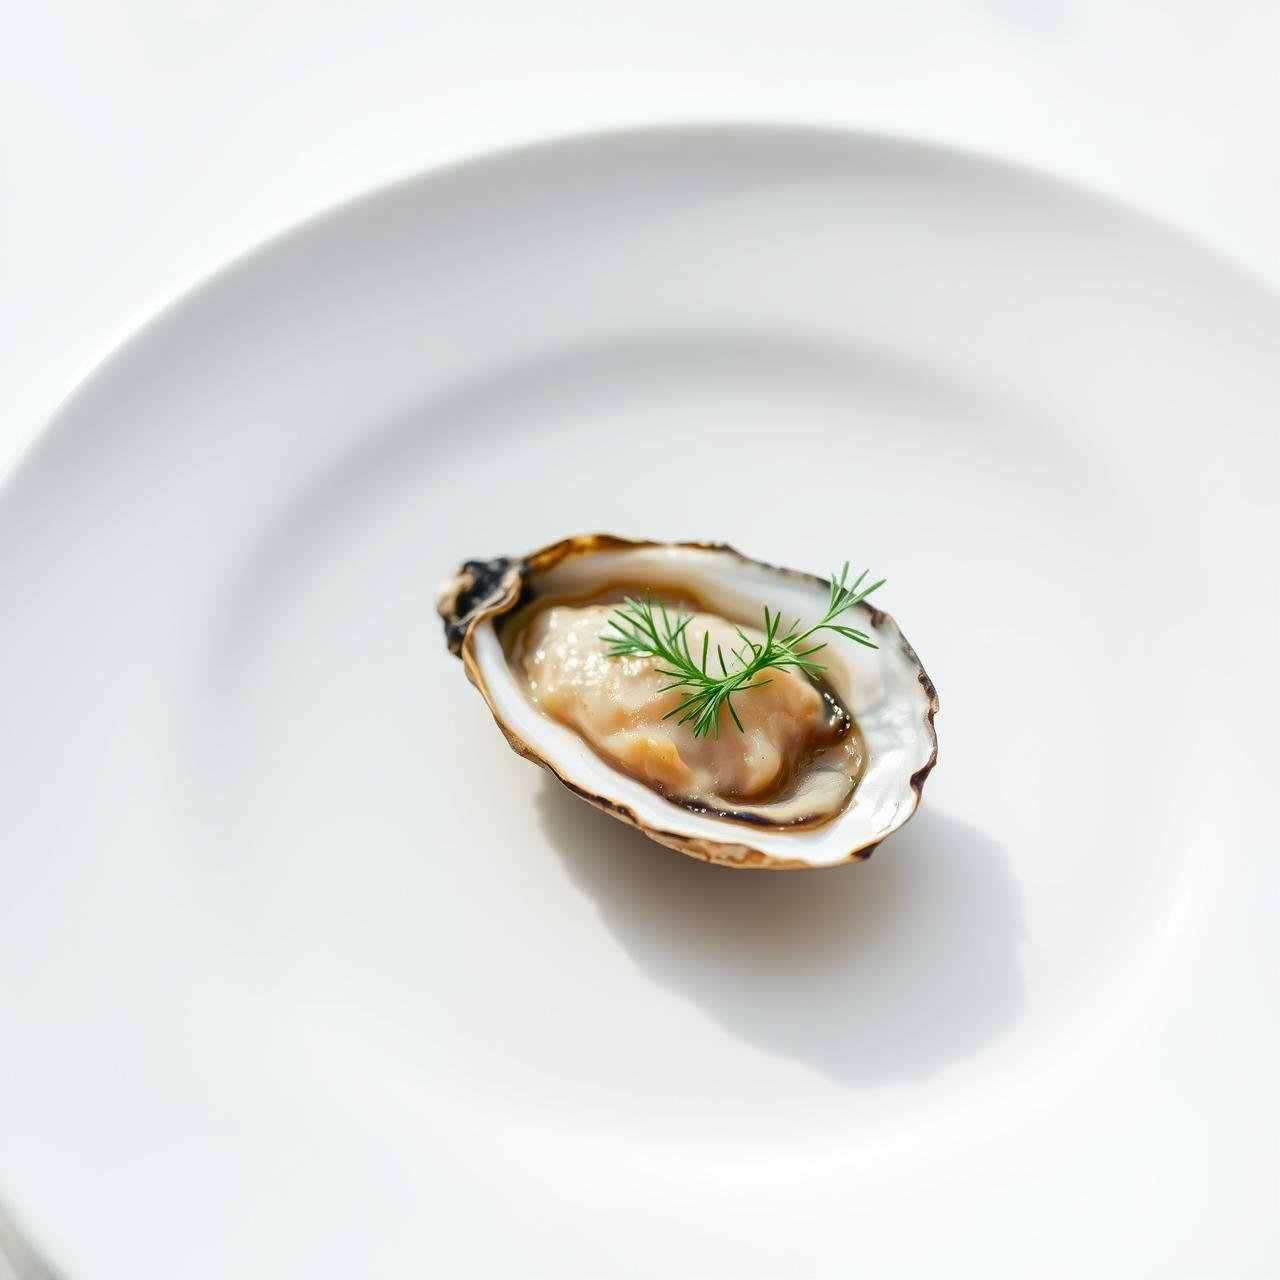
- Garnish and Serve Immediately: Carefully remove the hot baking sheet from the oven. The aroma will be intoxicating. Let them cool for just a minute, as the shells will be extremely hot. Serve them directly from the pan or transfer them to a platter. Provide plenty of fresh lemon wedges on the side for squeezing over the top just before eating. A basket of warm, crusty bread is highly recommended for sopping up every last drop of the divine butter sauce.
Pro Tips and Creative Twists
Once you’ve mastered the classic recipe, you can start to play. Here are some chef-approved tips for guaranteed success and some variations to inspire your next batch.
Tips for Success
- Buy Oysters the Day You Plan to Cook: Freshness is everything. Store them in the coldest part of your refrigerator, covered with a damp cloth, cup-side down. Never store them in water.
- Don’t Discard the Liquor: The liquid in the oyster shell is called the ‘liquor,’ and it’s pure, briny flavor. Do your best to preserve every drop when shucking.
- Soften, Don’t Melt the Butter: When making the compound butter, ensure it’s soft and malleable, not liquid. This helps it stay on top of the oyster as it goes into the oven, melting down and basting the meat as it cooks.
- Broil for a Crispy Finish: If you like a little color and texture, you can switch the oven to the broiler for the last 30-60 seconds of cooking. Watch them like a hawk to prevent burning.
Flavor Variations
The garlic-herb butter is a perfect canvas. Feel free to experiment with these delicious twists:
- Oysters Rockefeller-ish: Add a tablespoon of finely chopped spinach, a tablespoon of grated Parmesan cheese, and a splash of Pernod or absinthe to the butter mixture for a nod to the classic New Orleans dish. Top with a sprinkle of panko breadcrumbs before baking for a crunchy top.
- Spicy Chipotle-Lime: Swap the parsley and chives for fresh cilantro. Replace the red pepper flakes with a small amount of minced chipotle pepper in adobo sauce and use lime zest instead of lemon. This version is smoky, spicy, and zesty.
- Lemony Dill and Shallot: A classic pairing for seafood. Replace the garlic with one finely minced shallot and swap the parsley/chives for two tablespoons of fresh, chopped dill. This version is bright, aromatic, and elegant.
A Guilt-Free Indulgence: Nutritional Breakdown
It’s rare that something so decadent is also so good for you. These roasted oysters are a perfect example of clean eating without sacrifice. They are naturally low in carbohydrates and calories but are exceptionally rich in minerals that are vital for immune function, energy, and overall health. The addition of heart-healthy garlic and fresh herbs only boosts their nutritional profile.
Disclaimer: The following nutritional information is an estimate based on a serving size of 3 large oysters and may vary based on the exact size of the oysters and ingredients used.
| Nutrient | Amount per Serving (approx.) |
|---|---|
| Calories | 110 kcal |
| Protein | 7 g |
| Fat | 8 g |
| Saturated Fat | 4.5 g |
| Carbohydrates | 2 g |
| Sodium | 150 mg |
| Zinc | >100% of RDI |
| Iron | 20% of RDI |
| Selenium | 50% of RDI |
Savoring Later: Storage and Reheating
Frankly, oven-roasted oysters are at their absolute peak the moment they emerge from the heat, sizzling and fragrant. The textural contrast and vibrant flavors are best enjoyed immediately. However, if you find yourself with leftovers, proper storage is key to preserving their quality.
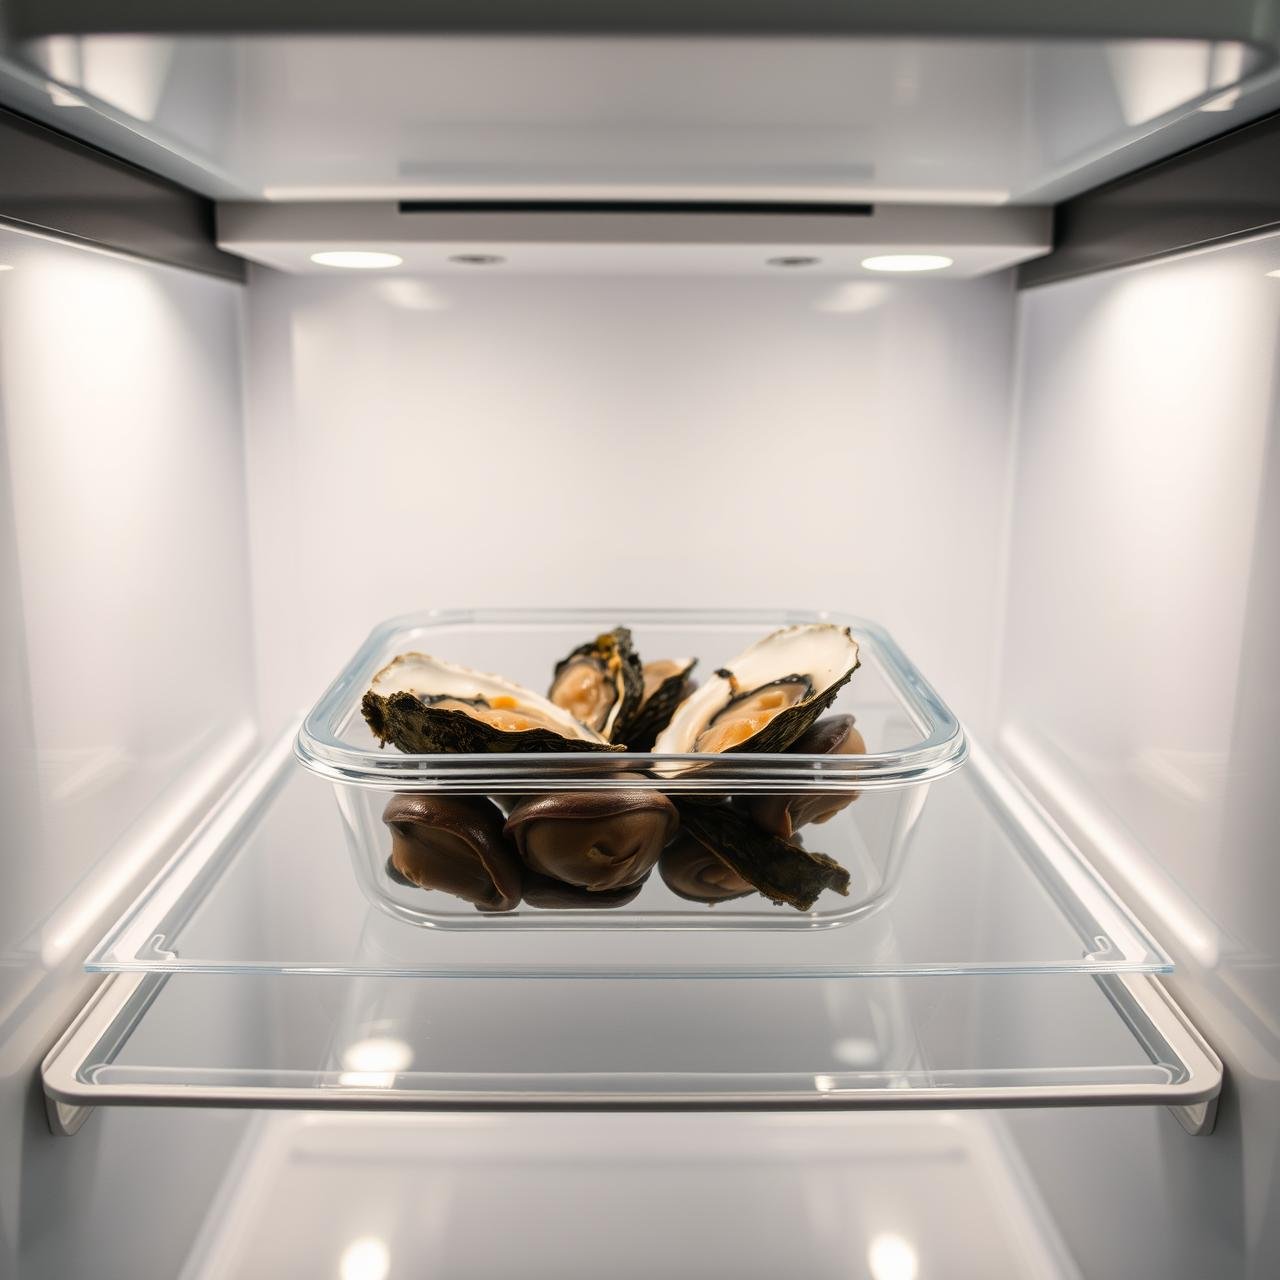
Storing Leftovers
Allow the oysters to cool completely to room temperature. Once cooled, you can remove the meat from the shells or store them as-is. Place them in a single layer in an airtight container. They can be refrigerated for up to 2 days. Any longer, and their delicate texture will begin to degrade significantly.
The Art of Reheating
The microwave is the enemy of leftover roasted oysters; it will turn them rubbery and sad. The best way to reheat them is to bring back the oven’s dry heat. Preheat your oven or a toaster oven to 350°F (175°C). Arrange the oysters on a small baking sheet and heat for just 3-5 minutes, or until they are warmed through and the butter is melted again. This gentle reheating helps maintain their tenderness and revives the wonderful aromas.
Conclusion
There you have it—a passport to an elegant, healthy, and incredibly flavorful seafood experience. Oven-Roasted Oysters with Garlic and Herbs prove that you don’t need a complicated recipe or a long list of ingredients to create something truly memorable. It’s about honoring the ingredient, in this case, the magnificent oyster, and enhancing its natural character with simple, aromatic companions. Whether you’re hosting a sophisticated soirée, planning a romantic appetizer for two, or simply treating yourself to a moment of culinary bliss, this recipe delivers on every front. So go ahead, embrace the simple luxury, master the art of shucking, and fill your home with the irresistible aroma of the sea meeting the garden. We invite you to try this recipe and make it your own—share your creations and your favorite flavor twists!