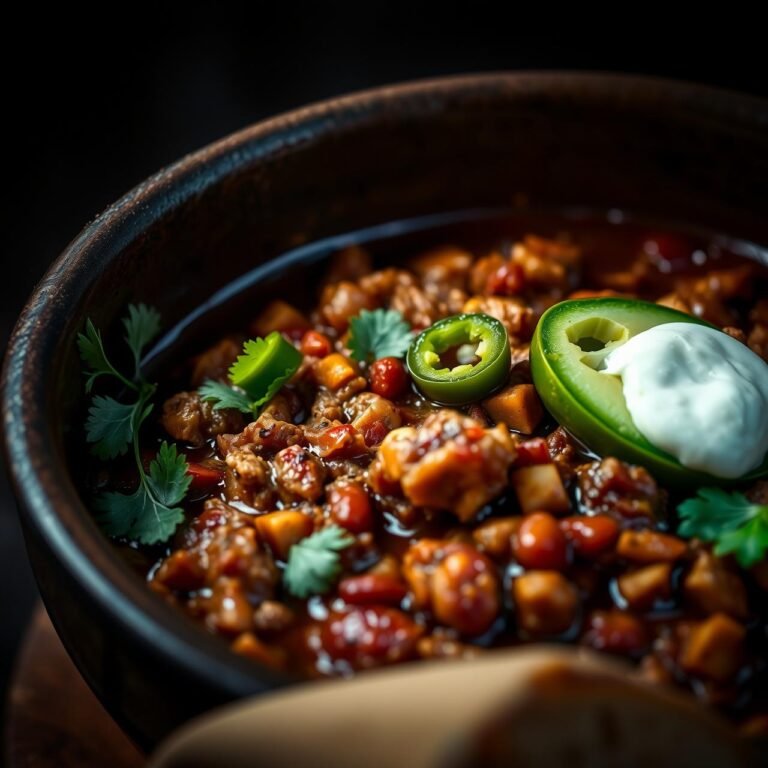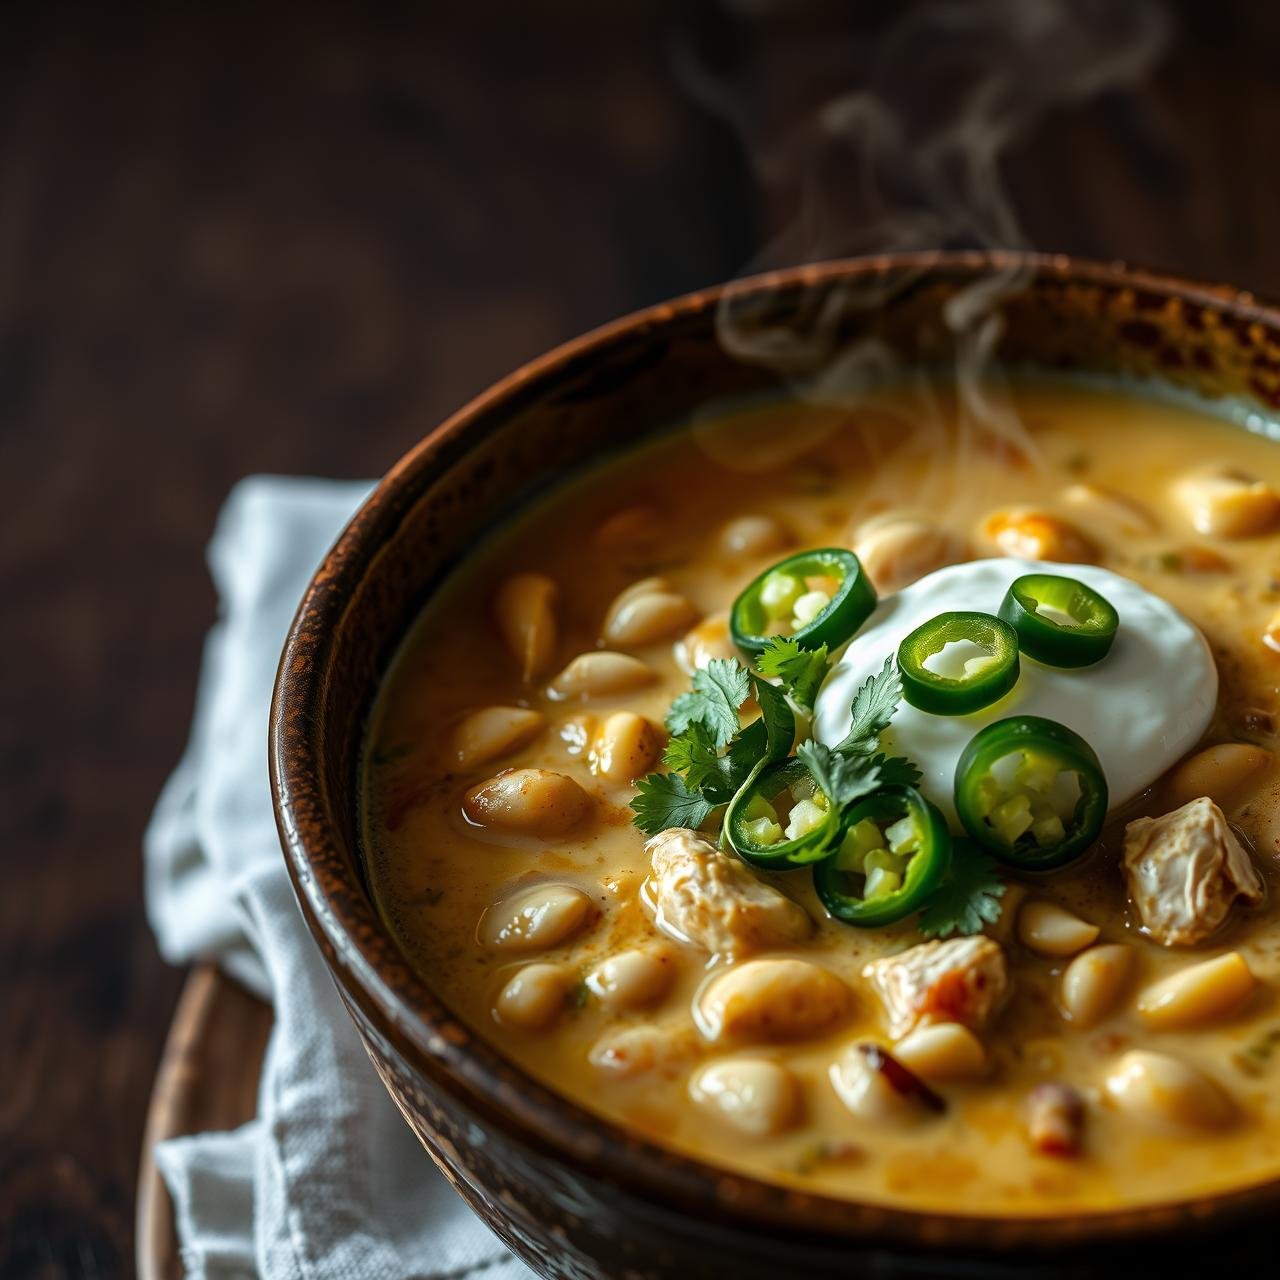
Creamy White Chicken Chili With Beans (Detailed Recipe, No Heavy Cream)
There are few things more comforting than a hearty bowl of chili on a cool evening. But when you’re craving something rich and velvety without the heaviness of dairy, this Creamy White Chicken Chili is the answer. It’s a rustic, soul-warming dish that achieves its luxurious texture through a simple, healthy culinary trick—no heavy cream required. We’re talking tender shredded chicken, plump cannellini beans, and a fragrant broth infused with green chiles, cumin, and coriander, all coming together in a single pot. This recipe is designed for home cooks of all levels, from the budget-conscious student to the health enthusiast and the gourmet foodie looking for a clean yet deeply satisfying meal. Prepare to be amazed at how simple ingredients can transform into a dish that tastes both indulgent and wholesome.
The Secret to Luscious Creaminess (Without the Cream)
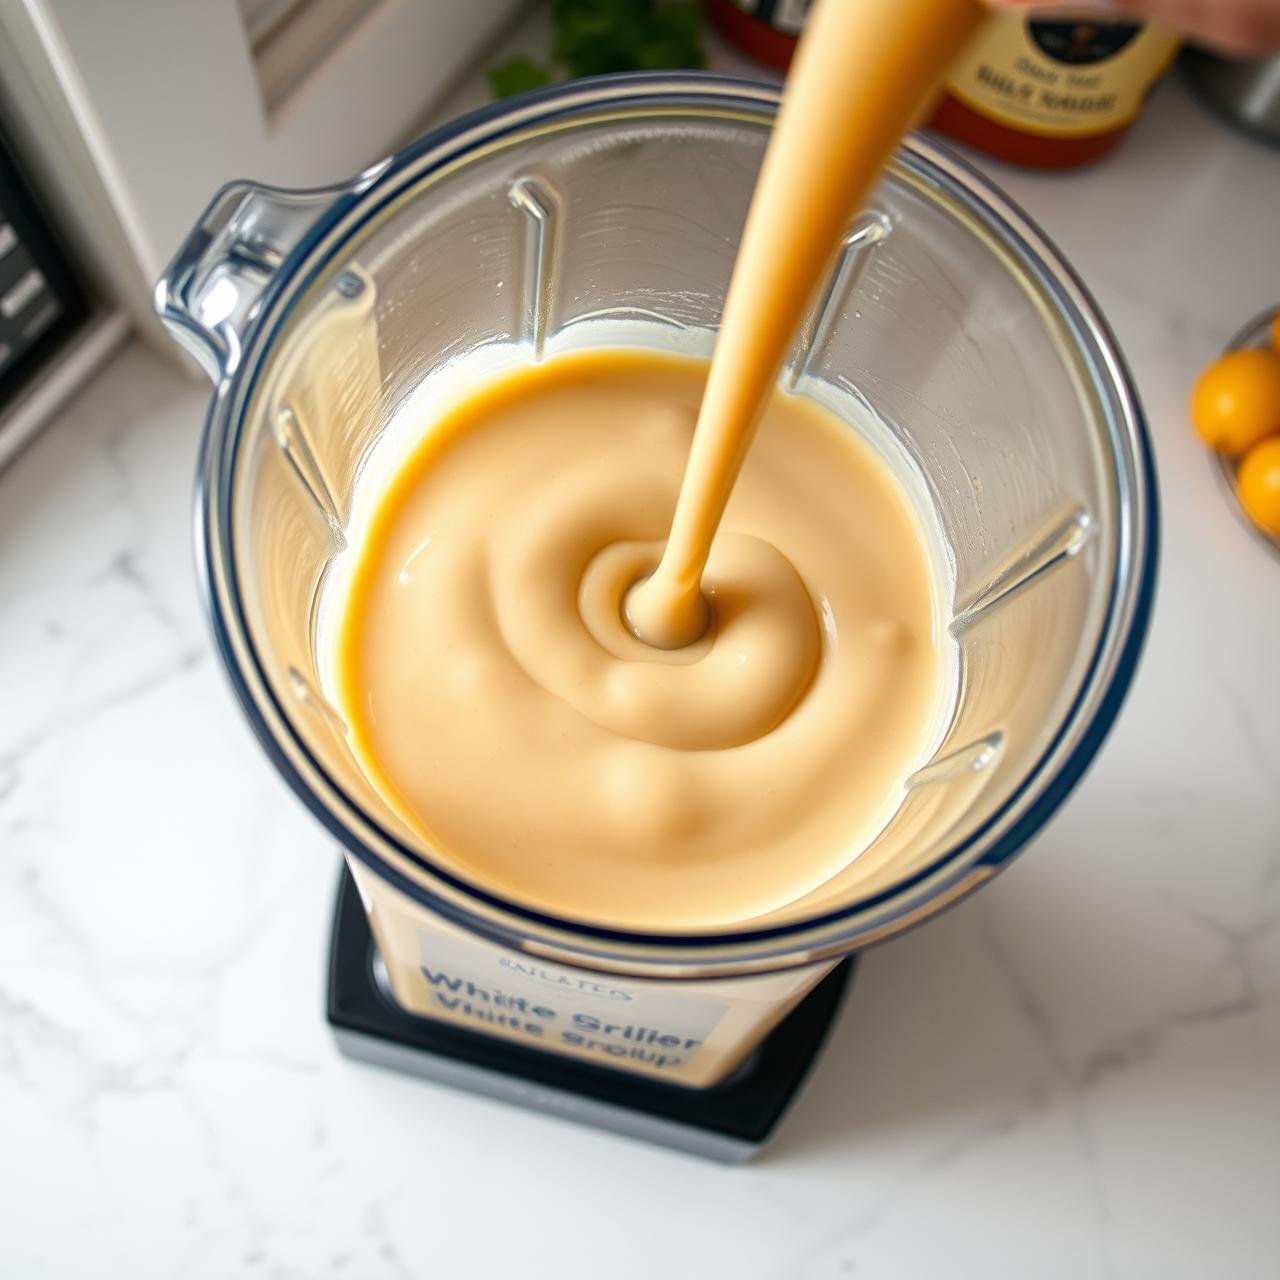
The magic of this recipe lies in its technique. How do we create that mouth-watering, velvety texture that usually comes from heavy cream or cheese? The secret is twofold: a bean purée and a touch of cornstarch. By taking a portion of the cooked cannellini beans and blending them with some of the flavorful broth, we create a naturally thick and creamy base. Beans are packed with starch, and when puréed, they release it into the liquid, emulsifying and thickening the entire chili. This not only adds incredible body but also boosts the fiber and protein content, making the dish more satisfying and nutritious. For an extra guarantee of thickness, a simple cornstarch slurry is whisked in at the end. This final step gives the chili a glossy, consistent texture that clings perfectly to every piece of chicken and bean. The result is a chili that’s every bit as creamy as its dairy-laden counterparts, but with a cleaner, lighter profile that lets the core flavors of the chicken and spices truly shine.
Essential Equipment for Your Chili Journey
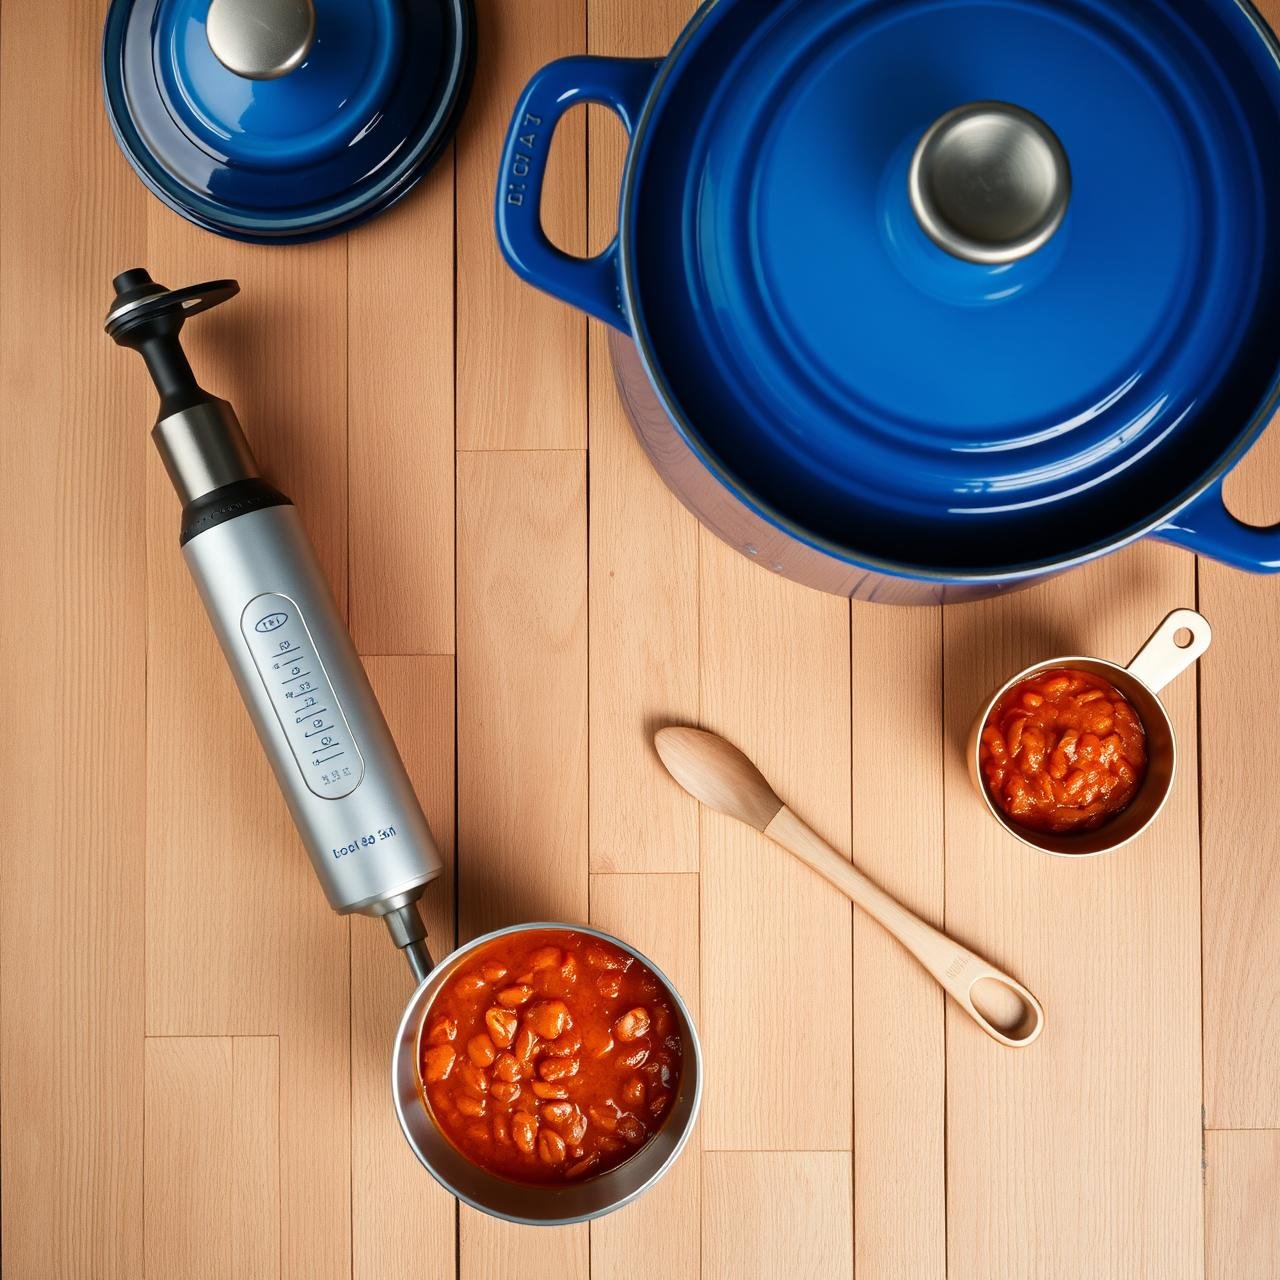
You don’t need a professional kitchen to master this recipe. A few basic tools will ensure perfect results every time.
| Equipment | Purpose |
|---|---|
| Large Dutch Oven or Heavy-Bottomed Pot | Provides even heat distribution for sautéing and simmering, preventing scorching. |
| Blender (Immersion or Standard) | Crucial for creating the creamy bean purée. An immersion blender allows you to blend directly in the pot. |
| Wooden Spoon or Spatula | Ideal for stirring and scraping up the flavorful browned bits (fond) from the bottom of the pot. |
| Measuring Cups and Spoons | For accurate measurement of spices and liquids, ensuring a balanced flavor profile. |
| Two Forks | The simplest tool for shredding the cooked chicken. |
Gathering Your Rustic Ingredients
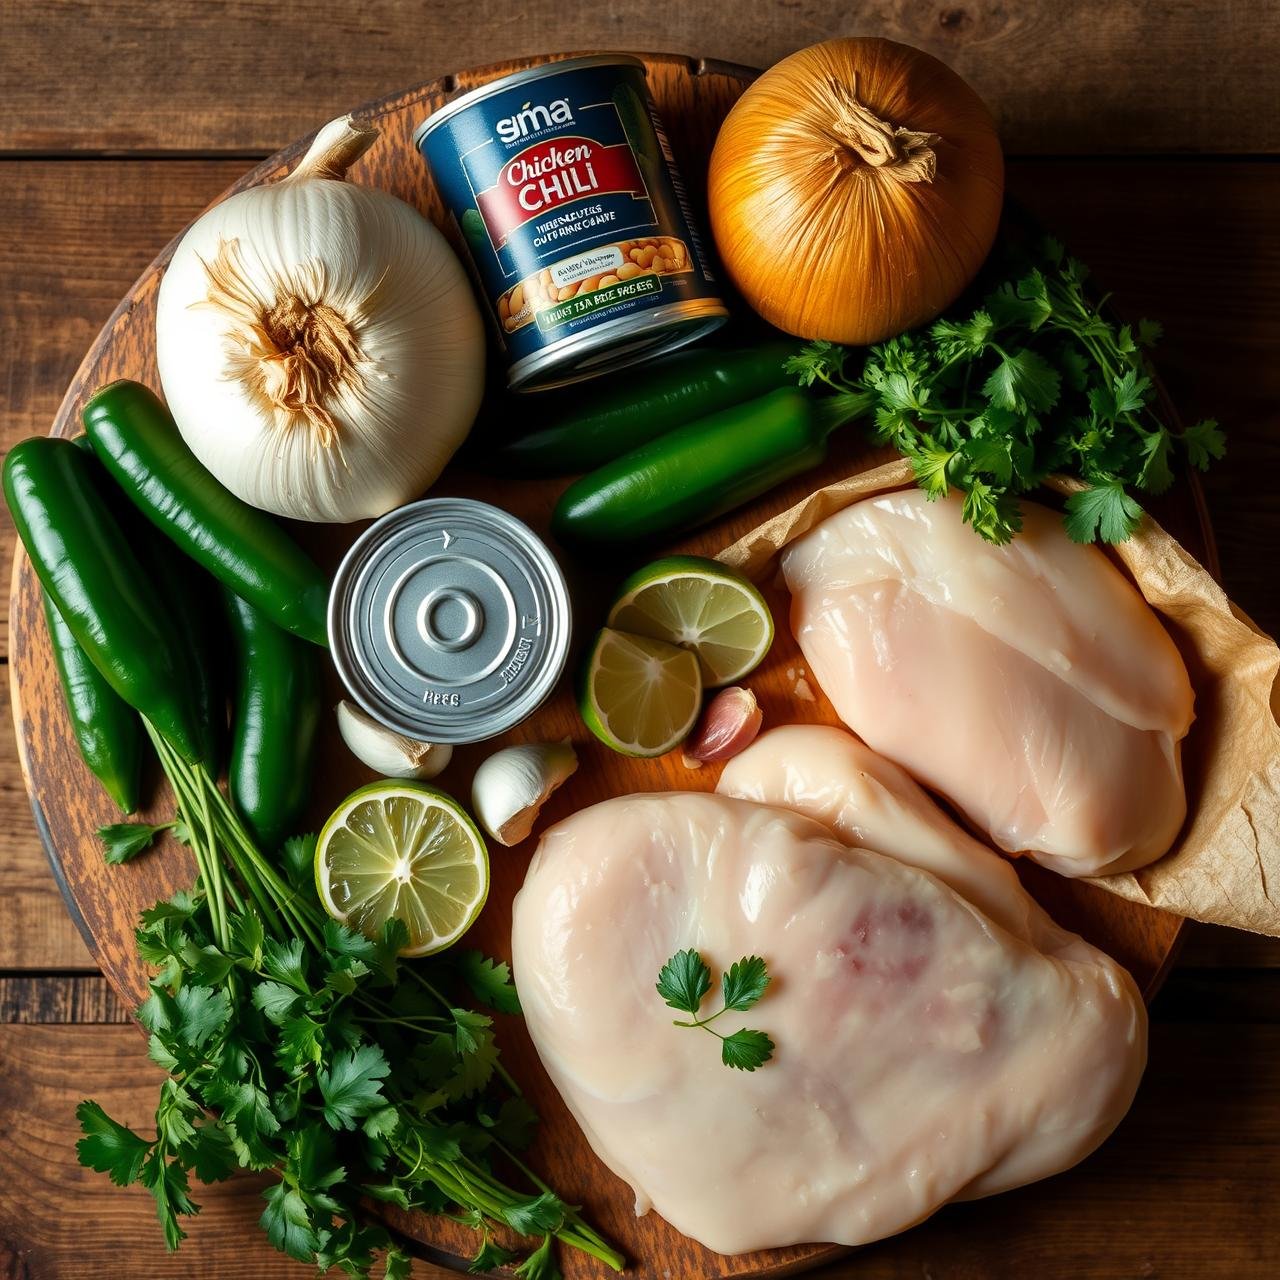
The beauty of this chili is its reliance on simple, accessible, and wholesome ingredients. Quality matters, so use the freshest you can find for the best flavor.
For the Chili
- 2 tablespoons olive oil or avocado oil
- 1 large yellow onion, diced
- 2 jalapeños, seeds removed and finely diced (adjust to your spice preference)
- 4 cloves garlic, minced
- 1.5 pounds boneless, skinless chicken breasts or thighs
- 1 tablespoon ground cumin
- 1 teaspoon dried oregano
- 1 teaspoon ground coriander
- 1/2 teaspoon smoked paprika
- 1/4 teaspoon cayenne pepper (optional, for extra heat)
- 6 cups low-sodium chicken broth
- 3 (15-ounce) cans cannellini beans or Great Northern beans, rinsed and drained
- 1 (4-ounce) can diced green chiles, undrained
- 1 bay leaf
- Salt and freshly ground black pepper to taste
- 1 tablespoon cornstarch mixed with 2 tablespoons cold water (slurry)
- 1/4 cup freshly squeezed lime juice (from about 2 limes)
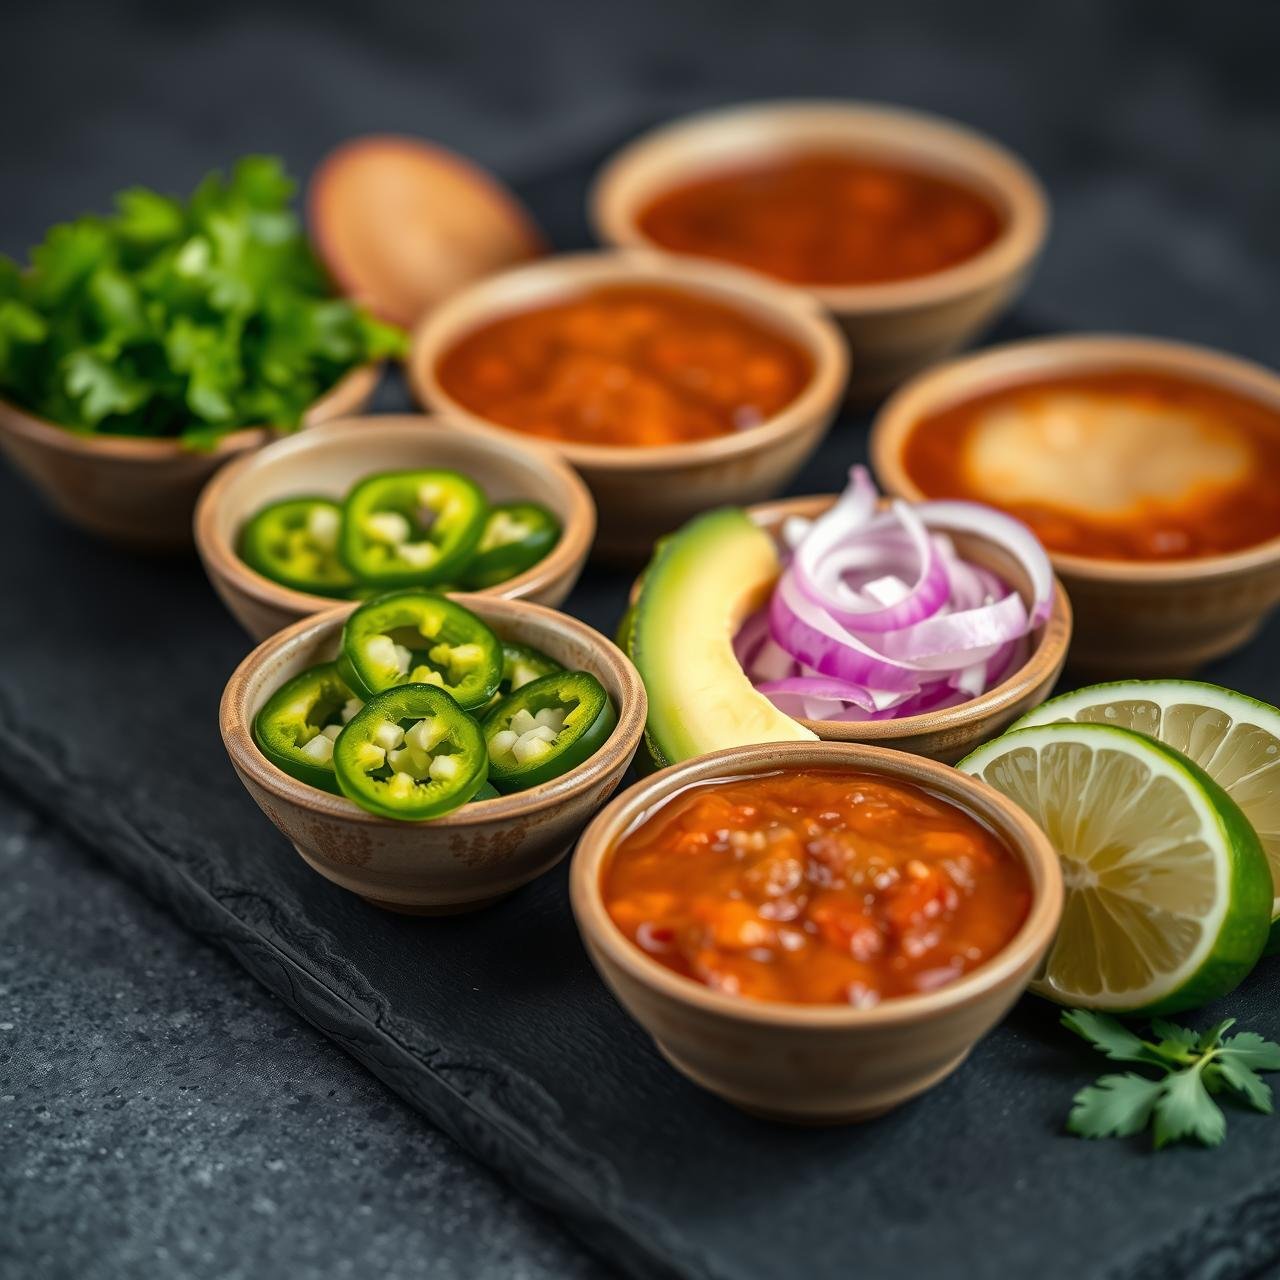
For Garnishing (Optional but Recommended)
- Fresh cilantro, chopped
- Sour cream or plain Greek yogurt
- Sliced avocado or guacamole
- Shredded Monterey Jack cheese
- Sliced jalapeños or radishes
- Tortilla strips or crushed tortilla chips
Step-by-Step Instructions to Chili Perfection
Follow these detailed steps carefully to build layers of flavor, resulting in a chili that tastes like it has been simmering all day.
-
Sauté the Aromatics
Heat the olive oil in your Dutch oven over medium-high heat. Once shimmering, add the diced onion and jalapeño. Sauté for 5-7 minutes, stirring occasionally, until the onion is soft and translucent. Add the minced garlic and cook for another minute until fragrant, being careful not to burn it.
-
Sear and Cook the Chicken
Gently place the whole chicken breasts or thighs into the pot. Season generously with salt and pepper. Sear for 3-4 minutes per side until lightly golden. Don’t worry about cooking it through at this stage. The goal is to develop flavor.
-
Bloom the Spices
Sprinkle the cumin, oregano, coriander, smoked paprika, and cayenne pepper (if using) directly into the pot. Stir constantly for 30-60 seconds. This step, known as ‘blooming,’ toasts the spices and awakens their essential oils, deepening their flavor immensely.
-
Simmer and Infuse
Pour in the chicken broth, using your wooden spoon to scrape any browned bits from the bottom of the pot—this is pure flavor! Add the rinsed and drained beans (all 3 cans), the can of diced green chiles, and the bay leaf. Stir everything to combine. Bring the mixture to a boil, then reduce the heat to low, cover, and let it simmer for 25-30 minutes, or until the chicken is cooked through and tender.
-
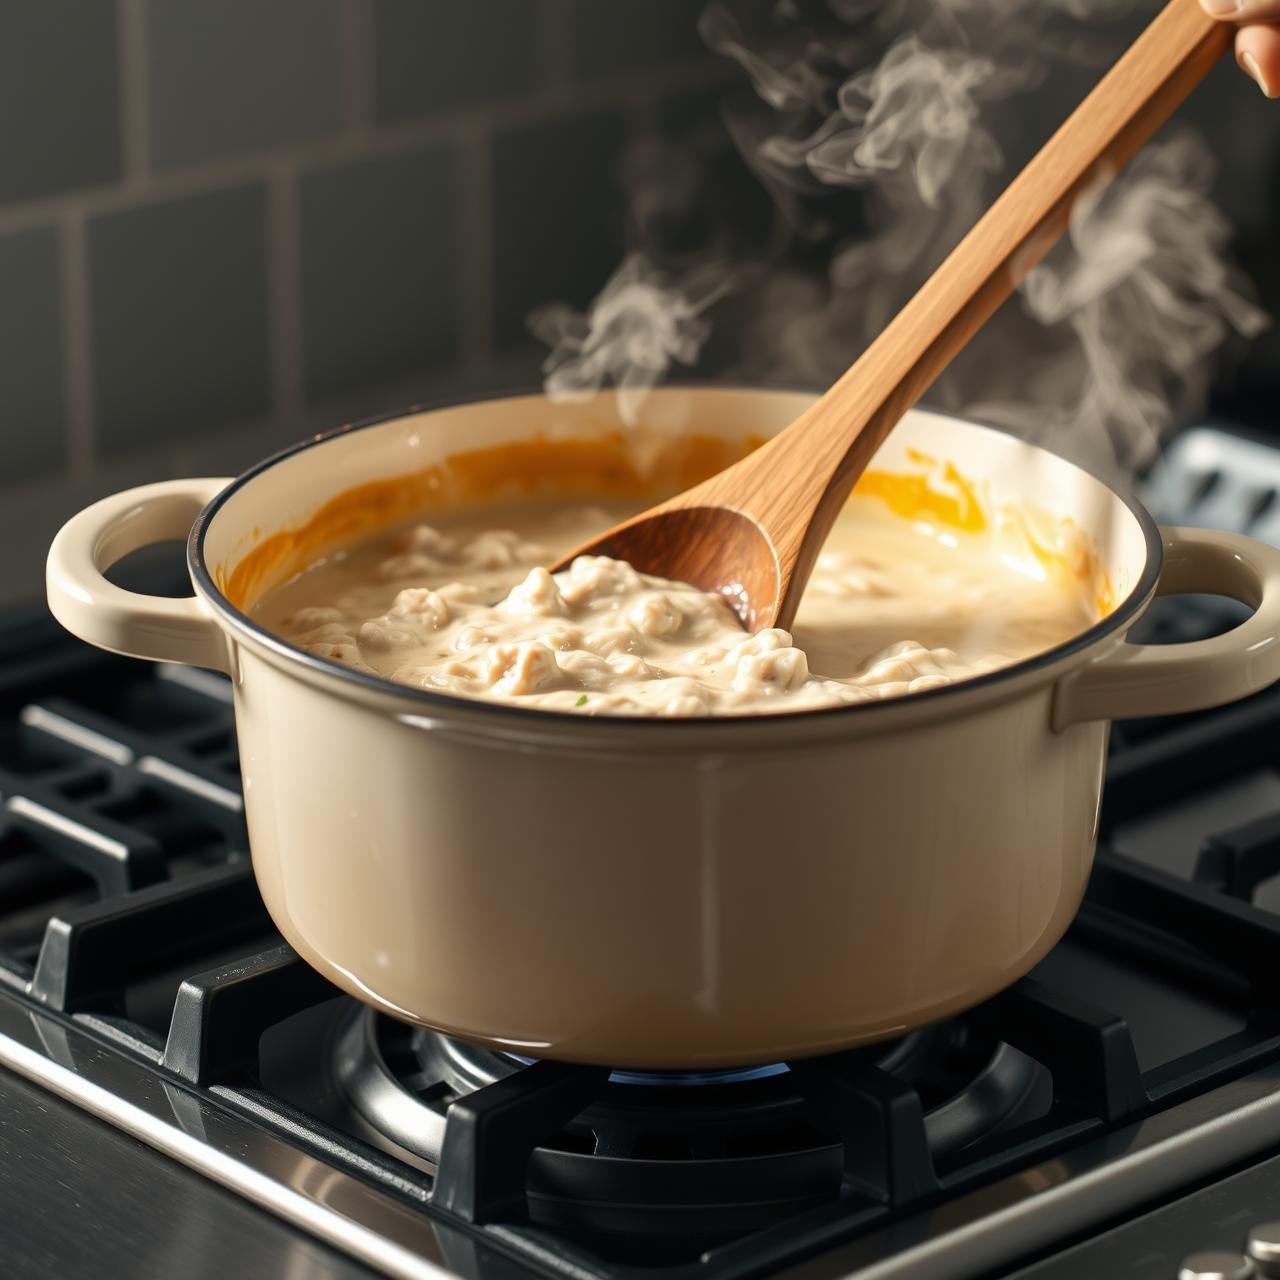
Create the Creamy Base
Carefully remove the cooked chicken from the pot and set it on a cutting board. Remove and discard the bay leaf. Using an immersion blender, pulse the chili directly in the pot a few times to slightly break down some beans. For a creamier texture, scoop out about 2 cups of the beans and broth mixture and transfer to a standard blender. Blend until completely smooth, then pour the purée back into the pot. This is the key to our creaminess!
-
Shred the Chicken and Thicken
While the chili continues to simmer gently, use two forks to shred the chicken into bite-sized pieces. Return the shredded chicken to the pot. In a small bowl, whisk together the cornstarch and cold water until no lumps remain. Slowly pour this slurry into the simmering chili, stirring constantly until it begins to thicken, which should take about 1-2 minutes.
-
Finish and Serve
Turn off the heat. Stir in the fresh lime juice. This final acidic touch brightens all the flavors and cuts through the richness. Taste the chili and adjust seasoning with more salt and pepper if needed. Let it rest for 5-10 minutes before serving. Ladle into bowls and top with your favorite garnishes.
A Chef’s Pro-Tips for the Best White Chili
Don’t Skip the Sear
Searing the chicken before simmering creates the Maillard reaction, a chemical process that develops deep, savory flavors that you can’t get from simply poaching the chicken in the broth.
Control the Heat
The heat in this chili comes from jalapeños and optional cayenne. For a milder chili, be sure to remove all seeds and white membranes from the jalapeños. For more fire, leave some in or add an extra pinch of cayenne.
The Power of Resting
Like many stews and braises, this chili is even better the next day. Allowing it to rest overnight in the refrigerator gives the flavors time to meld and deepen. If you can, make it a day ahead!
Garnish Generously
Toppings aren’t just for looks; they add crucial texture and flavor contrast. The coolness of sour cream or Greek yogurt, the fresh bite of cilantro, the creaminess of avocado, and the crunch of tortilla strips elevate each bowl from great to unforgettable.
Nutritional Information (Estimated)
This is an approximation based on a serving size of about 1.5 cups. Actual values may vary based on specific ingredients used.
| Nutrient | Amount per Serving |
|---|---|
| Calories | ~410 kcal |
| Protein | ~38g |
| Fat | ~12g |
| Carbohydrates | ~35g |
| Fiber | ~10g |
| Sodium | ~550mg (with low-sodium broth) |
Storing, Freezing, and Reheating Instructions
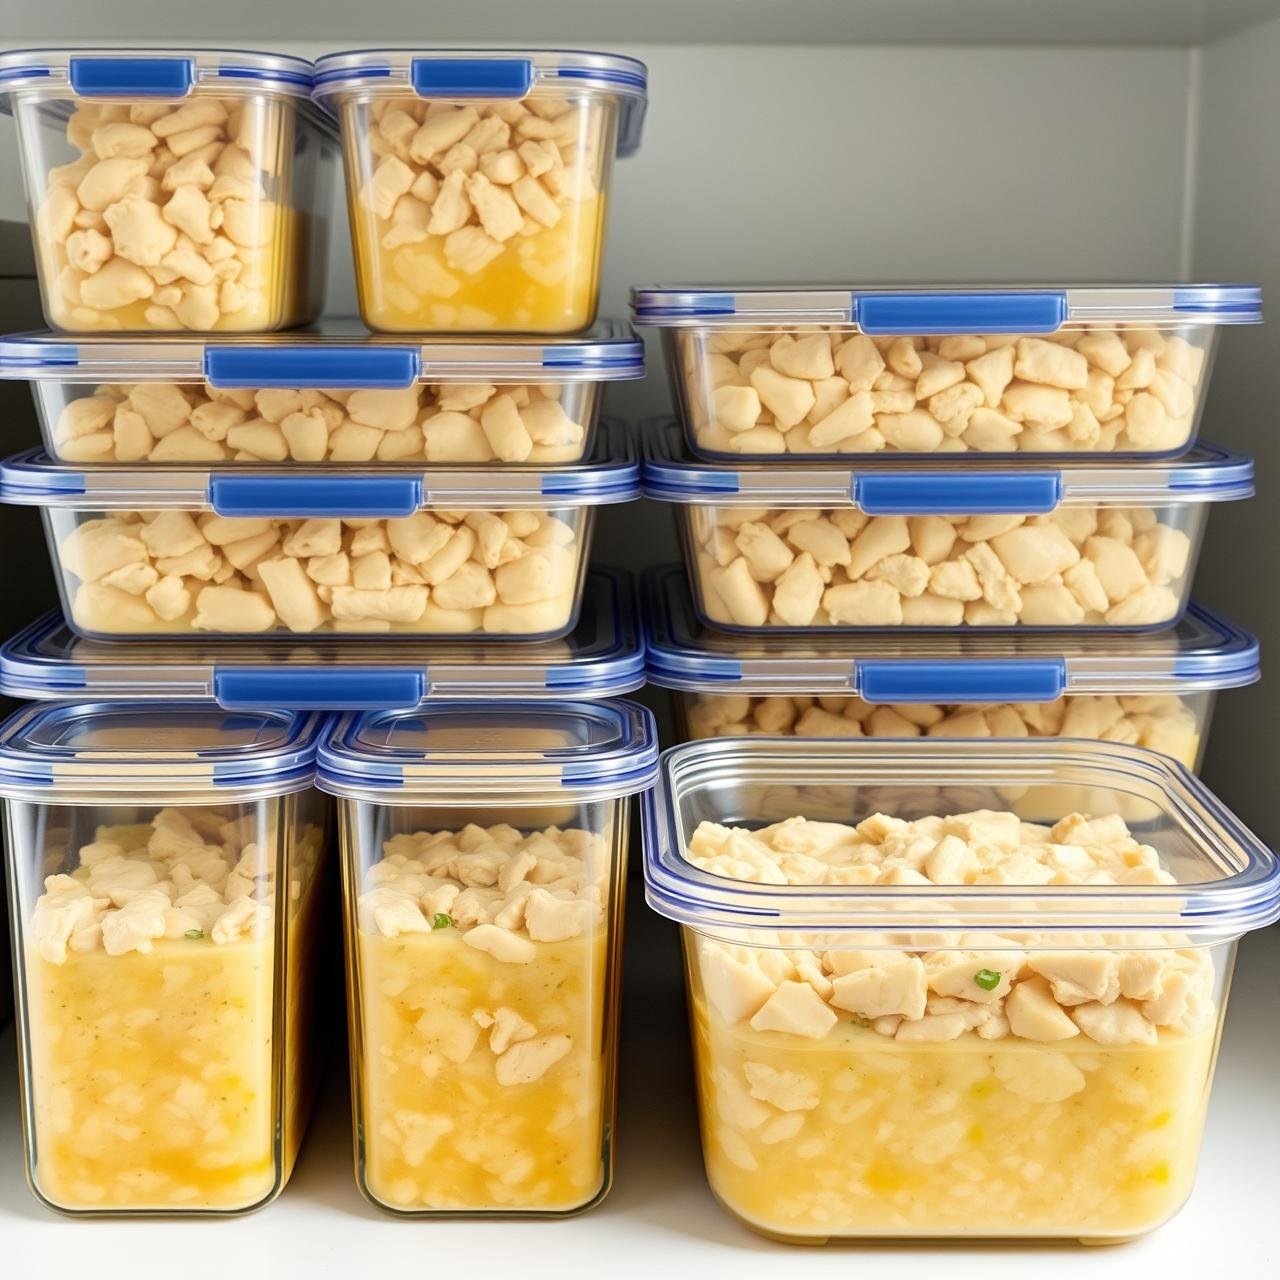
Storing Leftovers
Allow the chili to cool completely before transferring it to an airtight container. It will keep beautifully in the refrigerator for up to 4 days. As mentioned, the flavor only gets better!
Freezing for Later
This chili freezes exceptionally well. Let it cool completely, then portion it into freezer-safe containers or zip-top bags. It can be frozen for up to 3 months. To serve, thaw it overnight in the refrigerator.
Reheating
Gently reheat the chili in a saucepan over medium-low heat, stirring occasionally until warmed through. You may need to add a splash of chicken broth to loosen it up to your desired consistency. Avoid microwaving in short, high bursts, as this can make the chicken tough.
Conclusion
This Creamy White Chicken Chili is more than just a recipe; it’s a testament to the power of smart cooking techniques. It proves that you can achieve incredible depth of flavor and a rich, satisfying texture while keeping things healthy and wholesome. It’s a versatile, one-pot wonder perfect for busy weeknights, casual get-togethers, or meal prepping for the week ahead. So gather your ingredients, embrace the comforting aromas that will fill your kitchen, and prepare a bowl of chili that is guaranteed to become a new family favorite.