0 Carb Egg White Tortilla Wraps (Detailed Recipe No Fluff)
Remember the simple joy of a tortilla? That soft, pliable vessel for all things delicious, from hearty burritos to light and fresh lunch wraps. For those of us on a low-carb, keto, or gluten-free journey, that joy can feel like a distant memory. Store-bought alternatives are often expensive, packed with strange ingredients, or simply taste like cardboard. But what if I told you that you could create a perfect, tender, and durable wrap with virtually zero carbs, an abundance of protein, and ingredients you already have in your kitchen? Welcome to the definitive guide for 0 Carb Egg White Tortilla Wraps. This isn’t just a recipe; it’s a foundational technique that will unlock a world of culinary possibilities. We’re skipping the fluff and diving straight into the craft of creating the most versatile, healthy wrap you’ve ever tasted. Prepare to wrap, roll, and rejoice without an ounce of guilt.
Why You’ll Adore These 0-Carb Wraps
Before we even touch a whisk, let’s talk about why this recipe will become an indispensable staple in your healthy cooking arsenal. It’s more than just a bread substitute; it’s a nutritional powerhouse disguised as a humble wrap.
- Pure Protein Power: Each wrap is almost entirely made of protein, courtesy of the egg whites. This makes them incredibly satiating, helping you stay full and energized while supporting muscle maintenance and growth.
- Truly Zero-Carb & Gluten-Free: There are no hidden starches, flours, or fillers here. This recipe is a clean slate, making it perfectly suitable for the strictest keto, paleo, and gluten-sensitive diets. It’s pure, simple, and honest food.
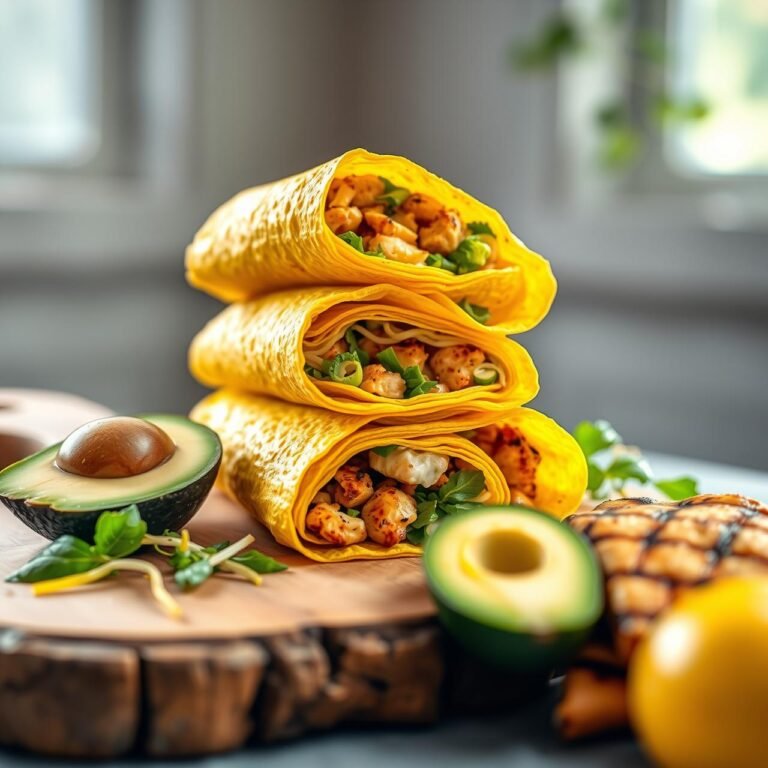
- Incredibly Versatile: The neutral flavor profile is a blank canvas. These wraps don’t taste overwhelmingly of ‘egg.’ They beautifully absorb the flavors of whatever you fill them with, making them perfect for savory tacos, sweet crêpe-style desserts, or anything in between.
- Budget-Friendly Mastery: Forget spending a fortune on specialty low-carb products. Eggs are one of the most affordable sources of high-quality protein, making this recipe as kind to your wallet as it is to your body.
- Ridiculously Simple: With just two core ingredients and a straightforward technique, this recipe is accessible to even the most novice home cook. The ‘no-fluff’ promise means we focus on the method that yields perfect results every single time.
Gather Your Tools: The Simplicity of Preparation
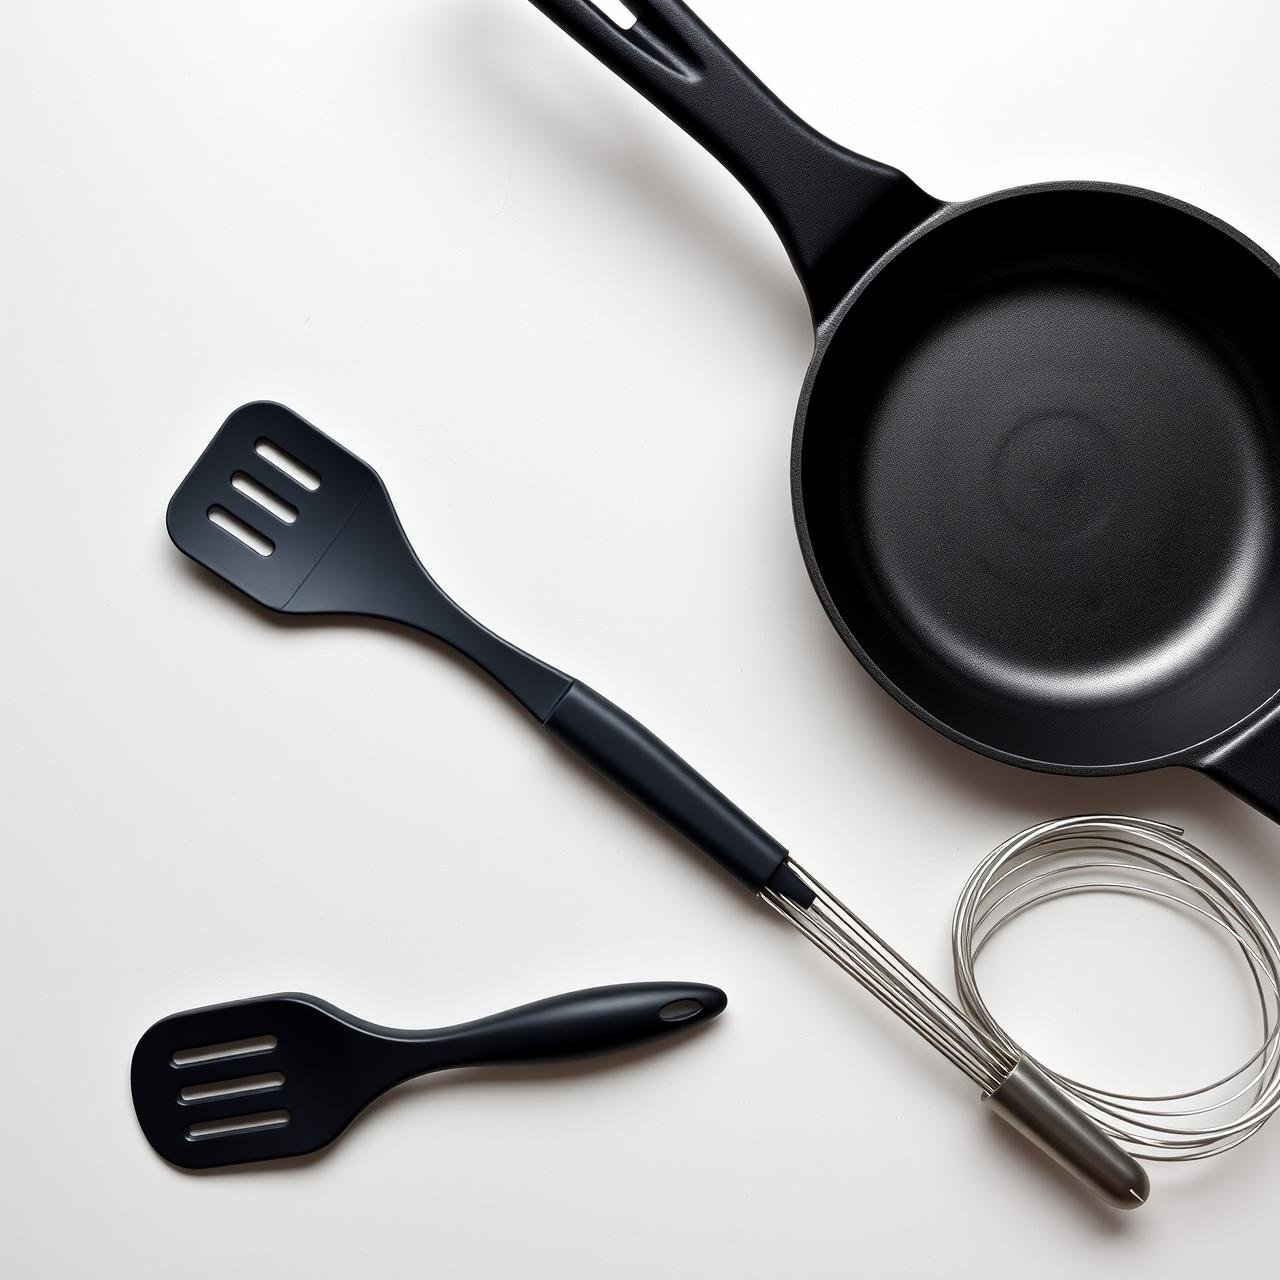
Great technique often relies on the right tools. The beauty of this recipe is its minimalism, but one piece of equipment is non-negotiable for success: a superb non-stick skillet. This is the cornerstone of a tear-free, perfectly cooked wrap.
Essential Equipment:
- High-Quality Non-Stick Skillet: A 8 or 10-inch skillet is ideal. Whether it’s ceramic, granite, or a classic Teflon, ensure its surface is smooth and un-scratched. This is the single most important tool for this recipe.
- Whisk or Blender: A simple whisk will do the job perfectly for incorporating the ingredients. For an ultra-smooth, slightly frothy batter, an immersion blender or a standard blender works wonders in just a few seconds.
- Flexible Silicone Spatula: You’ll need this for gently lifting the edges of the wrap and for the all-important flip. A thin, flexible spatula is much better than a rigid one.
- Measuring Cups and Spoons: For consistent results, accurate measurements are key.
- Small Bowl: For mixing your batter.
The Power of Simplicity: Just Two Core Ingredients
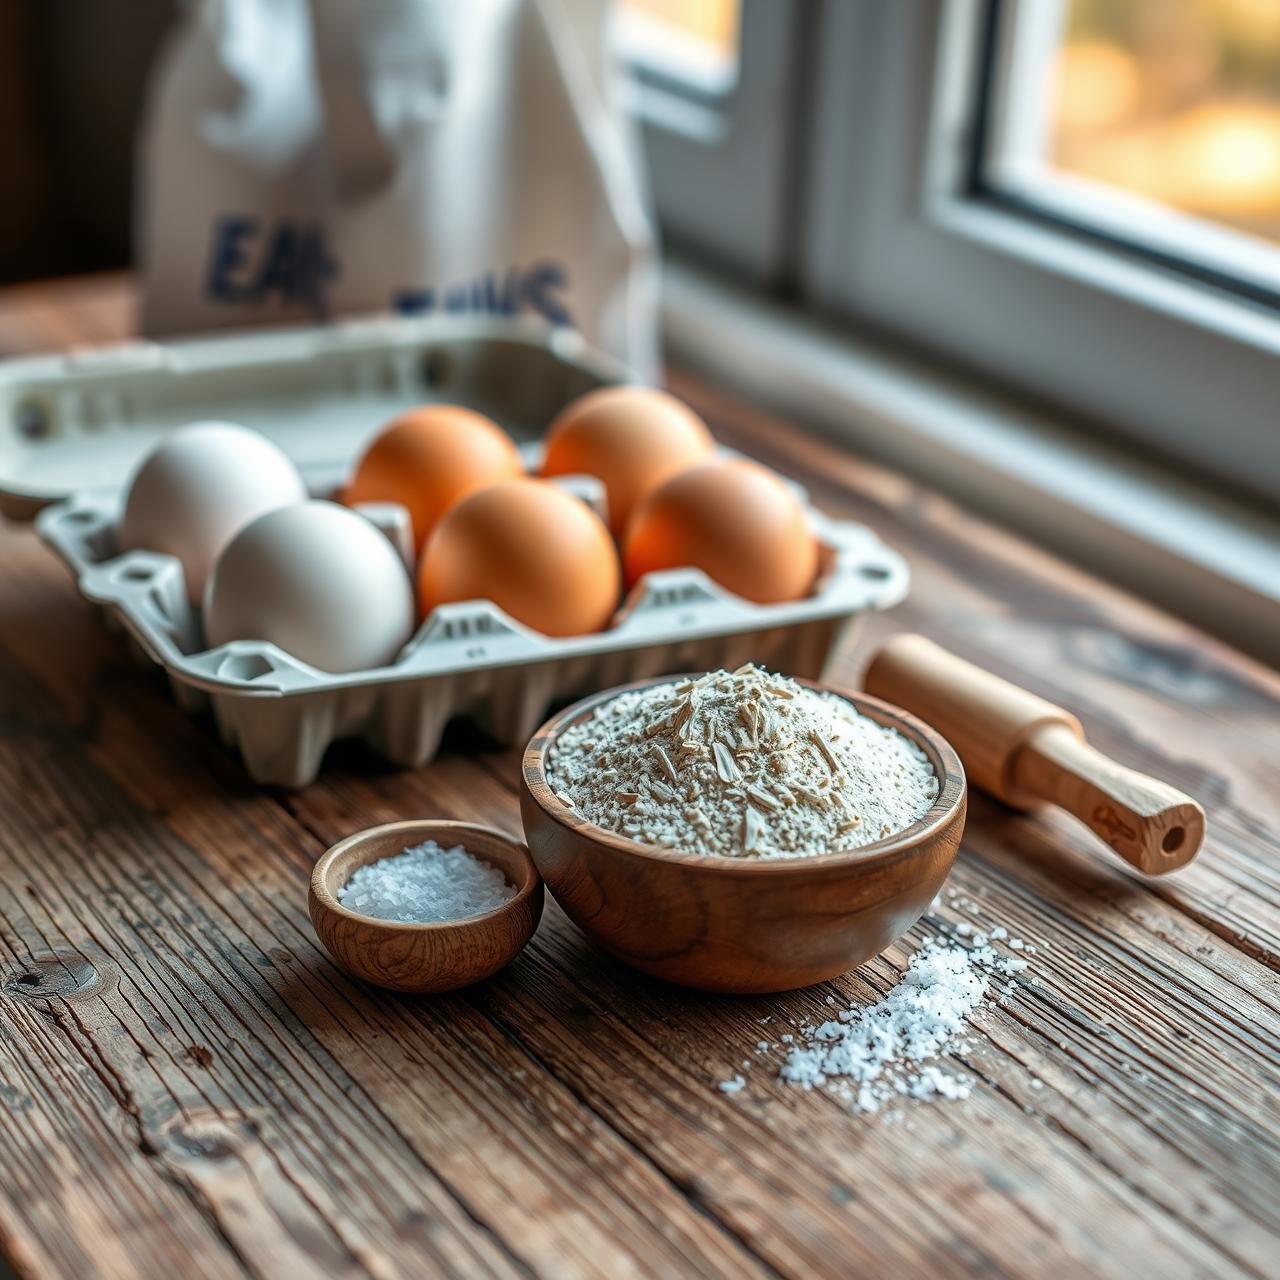
This recipe celebrates the elegance of simplicity. You don’t need a long list of obscure specialty flours. The magic lies in the interaction between two primary components.
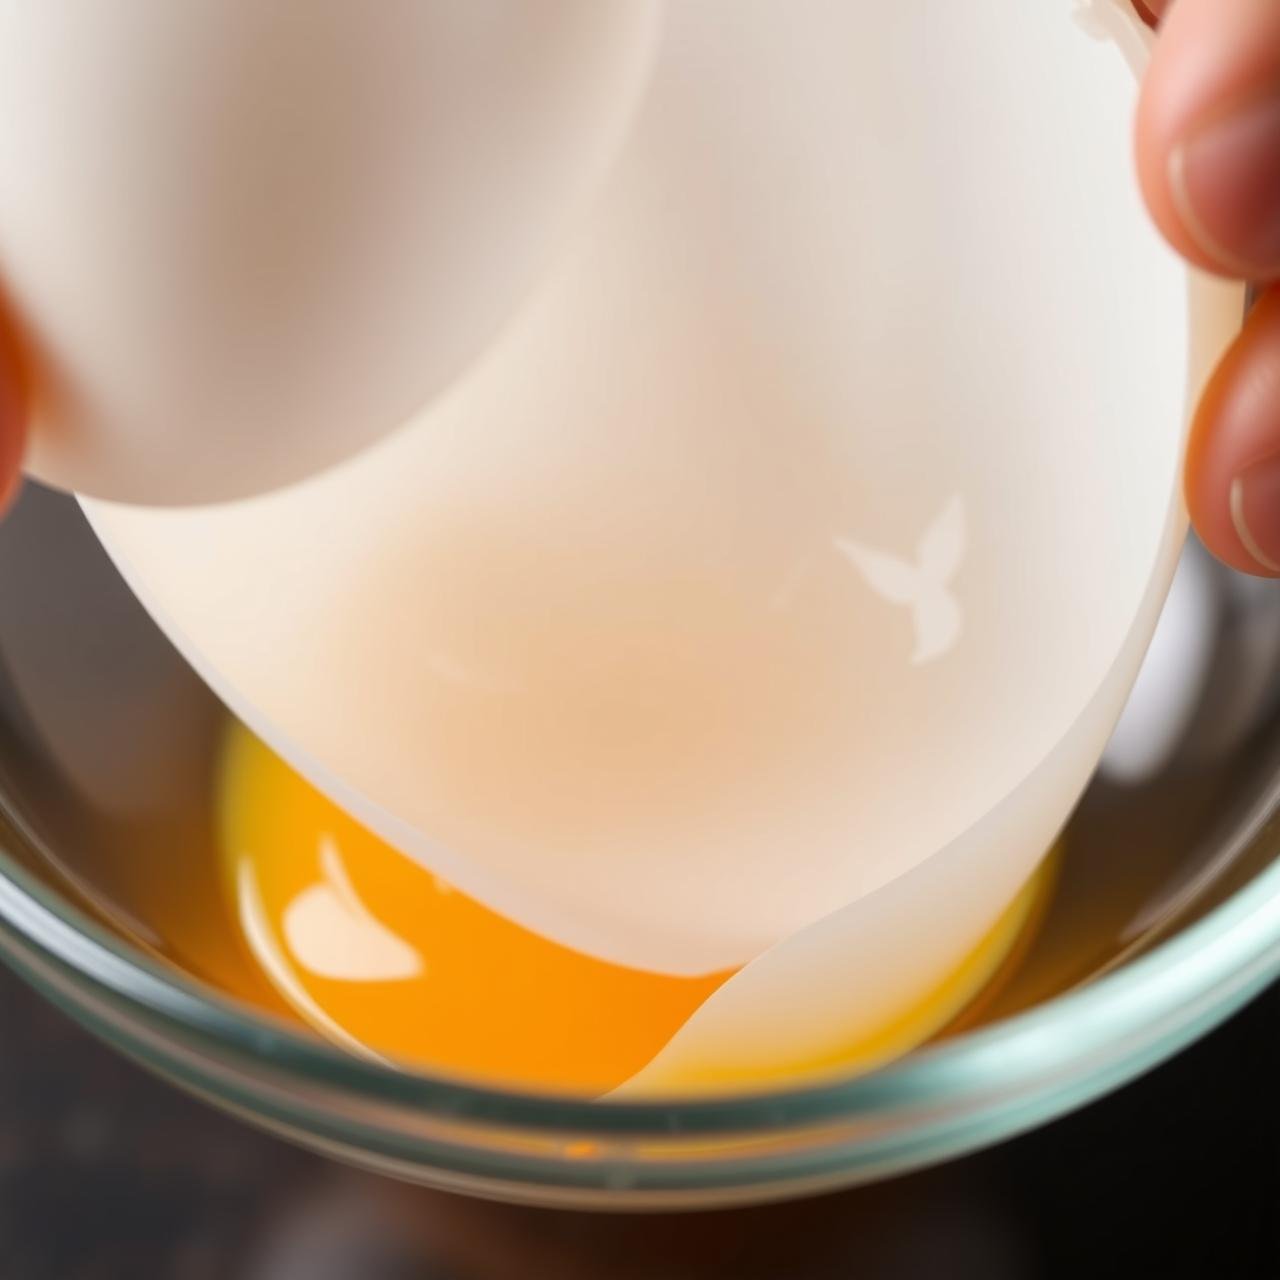
- Egg Whites: The star of the show. You can use liquid egg whites from a carton for convenience or separate them from whole eggs. For one 8-inch wrap, you’ll need approximately 1/4 cup (about 2 large) of egg whites.
- A Binder (Crucial for Pliability): This is the secret ingredient that transforms a simple egg white omelet into a flexible, foldable wrap. You have a couple of excellent options:
Option 1: Psyllium Husk Powder
This is my preferred choice. It’s pure fiber, adds no net carbs, and creates an incredible, bread-like texture and durability. You only need a tiny amount. Use 1/4 teaspoon of psyllium husk powder per 1/4 cup of egg whites.
Option 2: Xanthan Gum
A common gluten-free binder, xanthan gum also works well to provide structure and prevent tearing. Use a very small amount, about 1/8 teaspoon per 1/4 cup of egg whites.
- Seasoning (Optional): A small pinch of fine sea salt can enhance the flavor, but it’s entirely optional depending on what you plan to fill your wrap with.
Crafting the Perfect Wrap: A Step-by-Step Guide

This is where the technique comes to life. Follow these steps precisely, and you’ll be rewarded with a stack of beautiful, pliable wraps. The process is quick, so have your ingredients and tools ready.
-
Step 1: Prepare the Batter
In a small bowl, combine your 1/4 cup of egg whites with your chosen binder (1/4 tsp psyllium husk powder or 1/8 tsp xanthan gum) and a pinch of salt, if using. Whisk vigorously for about 30-60 seconds. You want to ensure the binder is fully incorporated and there are no lumps. The mixture will thicken slightly. For the smoothest texture, let the batter rest for a minute to allow the binder to fully hydrate.
-
Step 2: Heat the Skillet
Place your non-stick skillet over medium-low heat. This is critical. If the heat is too high, the egg white will cook too quickly, becoming brittle and bubbly. If it’s too low, it won’t set properly. You’re looking for a gentle, even heat. You should be able to comfortably hold your hand an inch above the surface for a few seconds. Do NOT add any oil or butter; a good non-stick pan needs nothing.
-
Step 3: The Pour and Swirl
Once the pan is at the correct temperature, pour the batter into the center of the skillet. Immediately lift the pan off the heat and gently swirl it in a circular motion, allowing the batter to spread out into a thin, even circle, just like making a crêpe. The goal is a consistent thickness across the entire wrap. If you have any small holes, you can dab a tiny bit of extra batter on them.
-
Step 4: The First Cook
Place the pan back on the medium-low heat. Let it cook for 60-90 seconds. You’ll see the edges become opaque and start to lift slightly from the pan. The surface will turn from translucent to a solid white. Resist the urge to touch it during this initial phase.
-
Step 5: The Flip
Gently slide your flexible silicone spatula under one edge of the wrap. It should release effortlessly. Lift it and quickly flip it over. The cooked side should be dry to the touch with maybe a few very light golden spots, but it should not be browned.
-
Step 6: The Final Cook
Cook the second side for another 30-45 seconds. This side cooks much faster. It just needs to be set and dry to the touch. Don’t overcook it, as this can make the wrap less pliable.
-
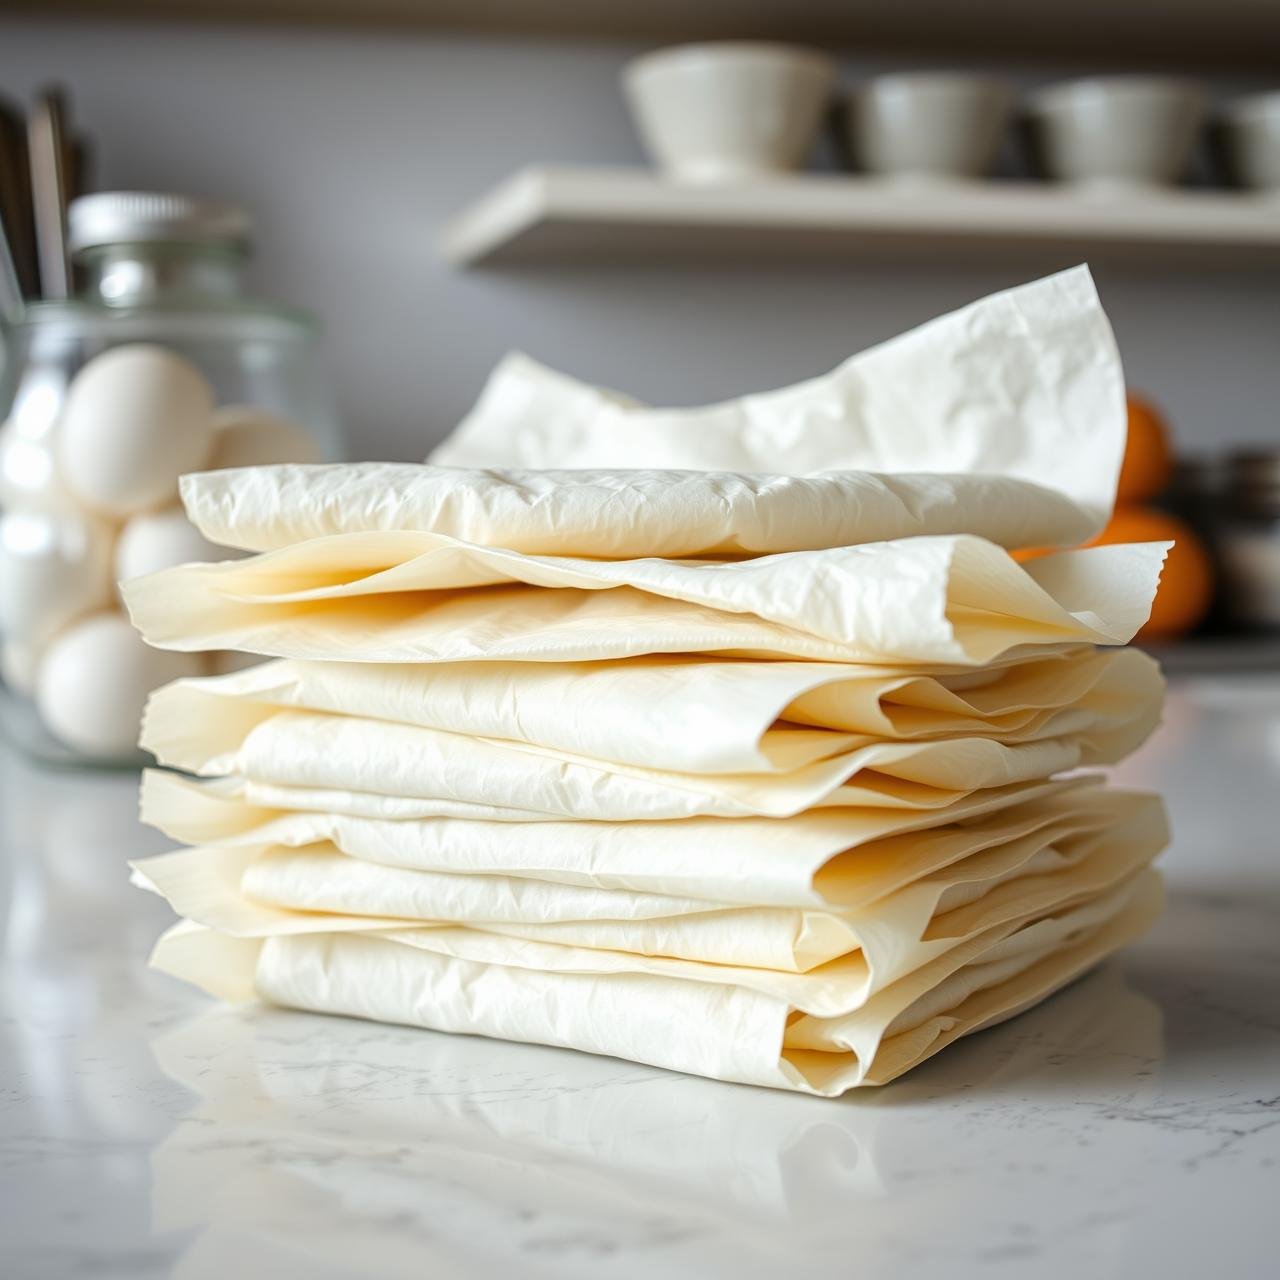
Step 7: Cool and Repeat
Slide the finished wrap onto a plate or a wire rack to cool. Repeat the process with the remaining batter, making one wrap at a time. It’s important to let them cool completely before stacking or filling to achieve maximum flexibility.
Chef’s Secrets for Flawless, Flexible Wraps

Mastering this recipe is about understanding the nuances. Here are the professional tips that make the difference between a good wrap and a perfect one.
Temperature is Everything
The most common mistake is having the pan too hot. An overly hot pan shocks the egg protein, causing it to seize up and become rigid rather than form a flexible sheet. Medium-low is your friend. The batter should sizzle gently, not aggressively, when it hits the pan.
Trust Your Non-Stick
I cannot overstate this: do not attempt this recipe in a stainless steel or cast-iron pan without a perfect seasoning, and even then, it’s risky. A quality non-stick surface is what allows the wrap to set and release without any added fat, which would make it greasy and fragile. If your wraps are sticking, your pan is the likely culprit.
The Thinner, The Better
Aim for a crêpe-like thinness. A thick wrap will feel more like a floppy omelet and will be more prone to cracking when you roll it. The ‘pour and swirl’ technique is key to achieving this. If your batter is too thick to swirl easily, you can add a teaspoon of water to thin it out slightly.
Don’t Fear the Binder
It might seem strange to add psyllium husk or xanthan gum, but this is the magic ingredient. Without it, the protein structure of the egg whites alone is too delicate and will tear easily. The binder creates a flexible, gluten-like network that gives the wrap its signature durability and foldability.
Patience During Cooling
Fresh off the pan, the wraps are at their most delicate. Letting them cool completely on a flat surface allows the structure to set fully. They become much more pliable and resilient once they’ve reached room temperature. Stacking them while warm will cause them to steam and stick together.
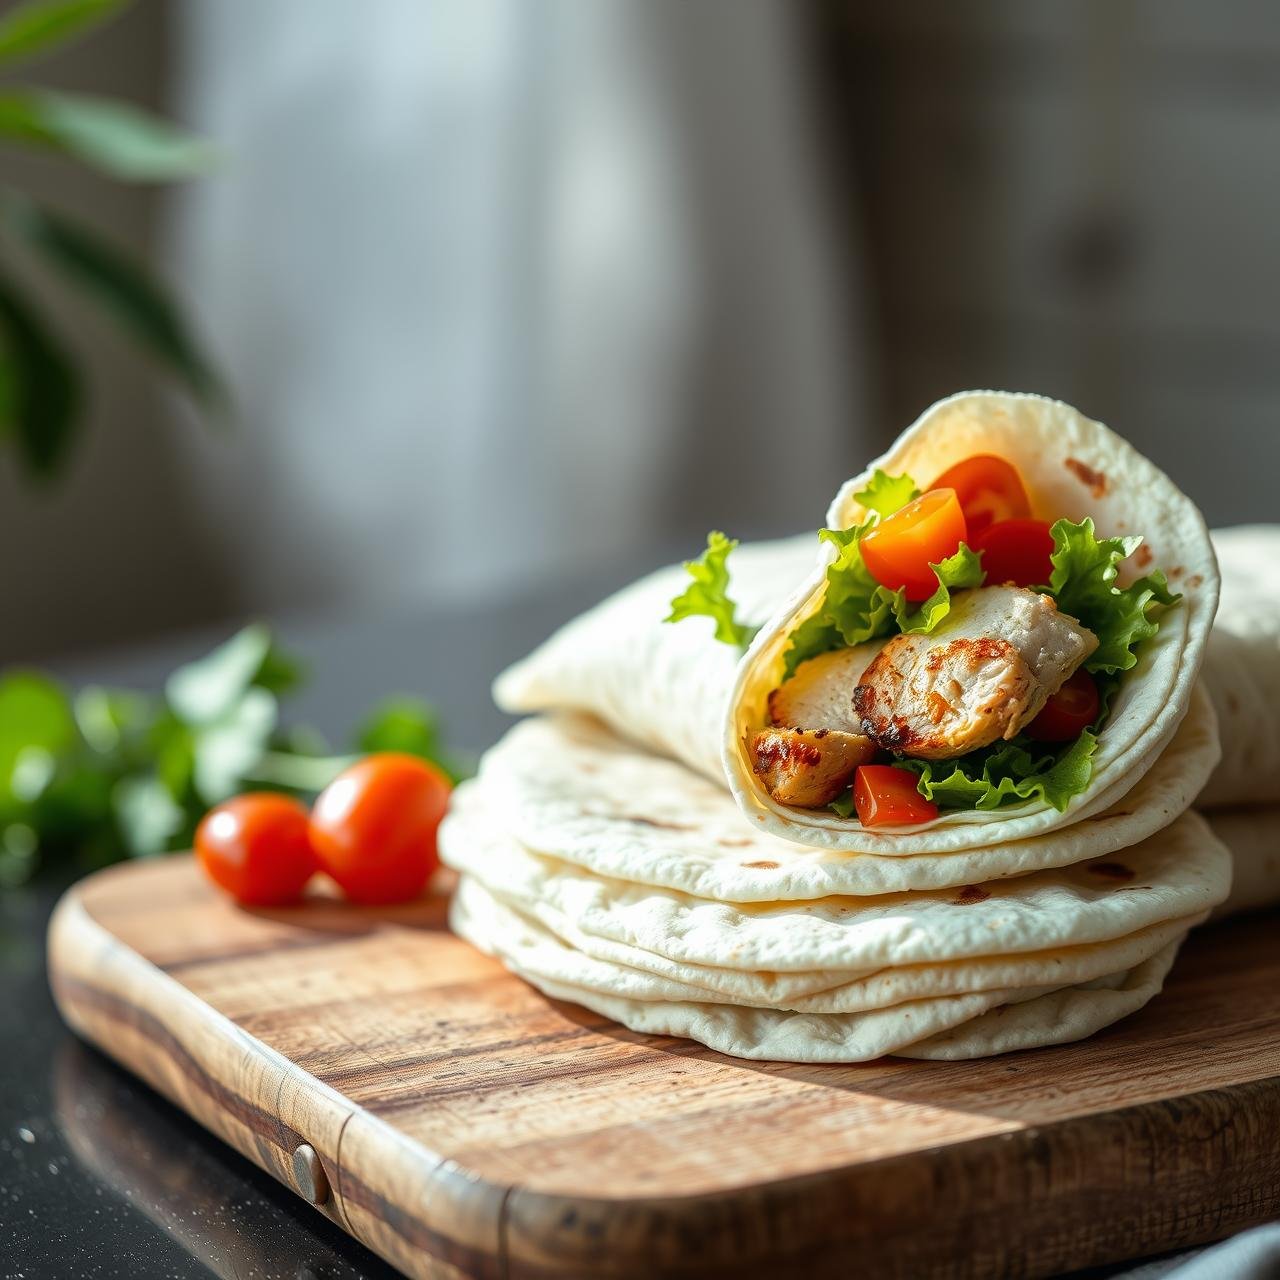
Beyond the Basics: Flavor Variations & Filling Ideas
Once you’ve mastered the basic technique, it’s time to get creative. These wraps are a blank canvas for your culinary imagination.
Infusing Flavor into the Batter:
Before you cook, try whisking in one of these additions to the batter for a whole new experience.
- Herbed Wraps: Add 1/2 teaspoon of finely chopped fresh herbs like chives, parsley, or dill. Dried herbs like Italian seasoning or oregano also work well.
- Savory & Cheesy: Whisk in a tablespoon of nutritional yeast for a savory, cheesy, umami flavor that’s completely dairy-free.
- Spiced Wraps: A pinch of smoked paprika, garlic powder, or onion powder can create the perfect savory base for tacos or enchiladas.
- Sweet Crêpes: For a dessert version, add a few drops of vanilla extract and a pinch of cinnamon. Fill with berries and a healthy yogurt or keto-friendly whipped cream.
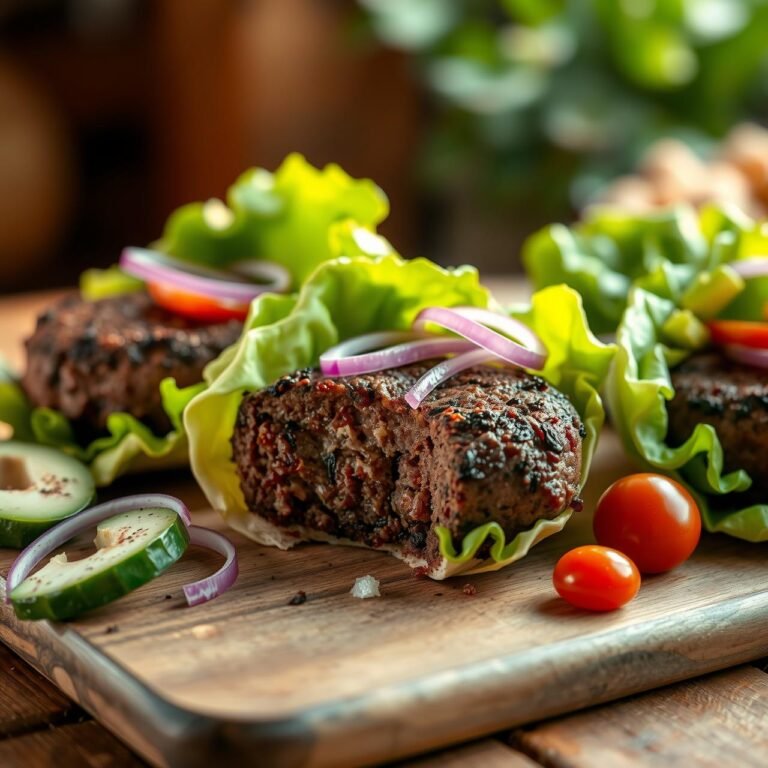
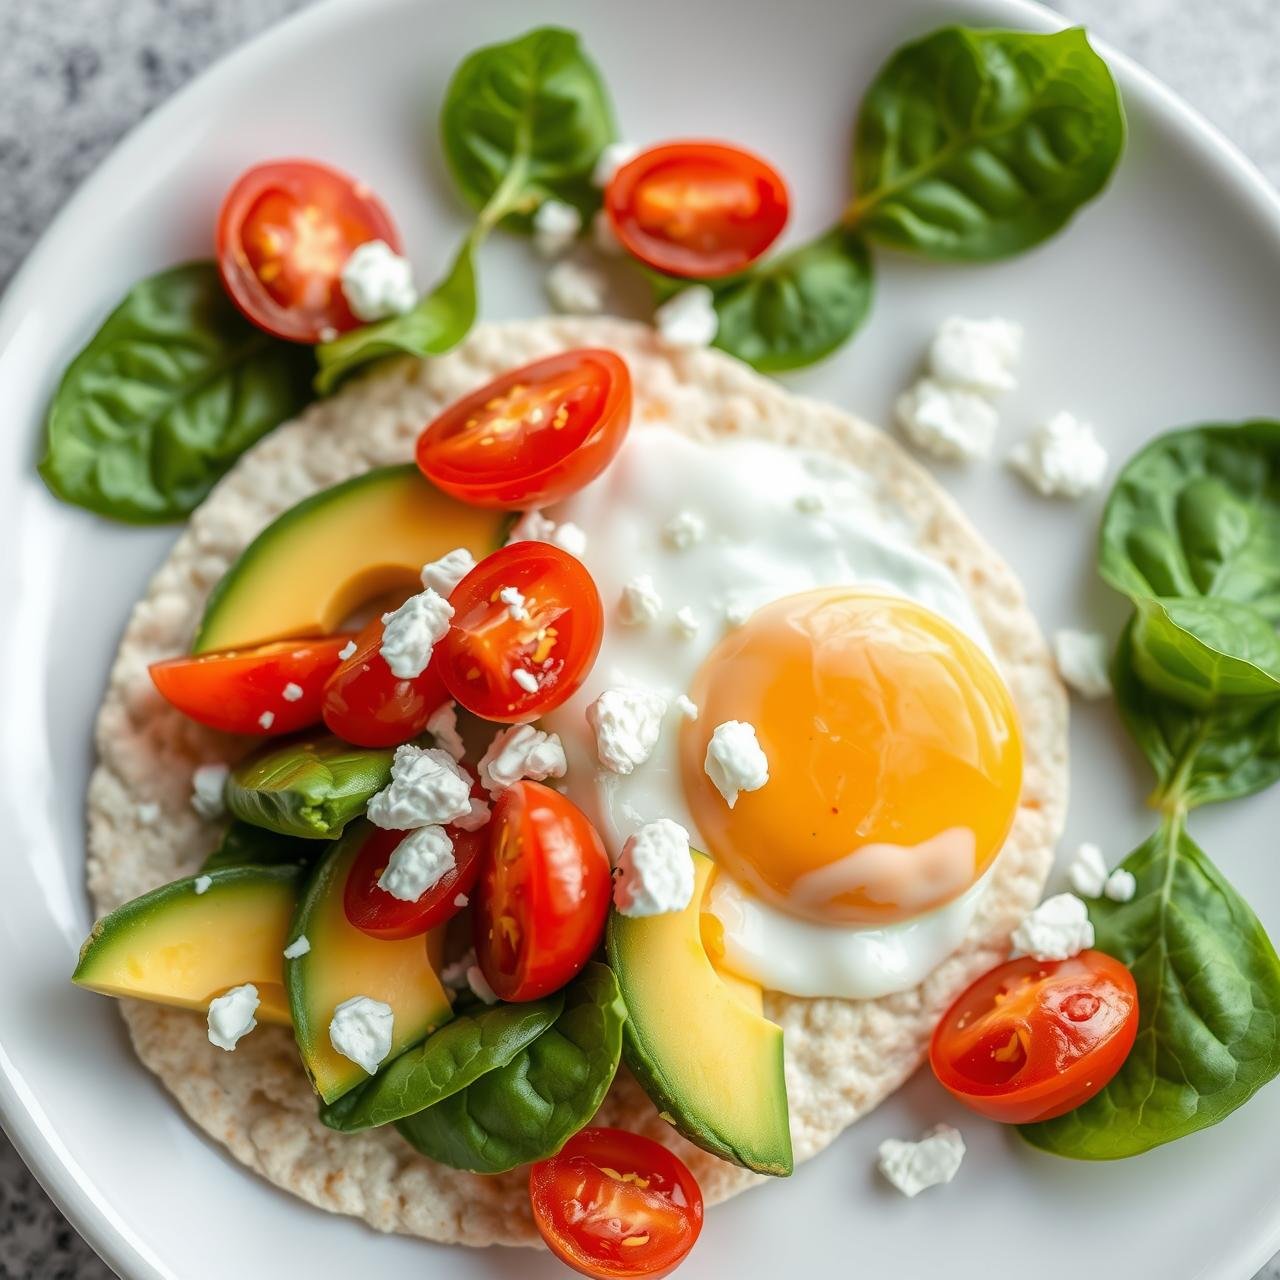
Inspirational Filling Combinations:
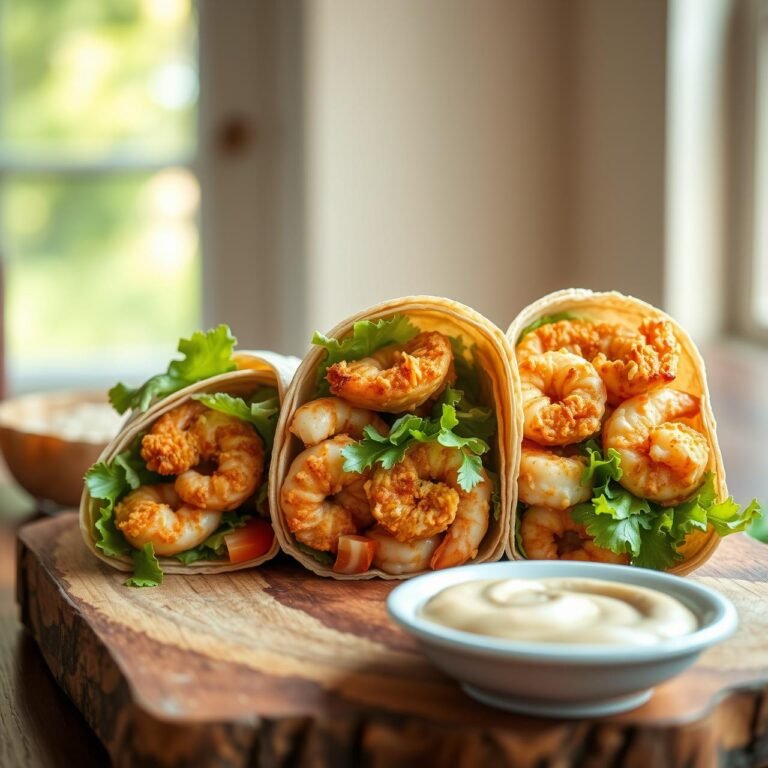
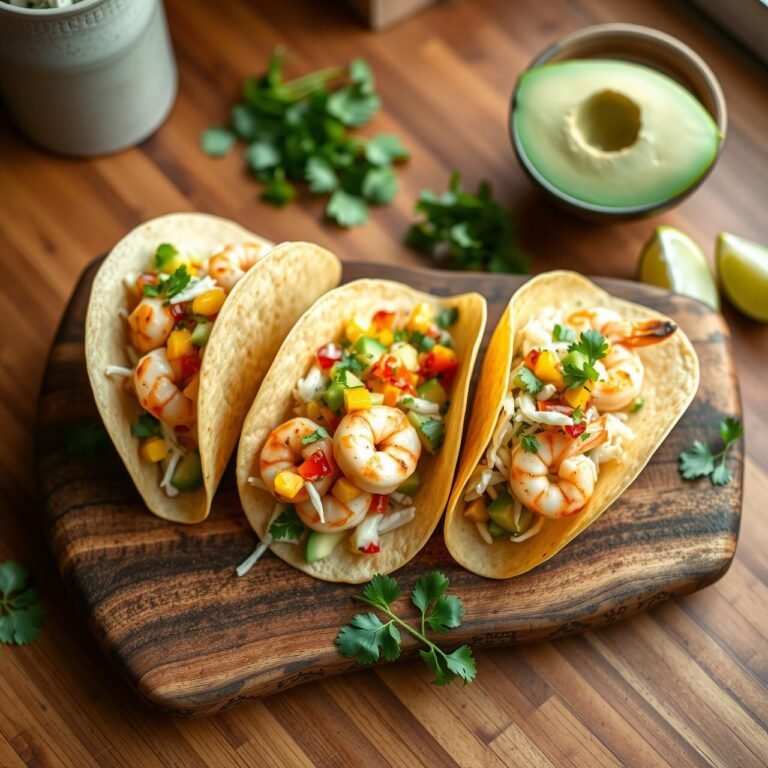
- Classic Turkey Club: Sliced roasted turkey, crispy bacon, fresh lettuce, ripe tomato slices, and a smear of avocado mayo.
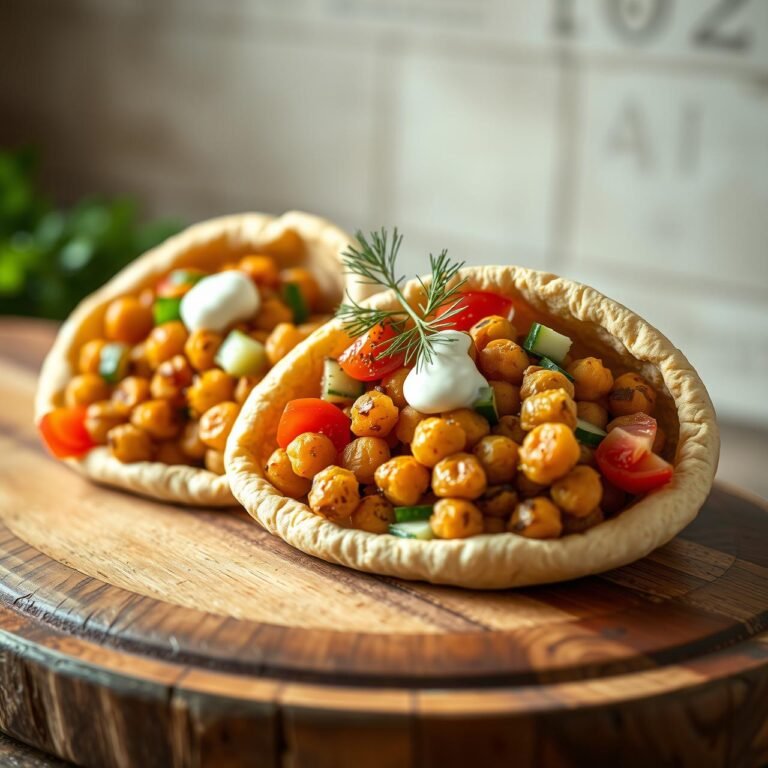
- Mediterranean Veggie: Hummus (if your diet allows), chopped cucumber, cherry tomatoes, olives, and a sprinkle of feta cheese.
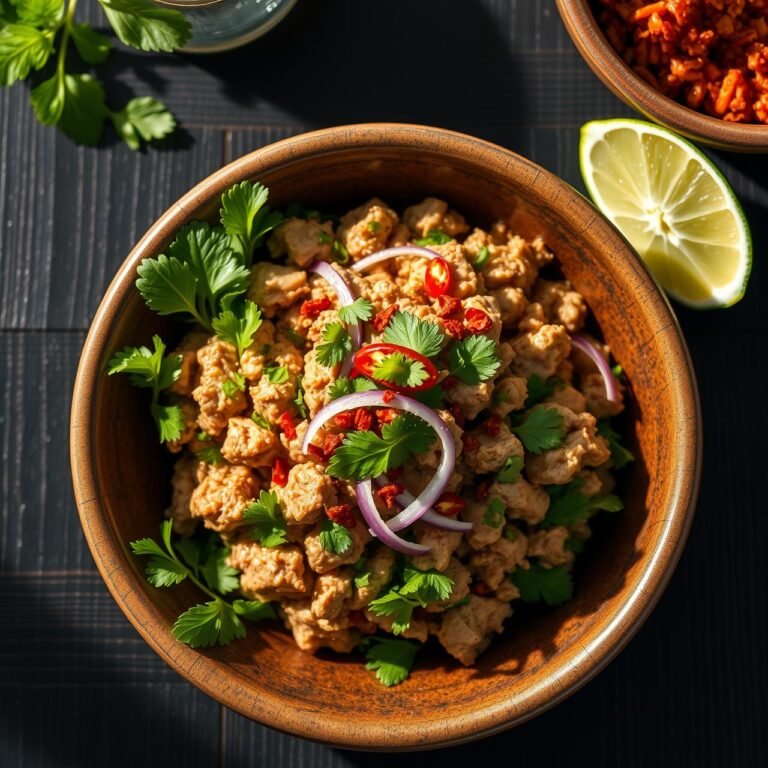
- Spicy Tuna Salad: Your favorite tuna salad recipe, kicked up with a bit of sriracha and packed with crunchy celery and red onion.
- Breakfast Burrito: Scrambled eggs, crumbled sausage or bacon, cheddar cheese, and a spoonful of salsa.
- Fajita Wrap: Sizzling grilled chicken or steak strips with sautéed bell peppers and onions.
The Healthy Breakdown: Nutritional Profile
This is where these wraps truly shine. The nutritional information is almost too good to be true, making them a powerful tool for anyone tracking their macros or focusing on clean eating. The following is an approximation for one wrap made with 1/4 cup of egg whites and psyllium husk powder.
| Nutrient | Amount per Wrap |
|---|---|
| Calories | ~25 kcal |
| Protein | ~6 g |
| Total Carbohydrates | ~0.5 g |
| Fiber | ~0.5 g |
| Net Carbohydrates | 0 g |
| Fat | 0 g |
| Sodium | ~85 mg (without added salt) |
As you can see, they are a nutritional dream: high in pure protein, virtually no calories from fat or carbs, and completely free of sugar and gluten. They are the ultimate guilt-free food.
Make-Ahead Magic: Storing & Reheating
These wraps are perfect for meal prep. Making a large batch at the beginning of the week can save you immense time and ensure you always have a healthy option on hand. Proper storage is key to maintaining their texture and preventing them from sticking.
Refrigeration (Up to 5 Days):
- Ensure the wraps are completely cooled to room temperature. This is the most important step.
- Stack the wraps, placing a small square of parchment paper or wax paper between each one. This is essential to prevent them from fusing together.
- Place the stack in an airtight container or a large zip-top bag.
- Store in the refrigerator for up to 5 days.
Freezing (Up to 3 Months):
- Follow the same cooling and stacking procedure with parchment paper.
- Place the stack in a freezer-safe zip-top bag, pressing out as much air as possible to prevent freezer burn.
- Label with the date and freeze for up to 3 months.
- To thaw, simply move the bag from the freezer to the refrigerator overnight. Do not microwave from frozen, as this can make them rubbery.
Reheating:
These wraps are excellent cold, straight from the fridge. If you prefer them warm, you can gently reheat them one at a time in a dry non-stick skillet over low heat for about 15-20 seconds per side, just until warmed through. You can also microwave them for 10-15 seconds, but be careful not to overdo it.
Conclusion
You now possess the knowledge and technique to create the perfect 0 Carb Egg White Tortilla Wrap. This simple recipe is more than just a substitute; it’s an upgrade. It’s a way to reintroduce some of your favorite meals back into your life without compromising your health goals. From savory lunches to delightful desserts, these versatile, protein-packed wraps are a testament to the fact that healthy eating can be both incredibly delicious and wonderfully simple. So, step into your kitchen, embrace the process, and get ready to roll, fold, and enjoy the endless possibilities that await.